This fun and easy project is perfect for autumn home decorating.
Supplies and Equipment that you'll need:
Let's make a book pumpkin:
- Remove the cover from your book.
- Draw half a pumpkin shape (similar to the one below) as a pattern.
- Trace your pattern onto the first page of the book.
- Cut the pumpkin pattern using the bansdaw or scroll saw.
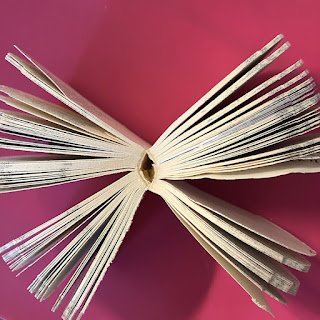
- Manipulate and fan the pages to soften the spine.
- Hot glue the edges of the spine together.
- Next, glue the first and last pages together. You'll have something that looks like this.
- Now, working with small sections of the book, paint the edges of the pages. I watered down my paint to about 2 parts paint :: 1 part water. As the pages absorb the water, they take on a nice rippled form.
- Separate each of the pages to achieve a full pumpkin. Set aside to dry.
- Make tendrils by wrapping the twine around ¼" dowel or large knitting needle. Secure the ends with pinch clothespins, Liberally mist the twine with water. Bake in a 250°F oven for 20 minutes. When the twine is cool, slide it from the rod and cut into lengths for tendrils.
- Hot glue the twig, leaves, and tendrils in place on top of the pumpkin.
- Display your book pumpkin with pride!!
 |
| Carole |


.png)


.png)

No comments:
Post a Comment