Sunday, February 25, 2024

Building Patriotic Buntings For Tiny Houses


Today I will show you how I built tiny patriotic buntings for one of my tiny houses. This simple project adds so much character to my fence. Follow along with me and I'll show you how I made them.


Supplies:
     1/16" Balsa Plywood
     Proxxon 2 Speed Scroll Saw DS460
     Plaid Paint


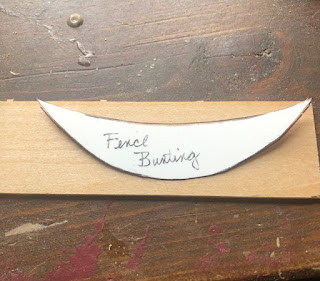
First, I determined the size I needed the buntings to be and drew a pattern.


I then drew the pattern on my balsa wood. Using my Proxxon Scroll Saw I began to cut them out. For the fence I needed 6.


The Proxxon Scroll Saw does such an amazing job that I didn't even need to sand the edges. If this were a thicker piece of wood, I'd imagine that to be necessary. As you can see in this picture, I even stacked 2 pieces together and cut.


Now all 6 pieces are cut out and ready to paint with my Plaid paint.


Using various shades of red, white and blue, the buntings are painted. I used a tiny awl to poke a hole in each end and attached them to the fence with sewing thread.


Here is my completed project.  Just wanted to add that every element of this tiny house was created using Proxxon tools.  Hope you enjoyed following along with me.
Colleen :-)


Sunday, February 18, 2024

How to Make a Jaunty St. Patrick's Day Gnome Using Proxxon Tools

 St. Patrick's Day is right around the corner. Time to make this jaunty St. Patrick's leprechaun gnome. 

Here are the supplies and equipment that you'll need:

Let's make the St. Patrick's Day Gnome:

  1. Print the gnome template of your choice, and cut out the shapes.
  2. Mount the shapes on your wood blank. Cover one side of the blank with painter's tape. Mist the back side of the pattern with spray adhesive, and mount on the taped blank. The painter's tape makes removal of the pattern easy without leaving any sticky residue.
  3. Cut out the body, hat, hat band, beard, and nose shapes using the bandsaw or scroll saw. For the nose, you can substitute a ¼" length of dowel rod. I used a slice of 5/8" dowel rod for the small gnome.

  4. If you're using the gnome as a wall hanging, you'll only need to cut one of the feet pieces. If you want him to stand, I recommend cutting two of the feet pieces. So the two feet are exactly the same, glue two blanks together. When the glue is dry, mount the pattern and cut out the feet.

  5. Sand the edges of all pieces using the Delta sander. I use the Delta sander mounted in the Precision Vice FMZ so both hands are free to manipulate the piece I'm sanding.

  6. Sand the inside curve of the hat using the flexishaft and a sanding drum.

  7. Paint the pieces.

  8. Glue the pieces together with liquid adhesive. First, glue the beard to the body, then the hat, next the hat band, and nose. Finally, glue the feet in position.

  9. Add handing hardware if the gnome will be a wall hanging.
  10. Hope this leprechaun gnome brings you luck and a pot of gold.

Carole

Saturday, February 3, 2024

How to make a fishing pole rack

       Hi everyone.  Hope your winter is going well.  Groundhog says an early spring and I'm all for it!  I'm ready.  Speaking of spring.  I like to go fishing when the weather is nice, but I hate storing the fishing poles.  Seems they are always getting tangled or falling over or just generally getting in my way in the workshop.  So today when I got them down out of the rafters, I made a little fishing rack with the intentions of keeping them tangle free and ready to go at a moment's notice.  I of course used my Proxxon tools, I find the smaller tools are so convenient to use for these quick projects.


 I used some wood pieces I found in my shop so my measurements might seem arbitrary, probably because they are. 😁 Feel free to shrink or enlarge your project according to your needs. 

Here are the measurements I used.  Enlarge the picture above to read it.

 I used the Proxxon mini table saw to cut all my pieces,  


Then, I used my Proxxon mini scroll saw to cut out the keyholes in the top piece.  My rack will hold 6 poles so I cut 6 keyholes.


I spaced the center of the keyholes 2 1/2 inches apart.


I always use my Proxxon O/ZIE delta sander to smooth all the edges after each cut. Splinters are never wanted.


To prepare the bottom to hold the butt of the fishing rod, I used a drill with a Forstner 1- 1/4 bit to make 1/4" deep holes spaced at center 2-1/4 inches apart.  This just keeps the poles from sliding around on the rack.


Next, I fastened the 3 supports to the side pieces, One at the top, one at the bottom/ and the third in the middle.  I glued and clamped them in place then added screws to strengthen it.  I used the Proxxon rotary tool with a small drill bit to predrill all my holes prior to adding the screws to avoid splitting the wood.


When the glue was dry, I added the top and bottom pieces aligning them perpendicular to the brace pieces; Again, I glued, clamped, and then when it was good and dry I predrilled mu screw holes prior to adding strengthening screws.  


                                                                                                                                                                                                                                                                                                                                                                                                                                                                                                                                                                                                                                                                                               I added the 2 small pieces to the top piece and fastened them down with wing nuts.  They can be loosened to release the poles.                                                                                                                                                       
 I put it all together and hung it temporarily on the wall.  It works great.  I'm going to take it down and paint it, then it will be finished, and I can add my other poles to this collection. 

]\

Proxxon tools made this project super easy.

Now I'm ready for fishing season and won't have to untangle everything first.
I enjoyed this project.  Hope you give it a try too.
Catch you next time   Carol W


00