Thursday, March 31, 2022

How to make a glassy eyed cat

 Hi everybody.   Spring is here yay!  Time to start getting out and having some fun in the yard.  Today, purely for fun lets make a cat to stick wherever I want to in the yard.   I'm going to show you how easy it is to cut some metal and make a cat stake using Proxxon tools.


Supplies
Proxxon mini bandsaw
Metal cookie sheet
wood chisel or wide straight screwdriver
hammer.
scrap wood for stake
2 screws.
pliers
2 glass marbles

  First things first.  Lets draw our design.


The next thing I did was go to the Dollar Tree and bought a cheap cookie sheet.   I wish it were a little stouter but it will work.


I drew the pattern onto the cookie sheet then I proceeded to cut it out using the Proxxon mini bandsaw.  Truthfully, I usually only cut wood but I read the back of the blade packages and found out they cut all kinds of metal, including steel!  Wow!   So I cut it out.  It works, it cuts like butta.   :)

Here comes the tricky part, (not real tricky, just a little tricky), the eyes.  I decided I would use a little wood chisel to cut the eyes.   What we need is to cut an X or something similar.  It is going to hold the eyes.  


I used some spray paint I had on time to color the kitty.  

The next step is to bend the Xs.  Use a pair of pliers, this metal is very sharp.  I bent the horizontal ones backward and the vertical parts towards the front.  I messed with the angles until I had them where they would hold the marbles secure.


I used the Proxxon mini bandsaw to cut a scrap piece of wood into a stake and screwed the cat onto it.   There you have it.  The glassy eyed kitty stake.  It's going to look good in the yard.


Thanks for visiting.   This was a quick and fun project.  I learned that I can now cut various metals using the Proxxon mini bandsaw.     See you soon   Carol


Monday, March 28, 2022

How To Build A Clock Case


Hi everyone!  Today I'm going to show you how I built a simple clock case for a cross stitch piece I stitched over 30 years ago. The piece has been in my cedar chest, and I've often thought about finishing it. Follow along with me and I'll show you how I did it.


Supplies:

     1" scrap pine boards
     Filigree Trim Molding (pine)
     Wood Glue
     Brad Nailer and Brads
     Plaid Paint  (black)
     Plaid Inspirations Clear Wax
     Small piece of window glass  (cut to fit)


First I measured my original piece of cross stitch soi could determine how large the opening for the face needed to be.  I made a sort of template from posterboard that I could build the frame around. Using the Proxxon Table Saw I cut my pieces accordingly from the template.  I cut two side pieces and a top and bottom face frame pieces. After I dry fit the top and bottom pieces, I removed them and using the table saw cut notches in them for the glass.  I also cut a slot in the two side pieces for the glass to slide in.


I glued and nailed the two side pieces to the bottom. I then slid in the glass and glued and nailed in the top piece.


I had to cut two spacers for the top and bottom to hold the clock hands away from the glass.


Next I cut a thin piece of scrap wood a little smaller than the size of the opening, to accommodate the fabric being folded over and to the back.  I dry fit the stitched piece in the frame.


Next, using the Proxxon table Saw,  I cut a top and bottom for the case. I glued and nailed them together with the sides. I went over some of the edges with the Proxxon belt sander.


Using the Proxxon Table Saw I cut a back for the case.  It was then I realized I had nothing to screw it into so again I cut two spacers and glued them in.


Lastly using the table Saw and the Micro Band Saw I cut some tiny filigree molding to go on the top and bottom of the case, and a rounded piece for the top.  Once each piece was cut, I glued them on.


With a little extra sanding, it's ready to paint and wax,  I used Plaid products.


After everything was dried, I inserted the stitched piece with the clockworks attached.


Here's my finished piece alongside a larger clock I made years ago.  Hope you enjoyed following along with my project!  
Colleen  :-)


Sunday, March 20, 2022

How to Recycle Two Water Bottles to Make the Perfect Travel Capsule

These travel capsules are so easy to make with Proxxon tools!! And I love that I can recycle two water bottles into something useful rather than trashing them.


Supplies and Equipment:

Here's how to make the travel capsule:

  1. Using the hot wire cutter, cut the caps from the bottles. Cut immediately below the cap.

  2. Alternatively, you can cut the caps from the bottles using the bandsaw.

  3. You will end up with the two caps.

  4. Spread a bead of adhesive along the edge of one cap, and glue the other one to it.

  5. Clamp the glued caps until the adhesive is dry.

  6. Now, plan a trip so you can put your travel capsule to use!!


Carole

Thursday, March 17, 2022

How to make a bobbin caddy

 Hi everyone.  I'm still sewing and still aggravated by the bobbins bobbing about in their box, getting tangled and unruly.   So.......I was playing in the shop and made a little bobbin holder that actually does the job and looks cute doing it.  


I first got the idea when I was sorting through the collection of clutter that I get on my workbench in the garage.  I found these little circles cut out and sat there thinking what I might do with them.    First step for this project is to cut out 5 circles approximately 3-4 inches in diameter.  You can easily do this using either the Proxxon mini bandsaw or The Proxxon mini scroll saw..


The next step is to divide up the little circles.  I first folded a paper circle in half then in half again to both find the center and to divide it equally in 4 pieces.


Then I divided each arc in half.  This gave me (hopefully) 8 equally spaced lines.  On these lines I drew an elongated half circle.   I am going to cut them out on the Proxxon scroll saw
They came out a little squarish, not exactly what I wanted but I knew I could fix it.

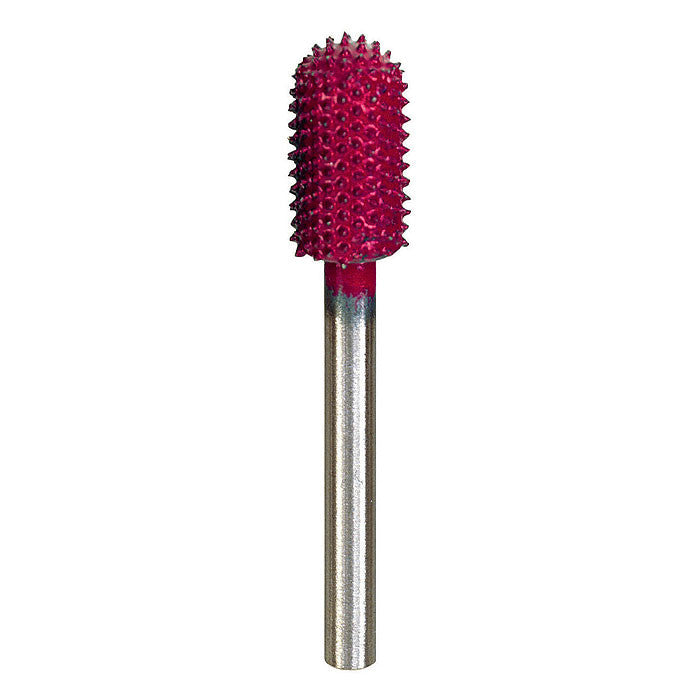
I used the Proxxon cordless rotary tool with the bull head carbide tip and this worked well to round my edges, (and it was fun to use).

Tungsten carbide burrs, Ball nose 5/16" x 1/2"


Repeat 4 more times  (you can add layers if you have many bobbins)

Make some spacers.  I drilled 1/4 inch holes about 1inch apart, then I cut them apart into little squares or circles

Drill 1/4 inch holes in the center point of all your "gears"  
Cut a small square to use as your base approx 4 x 4"
Now put it together

When I put it together it looked like a headless woman wearing a dress.  So I took a 1" ball, drilled a 1/4" hole half way through it and painted a face on it.  Well now she needed her :dress painted so I did.  I added the bobbin spools for bling and she was donel


I fear she will eventually break, but for now, she keeps my bobbins organized. " Bless her heart" as we say in the south.  Poor thing her nose is crooked...Bless her heart....LOL

Thank ya'all for visiting.  Take care and manage those bobbins!!  Carol

Thank You Proxxon company, I love using your tools.

Sunday, March 6, 2022

How to Make the Perfect Toast Tongs from Paint Stir Sticks

I accidentally discovered that toast tongs can be made from paint stir sticks!! Originally, I thought to use the stir sticks to make a prototype before using an exotic hardwood for the toast tongs. But, as the project progressed, I found that the stir sticks could be the final project.

Here's the list of supplies and equipment that I used:

Steps for making Paint Stir Toast Tongs:

  1. Using the Delta sander, remove any lettering on the paint stir sticks.

  2. Print the template, and select the size of the tongs you want. The template comes with patterns for 7" and 8" toast tongs.
  3. Cover one side of the blank with painter's tape. Mist the back side of the pattern with spray adhesive, and mount on the taped blank. The painter's tape makes removal of the pattern easy without leaving any sticky residue.

  4. With the bench drill press drill a pilot hole in the female piece of the tongs for threading the scroll saw blade.

  5. Thread the scroll saw blade through the pilot hole, and cut out the rectangle. Cut the notches on the male piece of the toast tongs on the scroll saw.
  6. If necessary, use the band saw to cut the stir sticks to the appropriate width. Mine were just the right size, so I didn't have to do this.
  7. Round the corners at the top and bottom of both pieces on the disc sander.

  8. Sand all surfaces with the Delta sander.

  9. Treat the finished tongs with a food safe wood oil.
  10. Now, no more burnt finger when retrieving toast from the toaster!!

Carole