Showing posts with label Colleen Colaizzi. Show all posts

Sunday, August 13, 2023

Making A Nautical Trade Sign Part 1


Hi friends!  Today I'm starting kind of a lengthy project.  I'm designing and building a nautical trade sign to hang on the wall. I'm splitting it in 3 parts because each element is a project in itself.  The first is cutting and carving this whale. The second will be a ship and the third will be a wood sign with carved elements to mount parts one and two on.  Follow along with me.  Lets get started  :-)


Supplies  

   Proxxon  2 speed Scroll Saw DS 460
   Proxxon Cordless Belt Sander  BS/A
   Proxxon Power Carver
   Proxxon Precision Rotary Tool FBS 115/E
   Clear #1 white pine board   1x8x6
   Wood Glue
   Brad Nailer


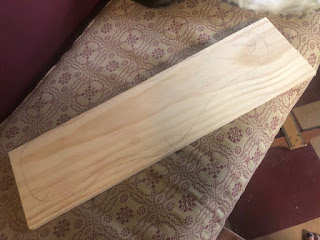
First, I started by drawing my whale directly on the pine board. This was some pine I had left from another project. 


Using The Proxxon Scroll Saw, I cut out the whale.


Now the fun begins!  Using the Proxxon cordless belt sander, I began to round off the edges. I also used the Proxxon rotary tool and Proxxon power carver for details.


Next using the Proxxon rotary tool, I worked on the eye.


Lastly. I cut and carved the flipper.  I laid a small piece of wood on the whale and drew what I felt would be the appropriate size.  Using the scroll saw, I cut out the flipper.  I used the belt sander to round off the edges, then I attached the flipper to the lower portion of the whale with wood glue and a brad nail.


This part 1 is complete except that it will be painted when the other two elements are finished.  

Thanks for following along with me.  Stay tuned for 2 more segments to this project.
Colleen :-) 


Saturday, June 10, 2023

Building An Arbor


Hi everyone!  We've had a lot going on here at the Colaizzi homestead.  We had a new deck put on our new pool.  There was a lot of scraps leftover of the treated lumber and I asked the builder to leave everything in hopes I could make something from them.  I thought I'd try building an arbor that will eventually be put in front of the gate to my garden.  Follow along with me and see how I built it with the help of my Proxxon tools.

Supplies:
 Treated lumber... 2x4s, 2x6s, 1x2s
 Lag Bolts  8 (3.5" long)
 Screws...1.25",  3"
 Brad Nailer and Brads

I had treated 2x4s that I cut with my miter saw but these could easily have been cut to size at the store you purchase the wood at.  I started with 2 pieces 7' long and 2 pieces 24" long.  I measured down 4" from the top and 8" from the bottom on the 2x4s.  These marks are where I put the 24" pieces and screwed them together. Using the Proxxon Table Saw, I then cut a piece of 1x2 lumber 63" long. I inserted it inside and nailed it in with the brad nailer.  This piece formed a ledge for all the lattice to lay on and get nailed in with the brad nailer.


I used the brad nailer for all the vertical and horizontal pieces but later I used small wood screws at the intersections.  Repeat this and make two sides.

Using the scroll saw I cut two 2x6s  60'long.  These will be the headers that will connect the two side panels. I drew a design on each end of the headers and cut out with the Proxxon Micro Band Saw.


I laid the two sides on end on the ground and laid the headers across measuring in 9" on each end.  These got attached with lag bolts.  Once one side was complete, I flipped it over and attached the back side.  Now the arbor was able to be stood up.


Next the corner brackets were cut out of 2x6s using the Proxxon Band Saw and attached with 3" screws to the upper corners.


At this point I ran out of 2x6 wood so I do have to add the back braces when I get more wood...I did attach the front corner braces with 3 1/2" screws.


Lastly I cut 8 pies of the 1x2" slats for the top using the Proxxon Table Saw.  These were spaced out across the top and attached with small screws.


For now It's finished until I can find the wood for the back corner braces. I am eventually going to stain or paint it, but treated lumber needs to dry before putting any finish on.  Thanks for following along with me as I made this fun project :-) 
Colleen


Sunday, May 14, 2023

Building A Garden Obelisk


    Hi everyone. Springtime is here and I've been wanting to build a few things for the garden. I've always loved a obelisk.  I want something that I could grow stuff on vertically. After looking at lots of pictures and doing some research, I came up with this design. Follow along with me and I'll show you how I made it.


Supplies:

   Proxxon Table Saw FET

   Proxxon Micro-Bandsaw MBS 115/E

   Proxxon Cordless Belt Sander

   Pressure Treated Pine 1"x 2"   10 pieces 8' long 

   Pressure Treated Finial 

   Outdoor Wood Glue (Gorilla Brand)

   Drill and Drill Bit

   Screws

   Brad Nailer and Brads


First thing is I determined how tall I wanted the obelisk to be. I decided on 7' without the finial. I laid out my wood on the floor. Marked 4 of the pieces at 7' and cut with the Proxxon Table Saw.


   Lay 2 of the pieces on the floor and put a clamp at one end just to hold them together.  Open the legs on the other end. I made mine 24" across the bottom. I tacked my legs to the floor temporarily just so it would stay still while I figured the sizes of the side stretchers.


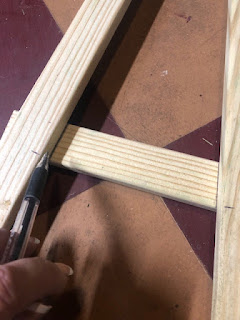
I decided I wanted a side stretcher every 21".  I marked that along each leg. Then at each mark I laid a piece of wood under the les and just drew on the angle that it had to be cut. So much easier than doing all the math.  Cut with Proxxon table saw and dry fit in between legs.


          Take all the 3 pieces out and get ready to glue. Glue and let dry. Repete for the second side


Once those side stretchers are dry then I removed the clamp, cut and secured a top piece with glue and brad nails.  I also measured up an inch and added a stretcher to the bottom.


After both sides were dry, I drilled and put a screw in at each stretcher, to add extra stability.


                    Now the sides are done enough to stand up and clamp together at the top.  keeping the top clamped, lay piece on its side so we can measure the side pieces for sides 3and 4.  again I measured 24" spance at the bottom.  I wanted these side pieces to go on the outside of the legs and each one to cover the screw holes.  Lay a piece of wood across and mark the angle with a pencil. Cut angles with either the Proxxon bandsaw or the Proxxon table saw. Glue and nail on the with brad nailer.


Repete for side 4.  Now stand the piece up.  I decided each side needed a strip going up the middle for style and extra stability.


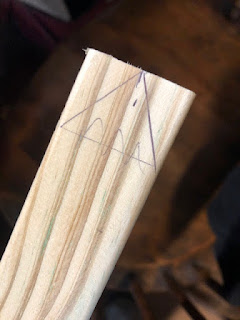
Two of the sides I shortened. the strip and cut a point on one end using the band saw, then again attached with glue and brads.  I also cut another top piece for these two sides, I glued and nailed with the brad nailer


Now there was some places that the brads came all the way through to the other side of the wood strips. I didn't want any sharp nails exposed so I grinded them off with the Proxxon belt sander.


I sat my piece up. Screwed the finial on the top and started to paint.


 My obelisk is complete!  I'm thrilled at how it turned out.  I cant wait to place it in my garden and start growing stuff on it.  Thanks for following along with me.   Colleen :-)