Monday, October 28, 2019

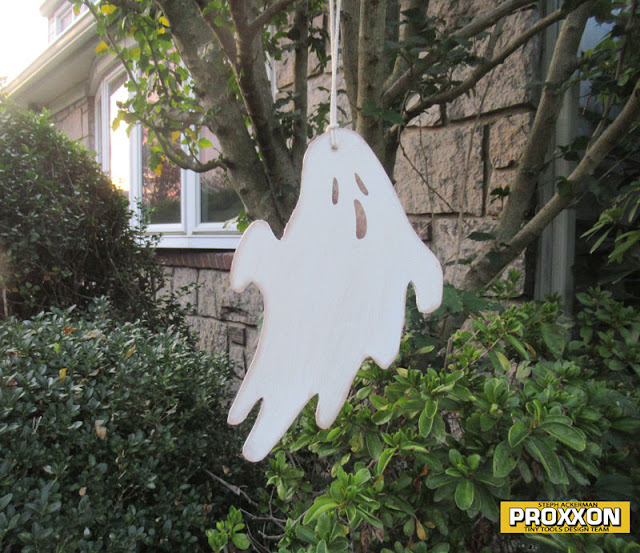
Happy Halloween Ghost

Hi everyone, Steph Ackerman here today sharing a new project created with Proxxon Tools just in time for Halloween.   This ghost was not only fun but also quick to make using a variety of Proxxon Tools.


I drew the ghost on a panel of plywood, then used the Proxxon Scroll Saw to cut the pattern.


Next, I used the Delta Sander to sand the edges before painting the ghost with white paint.


I inked the edges and added a face with brown ink.  Then I used the Bench Drill Press to create a hole into which I tied a string.


I couldn't decide if I liked hanging it from the tree or my front fence.


Thanks for stopping by.


Wednesday, October 23, 2019

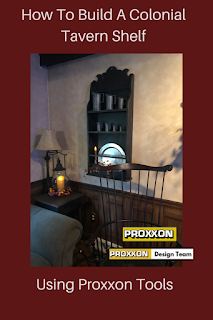
How To Build A Colonial Tavern Shelf Using Proxxon Tools

  Hi Everyone. I recently acquired a few pieces of antique pewter that I wanted to display. I'm going to show you the Colonial Tavern Shelf  I made for them using my Proxxon Tools and how I did it.

Supplies:

  Proxxon Micro Band Saw
  Proxxon Table Saw FET
  Proxxon  Bench Drill Press
  Proxxon Delta Sander
  1/2' birch plywood
  3/4' pine boards
  Brad Nailer and 1 1/4' brads
  Wood Glue
  Black Stain  solid
  Plaid Waverly Inspirations Wax.. clear

  1. First I drew out my pattern on grid paper. I needed to make sure it would be the right size for what I wanted to display in it,
  2.  I then transferred the pattern to my 1/2' birch plywood. I did transfer the pattern to both sides of the wood incase I needed to flip it over.


  3.  Using the Proxxon Micro Bandsaw I cut out the detail at the top.
  4. I drew my pattern on the 3/4' pine and cut out the side pieces with the Proxxon Micro Bandsaw.


  5. I then cut the bottom and shelves to length using the Proxxon Table Saw FET. I dry fitted everything and checked for placement of the shelves and drilled the hole for hanging using the Proxxon Bench Drill Press.

  6. Next I laid all the pieces out and used the Proxxon Delta Sander to smooth the edges.

  7.  Using my brad nailer and wood glue I connected all the 3/4' pieces together.
  8.  I then connected the front to the back with wood glue and brads and did a little additional sanding.

  9.  I applied 2 coats of solid black stain and 2 coats of  Plaid Inspirations clear wax.

Here's my completed shelf. I love how it turned out and how my pewter compliments it. I hope you enjoyed my project.  Thanks for following along with me!   Colleen

Sunday, October 20, 2019

How to Carve a Wooden Spoon

Who doesn't love using a wooden spoon while cooking?! Even better if that wooden spoon is hand carved. It's not as hard as you think. Here's how to carve a wooden spoon.

Supplies and Equipment for Carving a Wooden Spoon

Instruction for Carving a Wooden Spoon

  1. Trace the shape of your wooden spoon onto the wood blank. 
  2. Your shape may vary. Here's the one I used.
  3. Cut the curves on the scroll saw.
  4. Cut straight edges on the bandsaw.
  5. You will have a spoon blank—a solid block of wood roughly in the shape of a spoon.
  6. Begin by carving the inside of the bowl of the spoon using the power carver and a bowl gouge blade. When you're satisfied with the inside of the bowl, begin carving and shaping the under side of the bowl and, lastly, the handle. You now have a carved spoon.
  7. Sand all surfaces using the Delta sander and hand sanding. Use progressively finer grits of sandpaper from 100 to 220.
  8. Finish the wooden spoon with a coating of food grade wood oil. The kind used for butcher blocks is perfect.
  9. Stir up a big pot of soup, and enjoy your hand carved wooden spoon.

Carole

Wednesday, October 16, 2019

Happy Fall Sign

Hi everyone, Steph Ackerman here today sharing a new fall project.


The new sign was created with scraps of wood.  Using the Micro Bandsaw, I cut assorted sizes of blocks.  I wasn't too concerned with the sizes.


I used the Disc Sander to sand the edges of each block.


Next, I used Plaid FolkArt Paints to paint each block.


I needed a longer strip of wood to adhere the smaller blocks on, so I cut another strip of wood using the Micro Bandsaw again.


Next, I used the Bench Drill Press to drill holes in the ends of the strip.


I glued burlap to the panel, then glued the smaller blocks on top.


To decorate, I created assorted clay embellishments, inking each with Brilliance inks.


Placing the letters on each block, I adhered the clay leaves to each block.


Happy Fall.

Thanks for stopping by.


Sunday, October 6, 2019

How to Make a Sliding Book End

This sliding book end project to as easy as it is useful. It's a great beginner project for learning more about Proxxon tools.


Supplies and Equipment for the Sliding Book End

  1. Determine the size of your finished book end. Mine measures 6" x 6". Cut your board to size on the table saw.
  2. Transfer measurement from the schematic to the board.
  3. Cut the slot using either the bandsaw or scroll saw.
  4. Use a quarter to make the rounded corners.

  5. Use the disc sander to round the corners.
  6. Sand all surfaces with the Delta sander.
  7. Paint and finish the book end with your choice of finishes. I used FolkArt Ultra Dye.
  8. You can decorate and embellish the book end, or leave as is. I added a book band book mark.

Carole