Thursday, June 30, 2022

How to make a Plexiglas card holder for personal or business cards using Proxxon tools

 Hi folks, time for a new project.  Today I am going to show you how you can use Proxxon tools to make clear beautiful boxes.  For instructional purposes we are going to make a small little business card holder, but I'm sure you can imagine any number of things a person could make.   Hang on and let's get started 


I went to the local hardware store in town to see what Plexiglas sheets they had for sale.  Ooops.... there is a little bit of sticker shock involved, but I didn't need the giant sheets they were selling.   What I did find out was that most people come in not needing that big ol sheet either so there was a lot of cutoffs and scrap there.  Nice hardware man here said, "Oh that is the junk pile, help yourself", so I did.  😉    I got a bunch of it.  For Free!  I bet every hardware store has pieces like that.  Anyhow, let's get started.

The first thing to do is design the little box.  I wanted to make mine 4" x 2" x 2" but the sides will be shorter and the back taller.   I  also want to use the Proxxon engraver to personalize it a bit.

So off to the Proxxon mini table saw to cut the plexiglas.  I cut the pieces as below

back and bottom 4 x 2          sides 1 x 2                 back 4 x 4


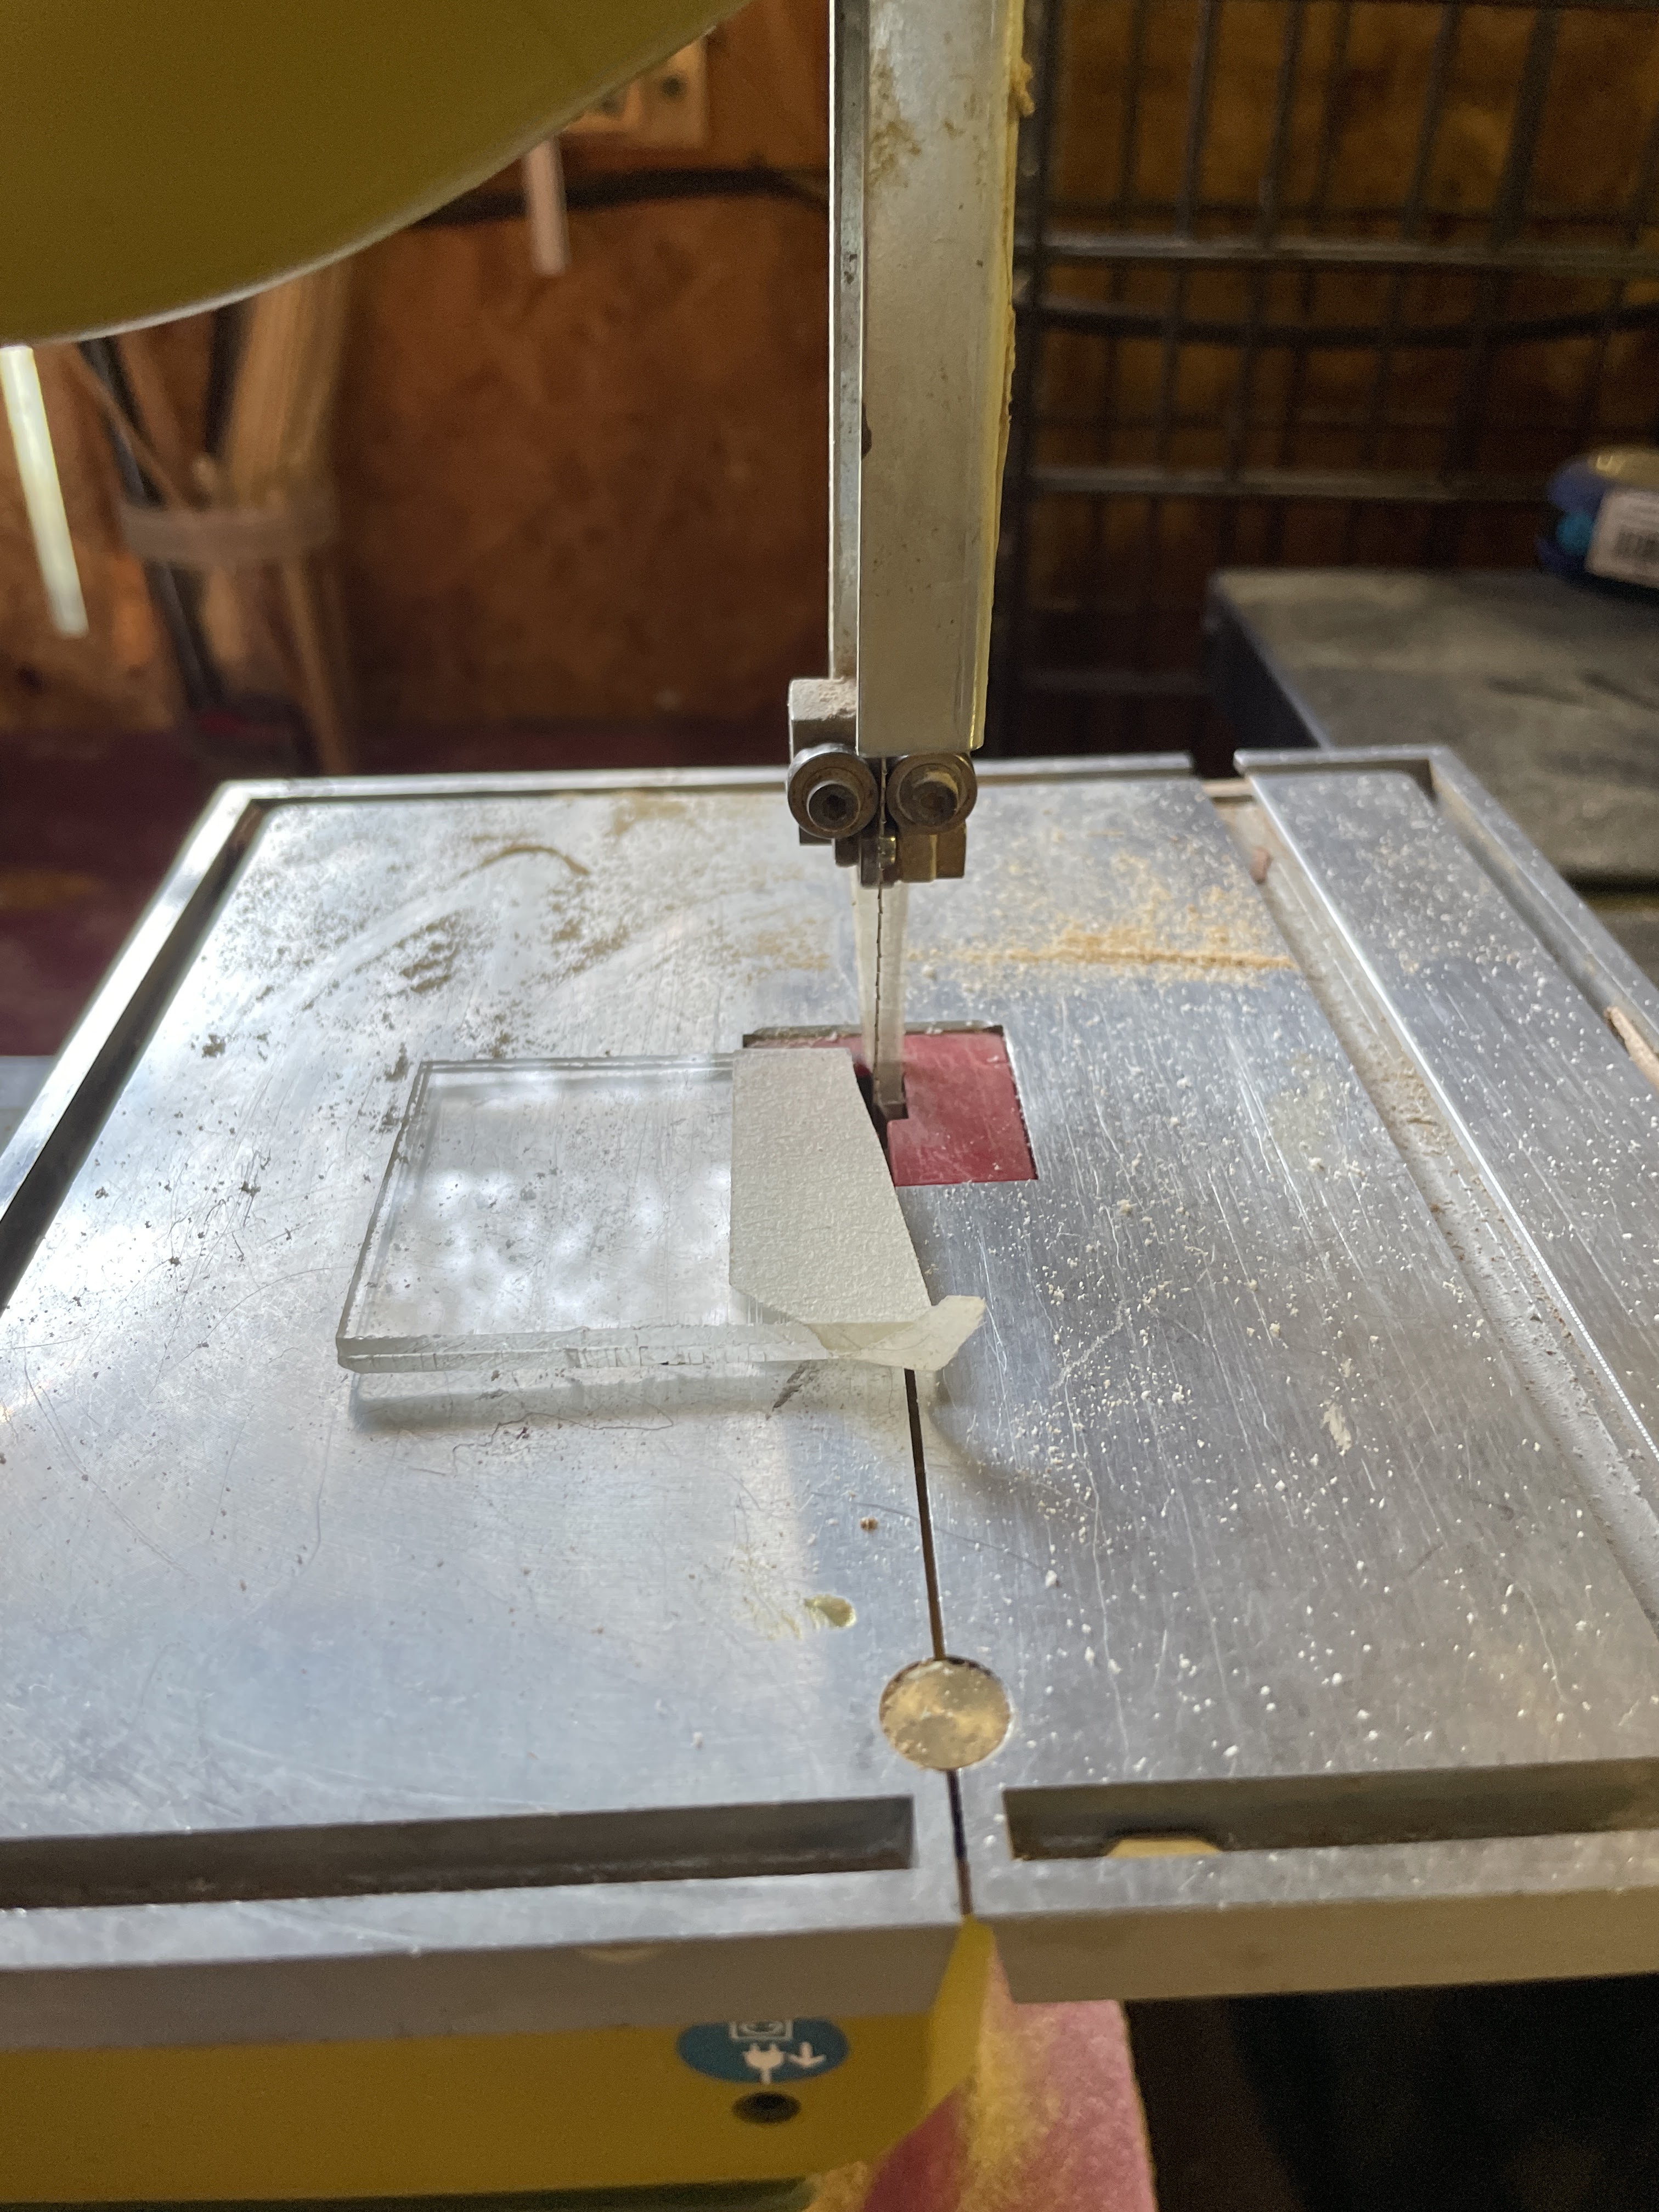
On the front piece I drew an arc that I cut out using the Proxxon mini bandsaw.  This just makes it easier to grab our business cards.


Then using the Proxxon OZI/E delta sander, I lightly sanded the exposed edges to remove any stuck-on pieces that might be sharp.   Oh... that reminds me.   When cutting plexiglas little pieces fly off everywhere.  Use eye protection without fail.  


Check out my face shield.  I use it in the shop all the time. It has a filter in it as well, so my lungs and face are protected!


Next, I glued up my box except the back using super glue plus an accelerator which makes the bond happen super fast so be ready.


Then, I took the back piece over to the engraver, made by Proxxon tools.   I set it up to engrave our company name.  Good directions come with the engraver so it can be set up accurately.   I placed the Proxxon rotary tool in the holder and engraved, my plexigals back with our company name.


Hey it looks good. And cost nothing but a little time.


I can't wait to make something else

Hope you enjoyed this quickie project and maybe learned how easy it is to work with plexiglas and Proxxon tools.  

Till next time   Play safe, Use eye protection please.!   Carol

Thanks for visiting.  


Sunday, June 19, 2022

How to Make the Perfect Flash Drive Holder with Proxxon Tools

 This flash drive holder is a great addition for organizing your computer workspace.


Supplies and Equipment

Instructions for making the Flash Drive Holder

  1. Print the template and select the size holder you want.

  2. Mount your template on the blank. Cover one side of the blank with painter's tape. Mist the back side of the pattern with spray adhesive, and mount on the taped blank. The painter's tape makes removal of the pattern easy without leaving any sticky residue.

  3. Cut out the exterior of the template on the bandsaw. The extra narrow scroll saw blade makes cutting on the bandsaw almost like using a scroll saw. Alternatively, you could use the Proxxon Scroll Saw DS 460.

  4. Use the MICRO Mill to cut the slots for the flash drives.

  5. Sand all surfaces with the Delta sander, using progressively finer grits of sandpaper.

  6. Finish with wood oil.

Carole

Friday, June 17, 2022

How to make a Proxxon tool caddy to keep things organized

 Hi again.  It's time I got my act together in the shop.   I have a lot of tools and when I get to working, they end up all over, which I don't mind, but...in between projects I like to get things back in order so that in my next flash of creativity I know where to find them.   Also, if you are like me, 4 or 5 corded tools can get so tangled up together it sort of slows projects way down.   Anyhow, today I am going to fix all that, so that my tools will be at my ready and not cluttering up all my free space at the workbench.

Let's make a Proxxon tool caddy for all our hand held Proxxon tools.   


Supplies needed

1/2" pine or plywood   Need a width of about 6"  I used a dog-erred fence board for part of this hat had been planed very smooth.  (very inexpensive wood that looks great if you spend a little time cleaning it up

1/16" or 1/4' thin plywood or paneling pieces.   Likely you have appropriate scraps for this part.

wood glue,

Proxxon mini table saw

Proxxon mini drill press with drill bits

Proxxon mini bandsaw

Proxxon ozi/e delta sander 

small screws and screwdriver

Proxxon rotary tool with rasp cutting bit.

masking tape.


Let's get started.    Cutting the wood is the trickiest part.  Be careful and, measure and cut accurately and it will go together like a puzzle in the end.    see the cutting dimensions below


I began by cutting some pieces using my proxxon mini table saw  Remember we need the 30 degrees on the long edges of the bottom and sides so I set the gauge on my Proxxon mini table saw to 30.   This way I can cut that angle on both my sides at the same time.    I want the  sides to lean out a little bit.


Next I lined up my sides and bottom and made my lines where I will cut my small slots for the inserts.  The best way to make sure they will fit well is to set the fence for the first cut and run them all through.  Then change the fence for the next cut and run them all through again.


Remove the blade cutter and splitter from the Proxxon table  saw and set the blade height to about 1/8 to 1/4"   Then set the fence and run the boards through making a slot that fits the inserts.


I cut the slot for my inserts using the Proxxon mini bandsaw.   I stacked them up and cut them all at once.

I remembered the cord problem and decided to cut some notches  where I can pass the cord through, then I cut a couple slots out where I plan to put some velcro straps to hold the cords on the outside of this box.   I used the Proxxon mini drill press to start my holes then cut them using the proxxon rotary tool with the rasp cutter to join the holes.


I applied glue to the angled cuts on the sides and bottom, then inserted a couple of my inserts to maintain the shape and taped in using masking tape to hold it until it was dry,  I will reinforce things later with some small screws.  


I finished by gluing in the rest of my inserts and securing the sides with some small screws.


This is going to sit in the center of my workbench.  My tools have a place to be and wont be all over the workbench now.   I will add a handle later but I was anxious for you to see this project.  Looks like I have room for a couple more hand tools.  hint hint.   

I had a good time making this.  I hope you enjoyed the journey.  Till next time have fun and be creative.  Carol     Thanks Proxxon.   I love your tools!


Tuesday, June 7, 2022

How To make a Charcuterie Board


     Hi everyone. I've been trying to get back to my woodworking since I had surgery. I thought I'd start with something fairly simple, but also something that's pretty trendy right now. I wanted one of these for my Fourth of July picnic.  Follow along with me and I'll show you how simple it is to make one.


Supplies:
   Proxxon 2 Speed Scroll Saw DS 460
   Proxxon long neck angle grinder LHW/E
  1"x12" pine board  (you can determine the length you want)
   Drill and large drill bit
   Butcher Block Conditioner


First I determined how long I wanted my board to be.  That was simple because I had a pine board that was left over from another project. I just worked around a few knot holes that I didn't want on my finished board and cut out what looked like the clearest area. The only thing I really had to draw was the handle. 


I started out using the Proxxon Band Saw but quickly realized I wasn't going to have enough room to swing the board so I switched over to the Proxxon Scroll Saw. 


I was easily able to swing the wood and get the handle cut out.


I used the Proxxon Long Neck Angle Grinder to sand around the edges of the handle and also around the edges of the entire board.


Next using my drill and a fairly large drill bit, I drilled a hole in the handle for hanging. 


                                      I gave the entire board a good sanding and wiped clean.


Lastly I wiped a butcher block conditioner on the entire board. I let it dry and put on a second coat.  You must make sure you use a product that is food safe.  I may put on a third coat after it dries overnight. Hopefully it will darken more with time and use.


Here's my finished charcuterie board!  I'm pretty happy with the way it turned out. These would even make great gifts! 
Thanks for following along with me. 
Colleen  :-)


Sunday, June 5, 2022

How to Make the Perfect Beginner's Flower Press

Get ready to preserve all your lovely summer blossoms with this easy-to-make flower press.


Supplies and Equipment for the Flower Press:

Instructions:

  1. You'll need two blanks for this project.

  2. Cut the blanks to size on the table saw.

  3. Use painter's tape or masking tape to tape the blanks together.

  4. Use a quarter to mark the rounded corners.

  5. Round the corners using the disc sander.

  6. Mark holes in each corner ½" to ¾" from each edge for the bolts.

  7. Drill the holes using the bench drill press. The holes should be slightly larger than the bolts so the pieces slide together easily.

  8. Untape the blanks, and sand the surfaces with the Delta sander.

  9. Sand the bolt holes using the rotary tool with a sanding drum.

  10. Carriage bolts have a square or hexagonal neck that, when hammered into the wood, prevent the bolt from turning when the wing nuts are tightened. Hammer the carriage bolts in place. Once in place the bolts are stationery.


  11. Cut watercolor paper about 6" x 7" to fit between the bolts.

     
  12. Drop the flower press cover onto the bolts, add the washers (to distribute the pressure applied by the wing nuts), then tighten the wing nuts.

 Fresh cut flowers and leaves are layered between the papers. Then, the cover is put in place and the wind nuts tightened. Leave the flowers to dry about a week (or more depending on the flower).


Carole