Showing posts with label easy projects. Show all posts

Saturday, November 4, 2023

How to make a patriotic frame for Veteran's day


Hi folks, Carol here to show you how to make a simple but fun picture frame to celebrate Veterans' Day

Does anybody out there have scraps of wood laying around?   
Who doesn't,  right? 
Ok, we are going to take those little scraps of wood to make our Veteran a special picture frame.  


I started with a long piece of simple pine.  It measured 1 1/2 inches wide by 3/8 inches thick and about 3 feet long.   I'm going to rip it down to 3/8 inches wide so that I can have a perfect square strip.


I use the Proxxon mini table saw to cut my strips of wood.
\

Now I have a long square strip of wood, I need some angles for what I'm doing.  I chose and 8-pointed star so that I could make 45-degree angled cuts that will fit together nicely.   This is so easy using the Proxxon mini chop saw.  I just set the angle to 45 and make my cuts.  I want the lengths to be even, so I use a guide mark where to put the wood for cutting.  I am going to use the edge of the circle to line up my cuts.  If I want a different spot, I might place a piece of tape to guide me.


So, I need 16 identical pieces to form my eight-pointed star.  So easy with the Proxxon mini chop saw.  I love it!


I use the Proxxon disc sander to just smooth the edges.  Use a gentle touch here.  
\
Ok, now glue 2 pieces together to form a >   8 times.  Let it dry good.

I use Titebond glue.  I use the premium for quick setting and ultimate for stronger set.  For this project I used the Premium because I'm a little impatient. 😁  

To hold things really well I added toothpicks.

\Using the Proxxon cordless mini rotary tool I drilled a hole through both pieces and stuck a toothpick in it.  When it dries, I will break off the toothpicks and sand it smooth. before I paint it. 

Put them all together in a similar manner and you have made a 8-pointed star.  


Ok, I wanted to take it a little further, so I did exactly the same thing only cutting my pieces slightly shorter on the Proxxon mini chop saw.
And then I did it again.    Hmmm 3 starts just beckoned to be red, white, and blue, the colors of our glorious flag.  
I glued it all together and temporarily placed a flag picture in it for Veteran's Day.   I like it, and am going to place it on our door.  


Hope you had some fun, I wanted to show you that no scrap is too small, that you can't make something out of it, using Proxxon tools.  They are the best tools for little projects.  

Thanks for visiting today.  Hope you all have a wonderful Veteran's Day.  Well everyday can be wonderful,,, ENJOY !!    Carol

Saturday, September 2, 2023

How to make a little bird feeder

 Hi folks !!  Time for another new project.  I'm thinking spring.  Why dont we  make a simple little birdfeede that will keep them coming back.  I love to watch the birds, dont you?     what I found appealing in this project was that every piece was scraps.


Let's get started.   Keep in mind this will be made with your scraps so your measurements might be different than mine.   But I will give you mine as an example.

I found 2 square pieces of 3/4" pine measuring 7.5 x 7.5   This will do for our roof and the middle piece.

My little feeder boxes are 3.5 x 4 x 1.5"  I will cut my scraps to size on my Proxxon mini table saw.

Additionally, I will need 4 small cup hooks and about a dozen small nails, and some leather  lacing.  .I will use my Proxxon cordless rotarty tool a small drill bit and my Proxxon OZI/E delta sander and, of course, paints by Plaid.  

Ok, so I made a line diagonally across the board I am going to use as my roof,  Then I laid a line of glue down and placed my second board vertically on it and let it dry.  I reinforced it later with some small nails  


Setting that aside I moved on to make my small feeder trays.  I cut 4 identical pieces approximately 1.5 x 4" to be the long sides of my little boxes and 4 similar pieces but only measuring 3.5 " in length.  My bottom pieces measured 4" square   I cut them on my Proxxon mini table saw then glued them together to form the two feeder trays. ( In the picture below the hammer is just a weight while the glue dries the bottom to the sides) When the glue dried, I reinforced all the junctions with small nails after drilling my pilot holes with my Proxxon cordless rotary tool.


Now I have 2 little trays.  Of course, I sanded everything well using my Proxxon OZI/E delta sander

Next, I put small cup holder hooks on two sides of the trays and on the ceiling part of the roof so I can hang the little trays.  I made loops in my leather hangers.  


Now find someone to paint it.   Hello kiddies next door.  👀  Then hang it and let the birds enjoy it. 

🐦🐦🐦🐦🐦🐦🐧


It's been fun.  I love spring!  Catch ya next time.  Carol


Thursday, December 1, 2022

How to make a little wooden Christmas deer

 Hi folks,  I know you have all seen them, and they come in multiple shapes and sizes, but I am going to give you step by step instructions on how to easily make them.  Make one,or make a dozen.   You guessed it we are going to make that cute little stand-up deer.


Equipment and Supplies
Piece of thin wood large enough to cut all your pattern pieces.  1/8" to 1/2" thick
tape, pencil, carbon paper
wood sealer lacquer, varnish or paint.

Ok, let's get started on this quick, easy, kid friendly, project.

I will tell you how I did it.

1.  First thing I did was to make myself a pattern.  Simply draw a deer the size you want on paper.
The legs and antlers will go on east to west and the body will be north to south.   In other words look how it is put together.  You need little slits to slide the legs into and the antlers on.   See my drawing and you will get the picture.
  

2.  Next I transferred my pattern onto the wood I chose.  **just a note watch which way the wood grain runs and try to have the skinny legs run with the grain.   Some woods\, especially cedar will come apart at the wood grain when you cut across them on small pieces**

I used carbon paper to transfer my pattern.


3.  I used the Proxxon mini scroll saw to cut out my patterns.


4.  I sanded everything using the Proxxon OZI/E delta sander.   Love that tool.  It gets into places other sanders couldn't.


5.  Finish them off with sealer, paint, or varnish 
and they are almost done.

6.  Slip the legs into the slots.   Slip the antlers on, and they are done.  So easy you can make a dozen.  And....you can make them any size, simply draw the pattern bigger or smaller.

Here is one in cedarandaand this one is an oak veneer.  

Well, that is it.   It was fun and very quick.  I hope you enjoyed it.  It's not original but it was my drawing.    Be safe and come back.  Thanks for visiting.   Thanks, Proxxon, great company!  

till next time.......Carol

Thursday, August 4, 2022

How to make a simple piggy bank

 Hi gang.  Hope all is going well for you.  Today I have a simple project that you can help your child make, under strict supervision of course due to the nature of saws living to cut, wood and or fingers.)  In other words, just be careful with cutting tools.  Enough said, let's get busy with this easy project.


I'm not sure if you can tell from the picture but my inspiration was an empty Gatorade bottle.  It had a couple of things going for it.   It was a nice sturdy plastic bottle, (so it could be cut) and... the orange bottle top which was bigger than a quarter sold me.


Firstt,I designed a pattern that I was going to use.  Everyone should do their own but basically see the cutting pattern below.  These are the 3 pieces you will need.


I drew my patterns onto my pieces of scrap wood then took it over to my Proxxon mini bandsaw and cut out the perimeter of all 3 pieces.


Now, for the inside cuts I used my Proxxon professional rotary tool with a small drill bit to make a hole inside the circle I wish to cut out.  Then I passed the scroll saw blade through that hole and reattached it so I could make my inside cut.

Then I used my Proxxon cordless mini belt sander to bevel the edges slightly outward on my inside pieces, so they fit the bottle pretty tight.   I used the Proxxon OZI/E delta sander to smooth all the edges of the wood, (no splinters allowed!)


Its a good time to paint the pig parts.  🐷🐖  I used Plaid paints because they have the best colors.


I used my Proxxon professional rotary tool with a cutting wheel to cut a slit in the top of my bottle.  This is where everyone is invited to stuff coins, and or paper cash.!


Next Glue the cap of the bottle the front part to the pig.  Be careful not to glue the piggy parts to the body of the bottle.   (To get our money out we are going to untwist the nose).


I'ts done, if you want, put a squiggly tail on him--or not

I painted him at this point, but hopefully you painted him earlier.  It's a lot easier before it is together. 


It[s been a lot of fun,  Thank's Proxxon, and Thank you for visiting!

Catch ya next time..   Carol

Thursday, June 30, 2022

How to make a Plexiglas card holder for personal or business cards using Proxxon tools

 Hi folks, time for a new project.  Today I am going to show you how you can use Proxxon tools to make clear beautiful boxes.  For instructional purposes we are going to make a small little business card holder, but I'm sure you can imagine any number of things a person could make.   Hang on and let's get started 


I went to the local hardware store in town to see what Plexiglas sheets they had for sale.  Ooops.... there is a little bit of sticker shock involved, but I didn't need the giant sheets they were selling.   What I did find out was that most people come in not needing that big ol sheet either so there was a lot of cutoffs and scrap there.  Nice hardware man here said, "Oh that is the junk pile, help yourself", so I did.  😉    I got a bunch of it.  For Free!  I bet every hardware store has pieces like that.  Anyhow, let's get started.

The first thing to do is design the little box.  I wanted to make mine 4" x 2" x 2" but the sides will be shorter and the back taller.   I  also want to use the Proxxon engraver to personalize it a bit.

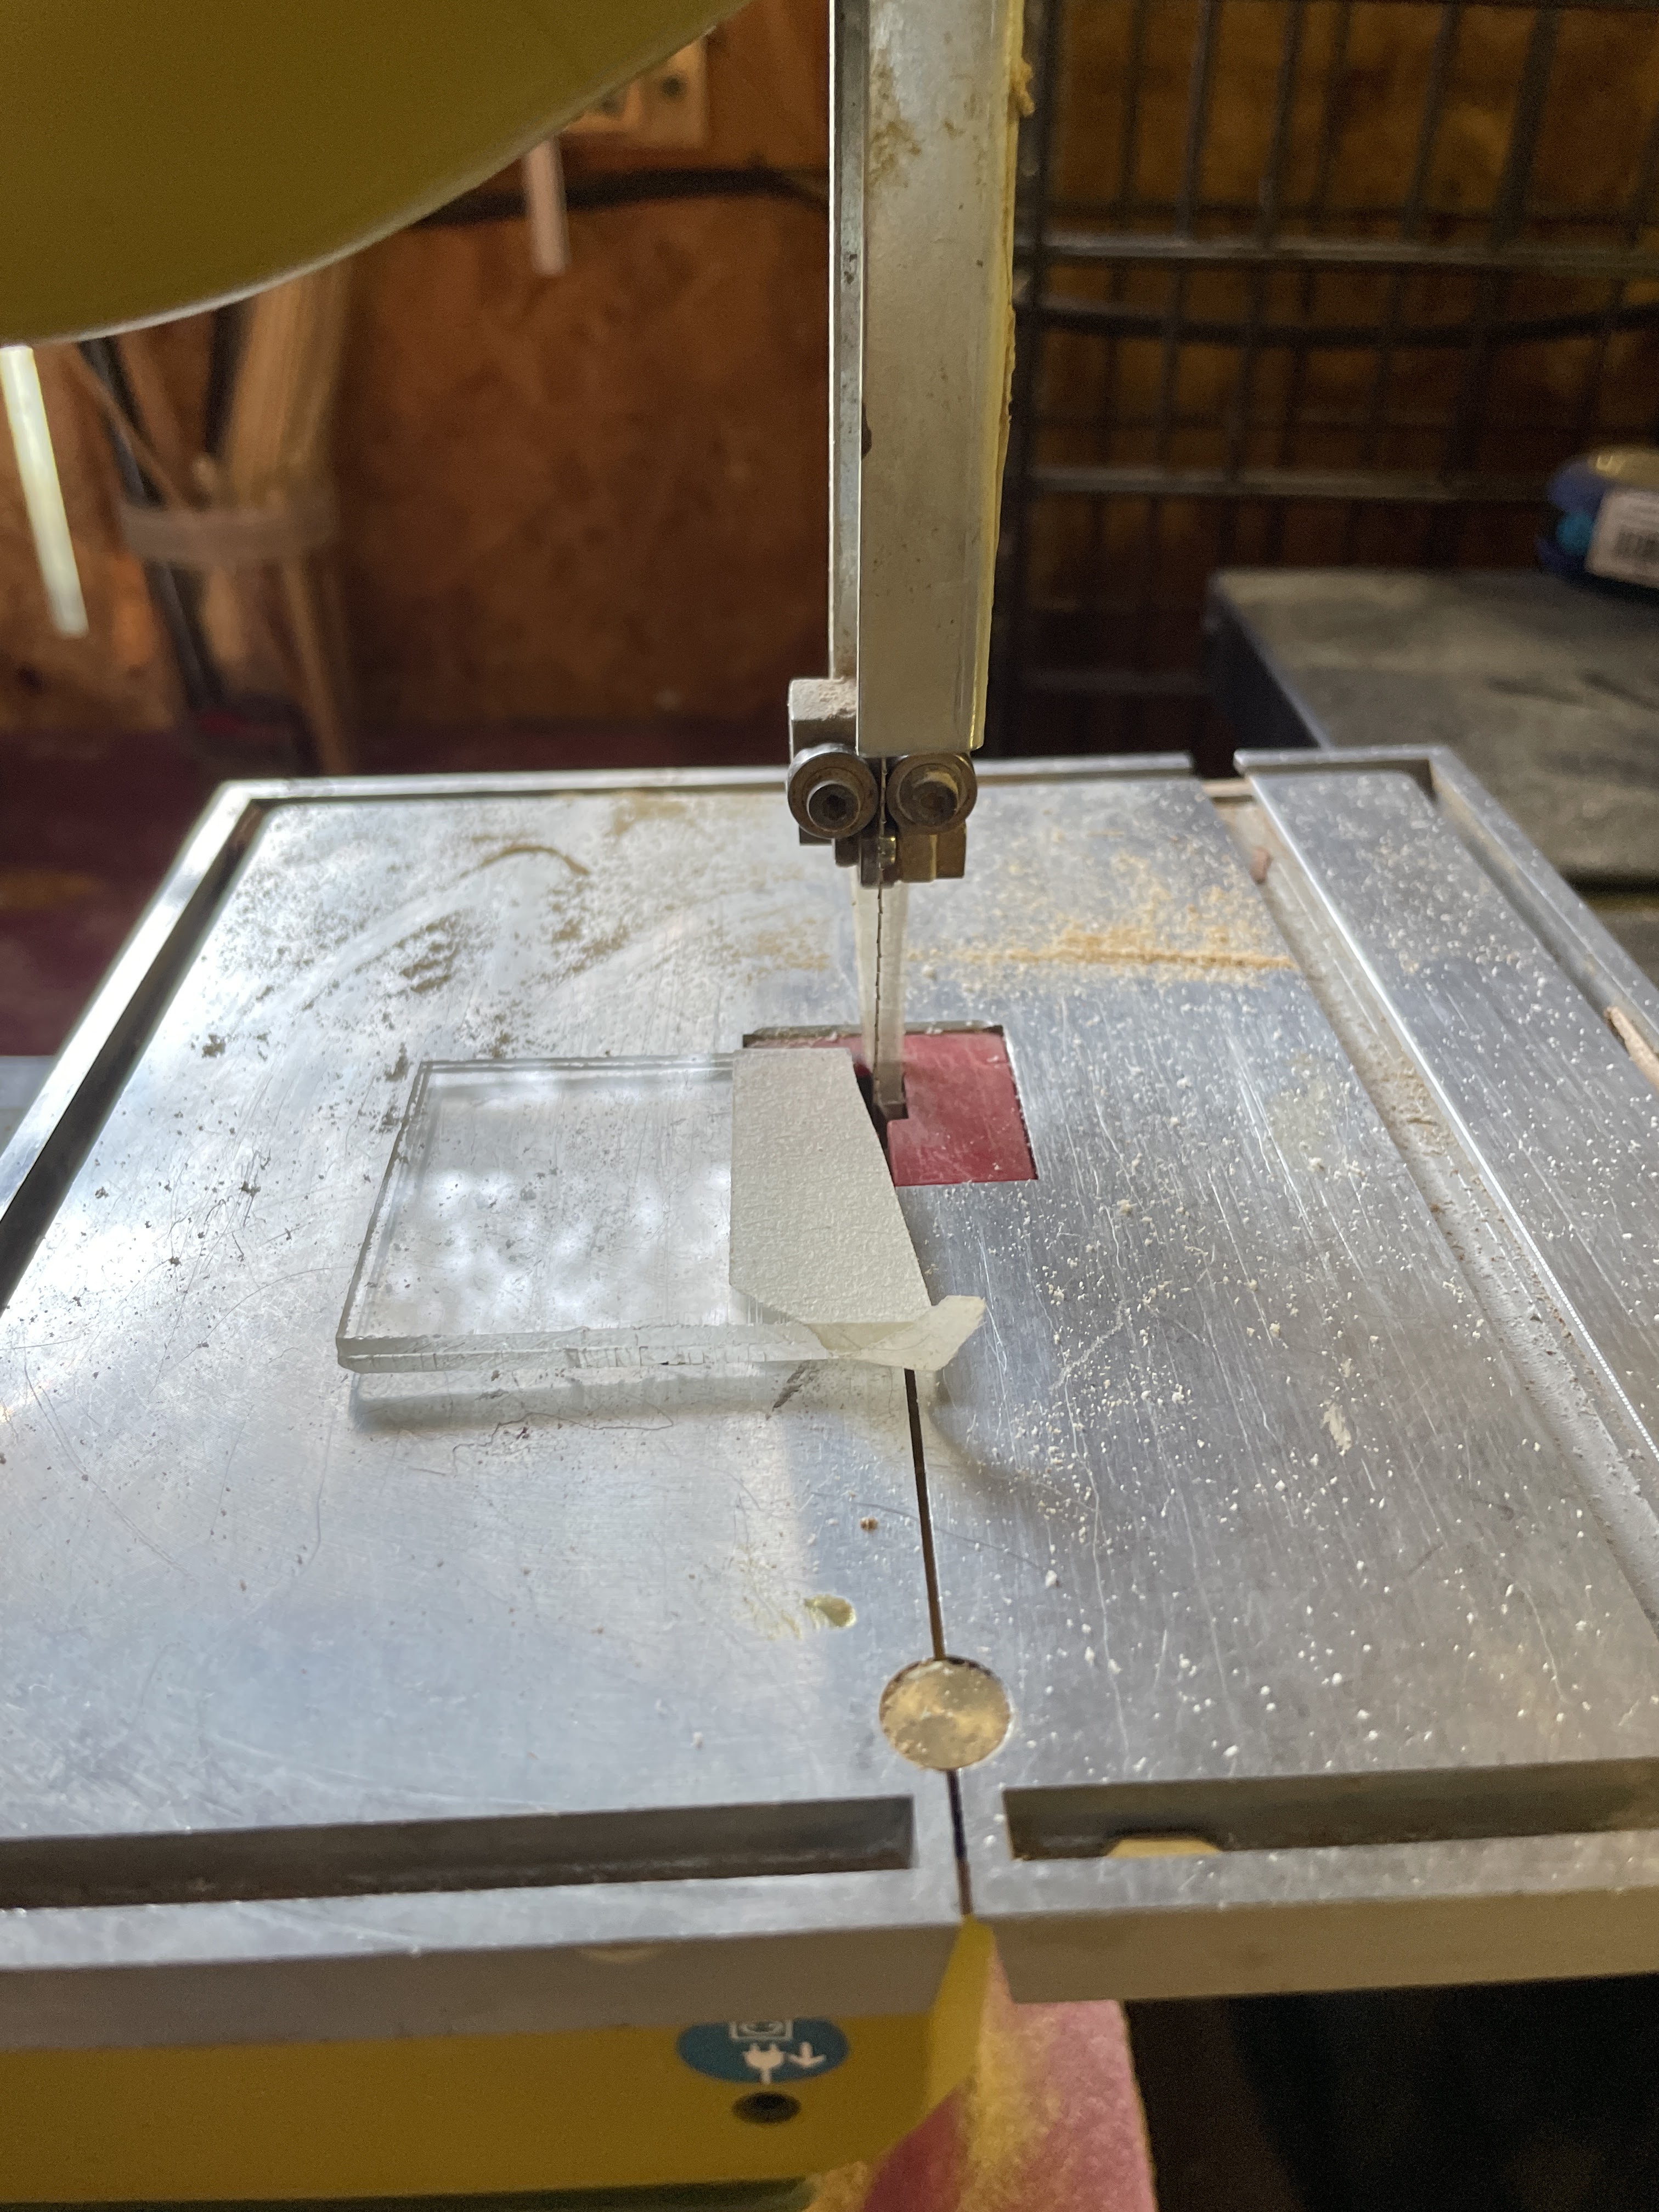
So off to the Proxxon mini table saw to cut the plexiglas.  I cut the pieces as below

back and bottom 4 x 2          sides 1 x 2                 back 4 x 4


On the front piece I drew an arc that I cut out using the Proxxon mini bandsaw.  This just makes it easier to grab our business cards.


Then using the Proxxon OZI/E delta sander, I lightly sanded the exposed edges to remove any stuck-on pieces that might be sharp.   Oh... that reminds me.   When cutting plexiglas little pieces fly off everywhere.  Use eye protection without fail.  


Check out my face shield.  I use it in the shop all the time. It has a filter in it as well, so my lungs and face are protected!


Next, I glued up my box except the back using super glue plus an accelerator which makes the bond happen super fast so be ready.


Then, I took the back piece over to the engraver, made by Proxxon tools.   I set it up to engrave our company name.  Good directions come with the engraver so it can be set up accurately.   I placed the Proxxon rotary tool in the holder and engraved, my plexigals back with our company name.


Hey it looks good. And cost nothing but a little time.


I can't wait to make something else

Hope you enjoyed this quickie project and maybe learned how easy it is to work with plexiglas and Proxxon tools.  

Till next time   Play safe, Use eye protection please.!   Carol
Thanks for visiting.  


Thursday, June 17, 2021

How to make a custom wood box without measuring anything

 Hi everyone.  I have a good project for you today, easy and stress free.


Let me tell you why I chose this particular project.   I take art lessons and am currently working on a pastel picture.  Well, I have to take my supplies to class and the pastels I have came in a flimsy plastic thing I won't even call a container.  See below.


I took it to class but first dumped them in my car, then dumped them again in class.  If I am going to tote them back and forth I need a sturdier container.

First of all, I enjoy making boxes, but I was rushed this time and took some shortcuts that actually worked out well.   This project features the Proxxon mini miter and chop saw, as well as the Proxxon mini table saw and of course, Proxxon's OZI/E delta sander.


The first thing I did was trace around the bottom of my plastic thingy I wont call a container, then cut it out for the bottom  In the picture below I am using the Proxxon mini band saw to do my cutting.


The next step was to mark the height of the sides.  I didn't want to measure so I simply put the plastic thingy next to the wood I would use for side and made a line for the height


I cut slats of wood the height I just measured on the Proxxon mini table saw.  I made them as long as the wood was and will cut them to size next.


I laid the plastic thing beside the wood and marked where the corners of the plastic were, then took the wood slat over to the Proxxon mini chop saw,  The marks on our wood will be the short side of the mitered corner.  I set the miter gauge to 45 degrees, then placed my wood slat with the sides up into the holding slot and cut my 45 degree angle. I made 2 of these for my long sides then repeated the process for the short sides.


Now I have all my pieces cut and it is time to glue them together.   I made a glue bead around the bottom and where the sides met up  with the bottom and clamped it all together.  If you have corner clamps this is the time to use them. I used a lot of clamps.  


When it was good and dry I turned it over atop another piece of thin wood and traced an outline outside the sides for the top.   I cut it out using the Proxxon mini bandsaw and attached my hinges and latch to form a lid.
My plastic thingy fit nicely inside to hold my pastels.  Mission accomplished.  Looks pretty good and is very functional.  


Thank you all for visiting,  Hope this tutorial is a help in someway.  Remember you can customize the size of this to what you need.  Proxxon makes these small projects easy.  Thanks Proxxon.   
Till next time, play safe  Carol