Showing posts with label fun. Show all posts

Sunday, March 3, 2024

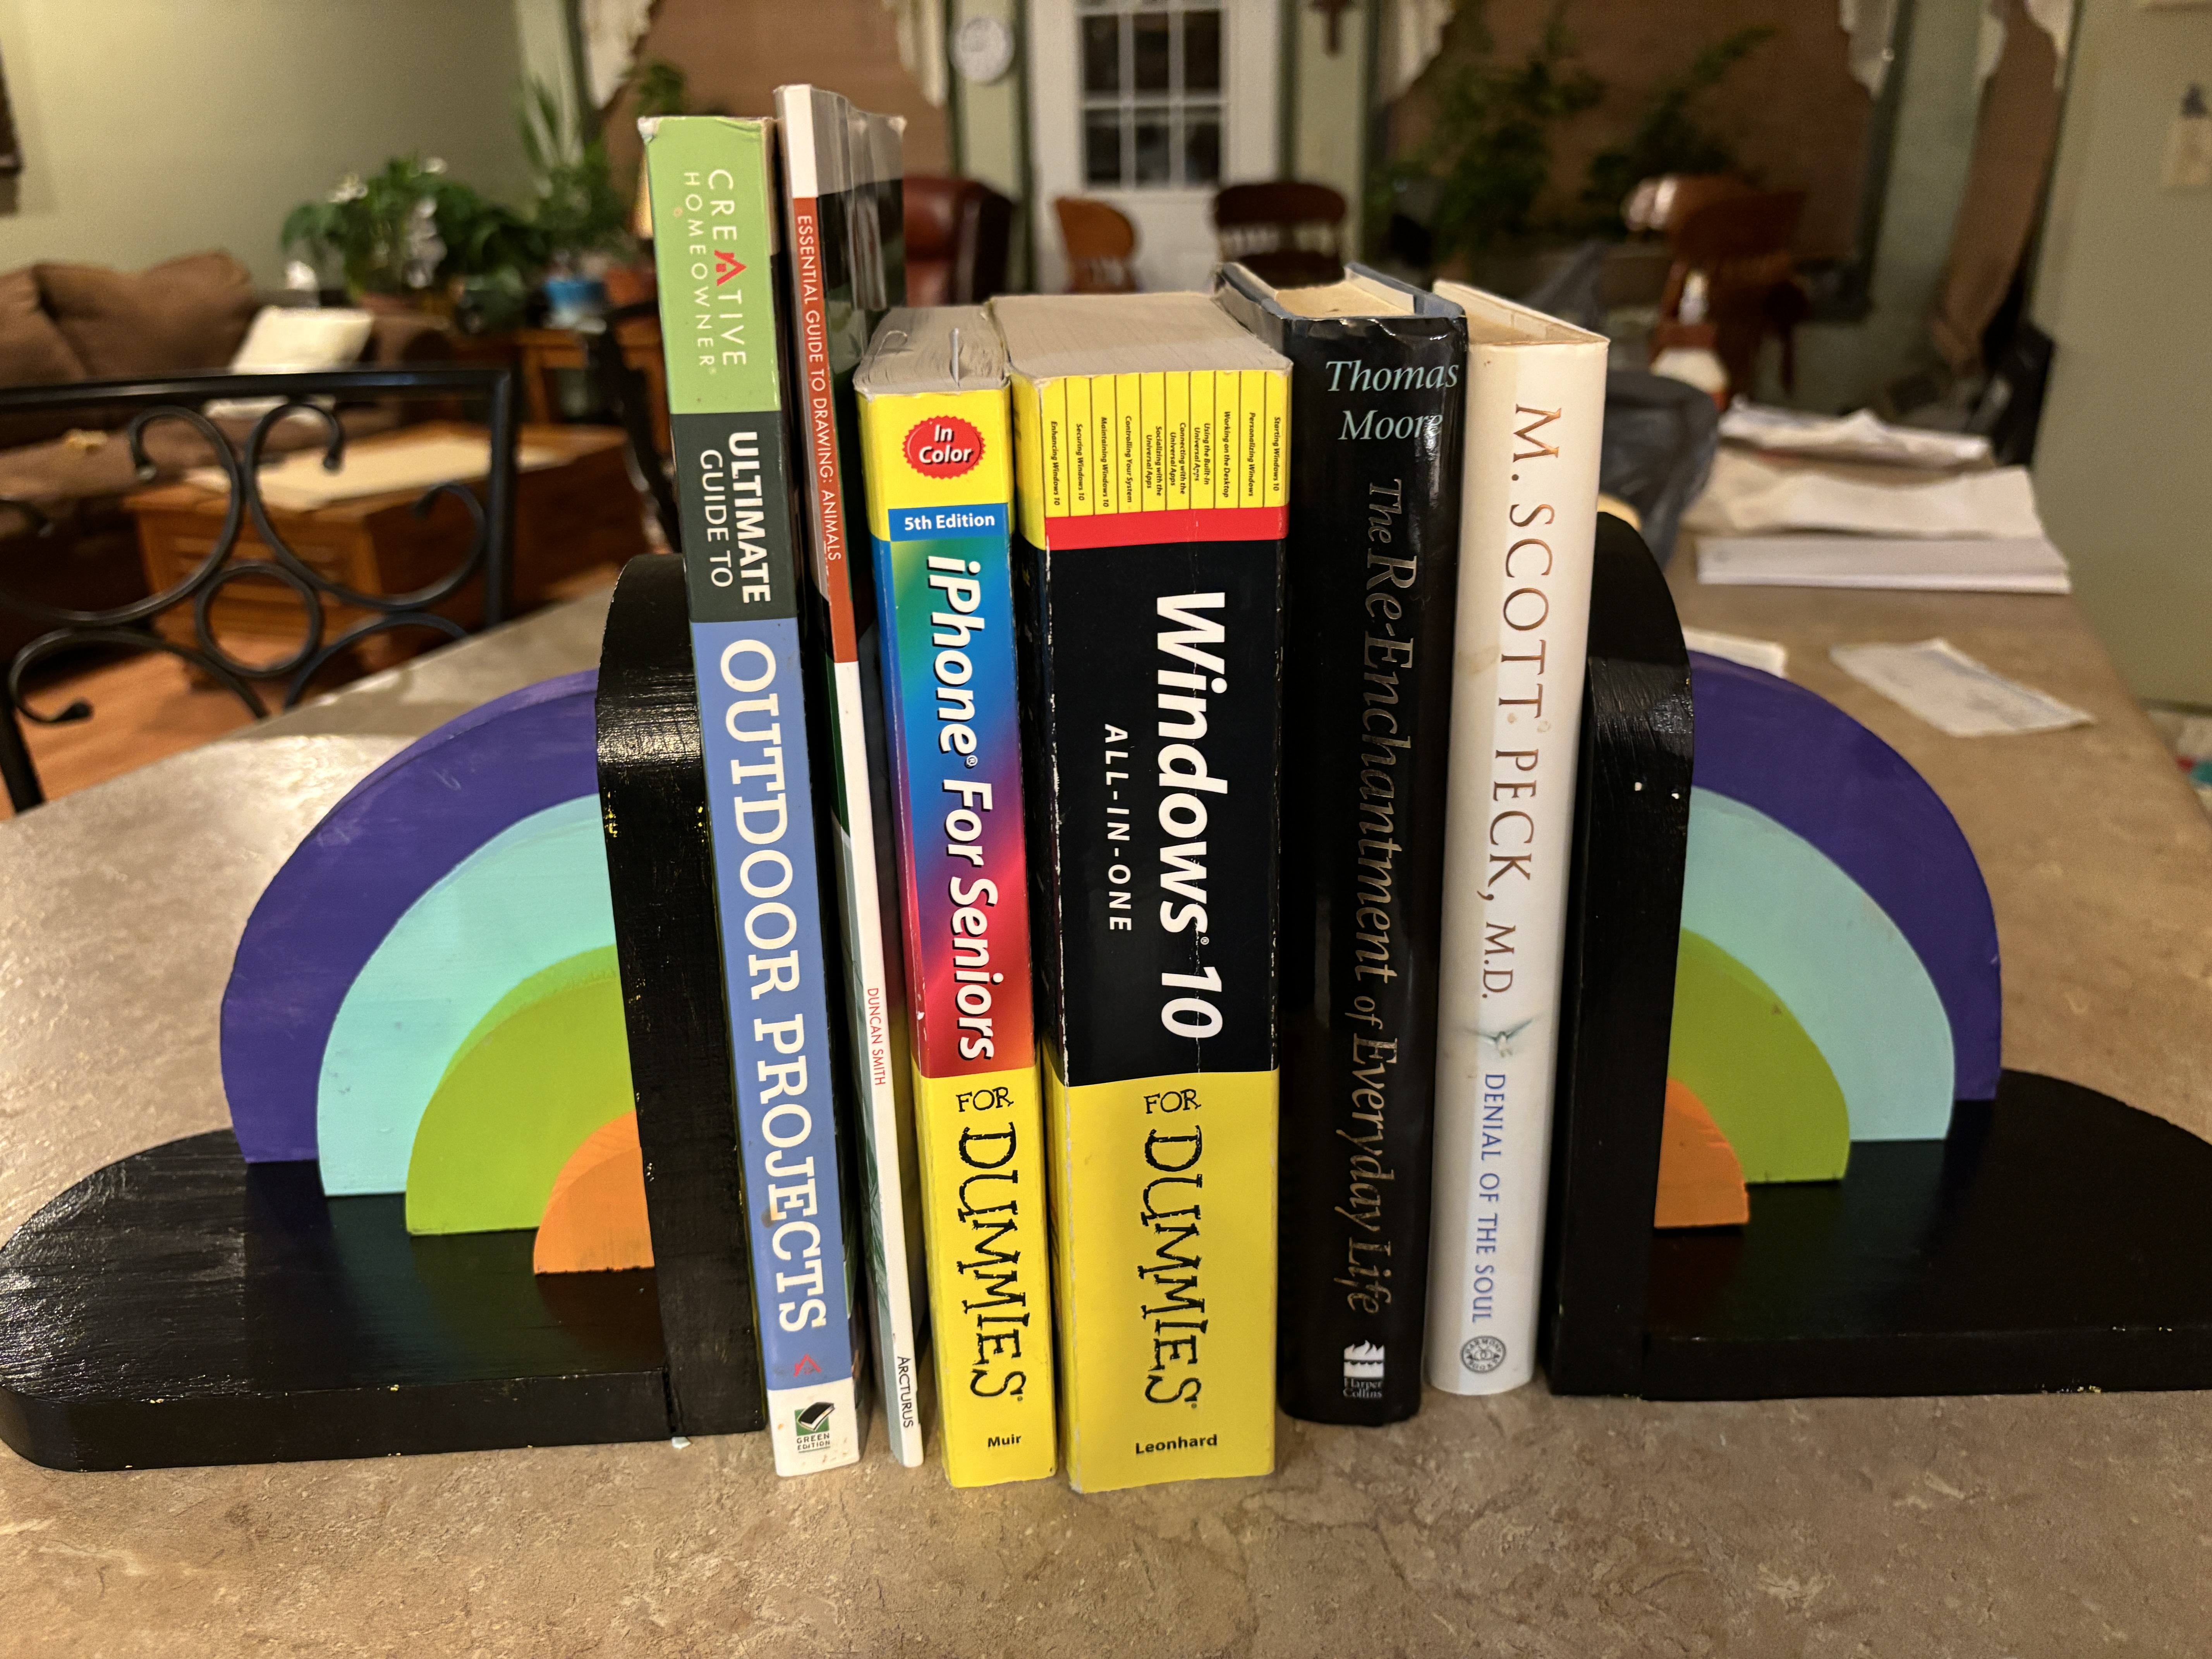
Easy to make bookends

 Hi everyone.  Hope this finds everyone well, and anxious and motivated for a new project. 

I just want to tell you that since it warmed up a little, I have been enjoying my workshop.  But, I didn't know what to make, I had dug out an old board that I knew would work for whatever project I decided on.  Flipping through an artists' journal gave me an idea, so now I will get busy and show you what I made so you can go out and make yourself 1 or 2. This would be great in a toddler's room to hold his colorful books.

I used just one board.  1 x 7 x 48  


First, I transferred my pattern onto my board Then, using my Proxxon mini bandsaw I cut  out all the pieces.  Note if you use the extra narrow band saw blade you can cut out these pieces very easily as it will take tight curves with ease.

After sanding real well, I used some carpenter's glue to glue the basic braces together.  Note:  The longer one is glued to the shorter one so that the sides and the base are of equal length.   When the glue dries I add some nails for added support.  I used the Proxxon cordless rotary tool to pre-drill my holes to avoid cracking the wood.  


Then I sand all the pieces well and proceed to painting. 


]\

Let that get good and dry then glue it up like a rainbow to the base and side pieces.  Drill and add the nails or screws for added support and you're done.  The bookends are heavy enough, so they don't slide.  

It was easy, wasn't it.  Put it anywhere you need a splash of color or to hold those oversized books neatly.

Thanks for visiting!  Check out Proxxon tools next time you get a chance.  Small precision tools are so easy to use.

Saturday, January 6, 2024

How to make a dollhouse chair.

Hi everybody!   Guess you survived the holidays!    Time to get going onto something new in this brand-new year!   I'm in the process of helping a friend. refurbish an old doll house.  We have been working mostly on the structure and exterior, but now we are giving that a little rest and thinking about the interior. So, my project today is to make a little chair for this little house. It's very first piece of furniture.\


Ok, Let's get started, I saw a design for a chair and have redone it to fit my needs.   See below for my plan.
I see that it could have been darker,  sorry!
So the first step was to draw the pattern, as above.  This little chair is going to be about 4" tall.
Next it gets transferred to the 1/4" poplar plywood I am using and I begin to cut it out using the Proxxon mini band saw.   A scroll saw would work just as well, (maybe better), but I just love the little Proxxon band saw.   Anyway, there are parts of this I do take to the Proxxon mini scroll saw as it works better on the tight curves.
]


I need to tell you on the patterns there are small tabs and slots where things will fit together.  This makes gluing so much easier.  After all is done there might be a bit of tab showing but that can easily be sanded off.  I like to use the Proxxon delta sander for this and pretty much all my sanding needs.


For the inside cuts on the chair back, I drilled some holes ahead of taking it to the scroll saw as a shortcut.  You do have to drill a hole in it someplace anyway, so it might as well make it do something.  Then I released the sawblade on the Proxxon scroll saw and threaded it through the hole to cut the sides.  The Proxxon scroll saw can use blades with pins.  This makes changing blades or releasing and replacing blade for inside cuts very easy!
]````````````````````````````````


Once we get all our pieces cut and sanded it's time for gluing.  This can be little tricky but small clamps really help. 


And now we got a chair.  It's pretty sturdy and will look nice when I finish sanding and painting it.
]


There, Now, there is a place to sit on the porch.😁

I really enjoyed making the little chair and look forward to constructing some more furniture for this many-roomed dollhouse.

Thanks for visiting.  Hope to see you back next time.  Carol.
Play safe everybody.!

Thanks Proxxon, I'm still loving your tools.

Saturday, March 4, 2023

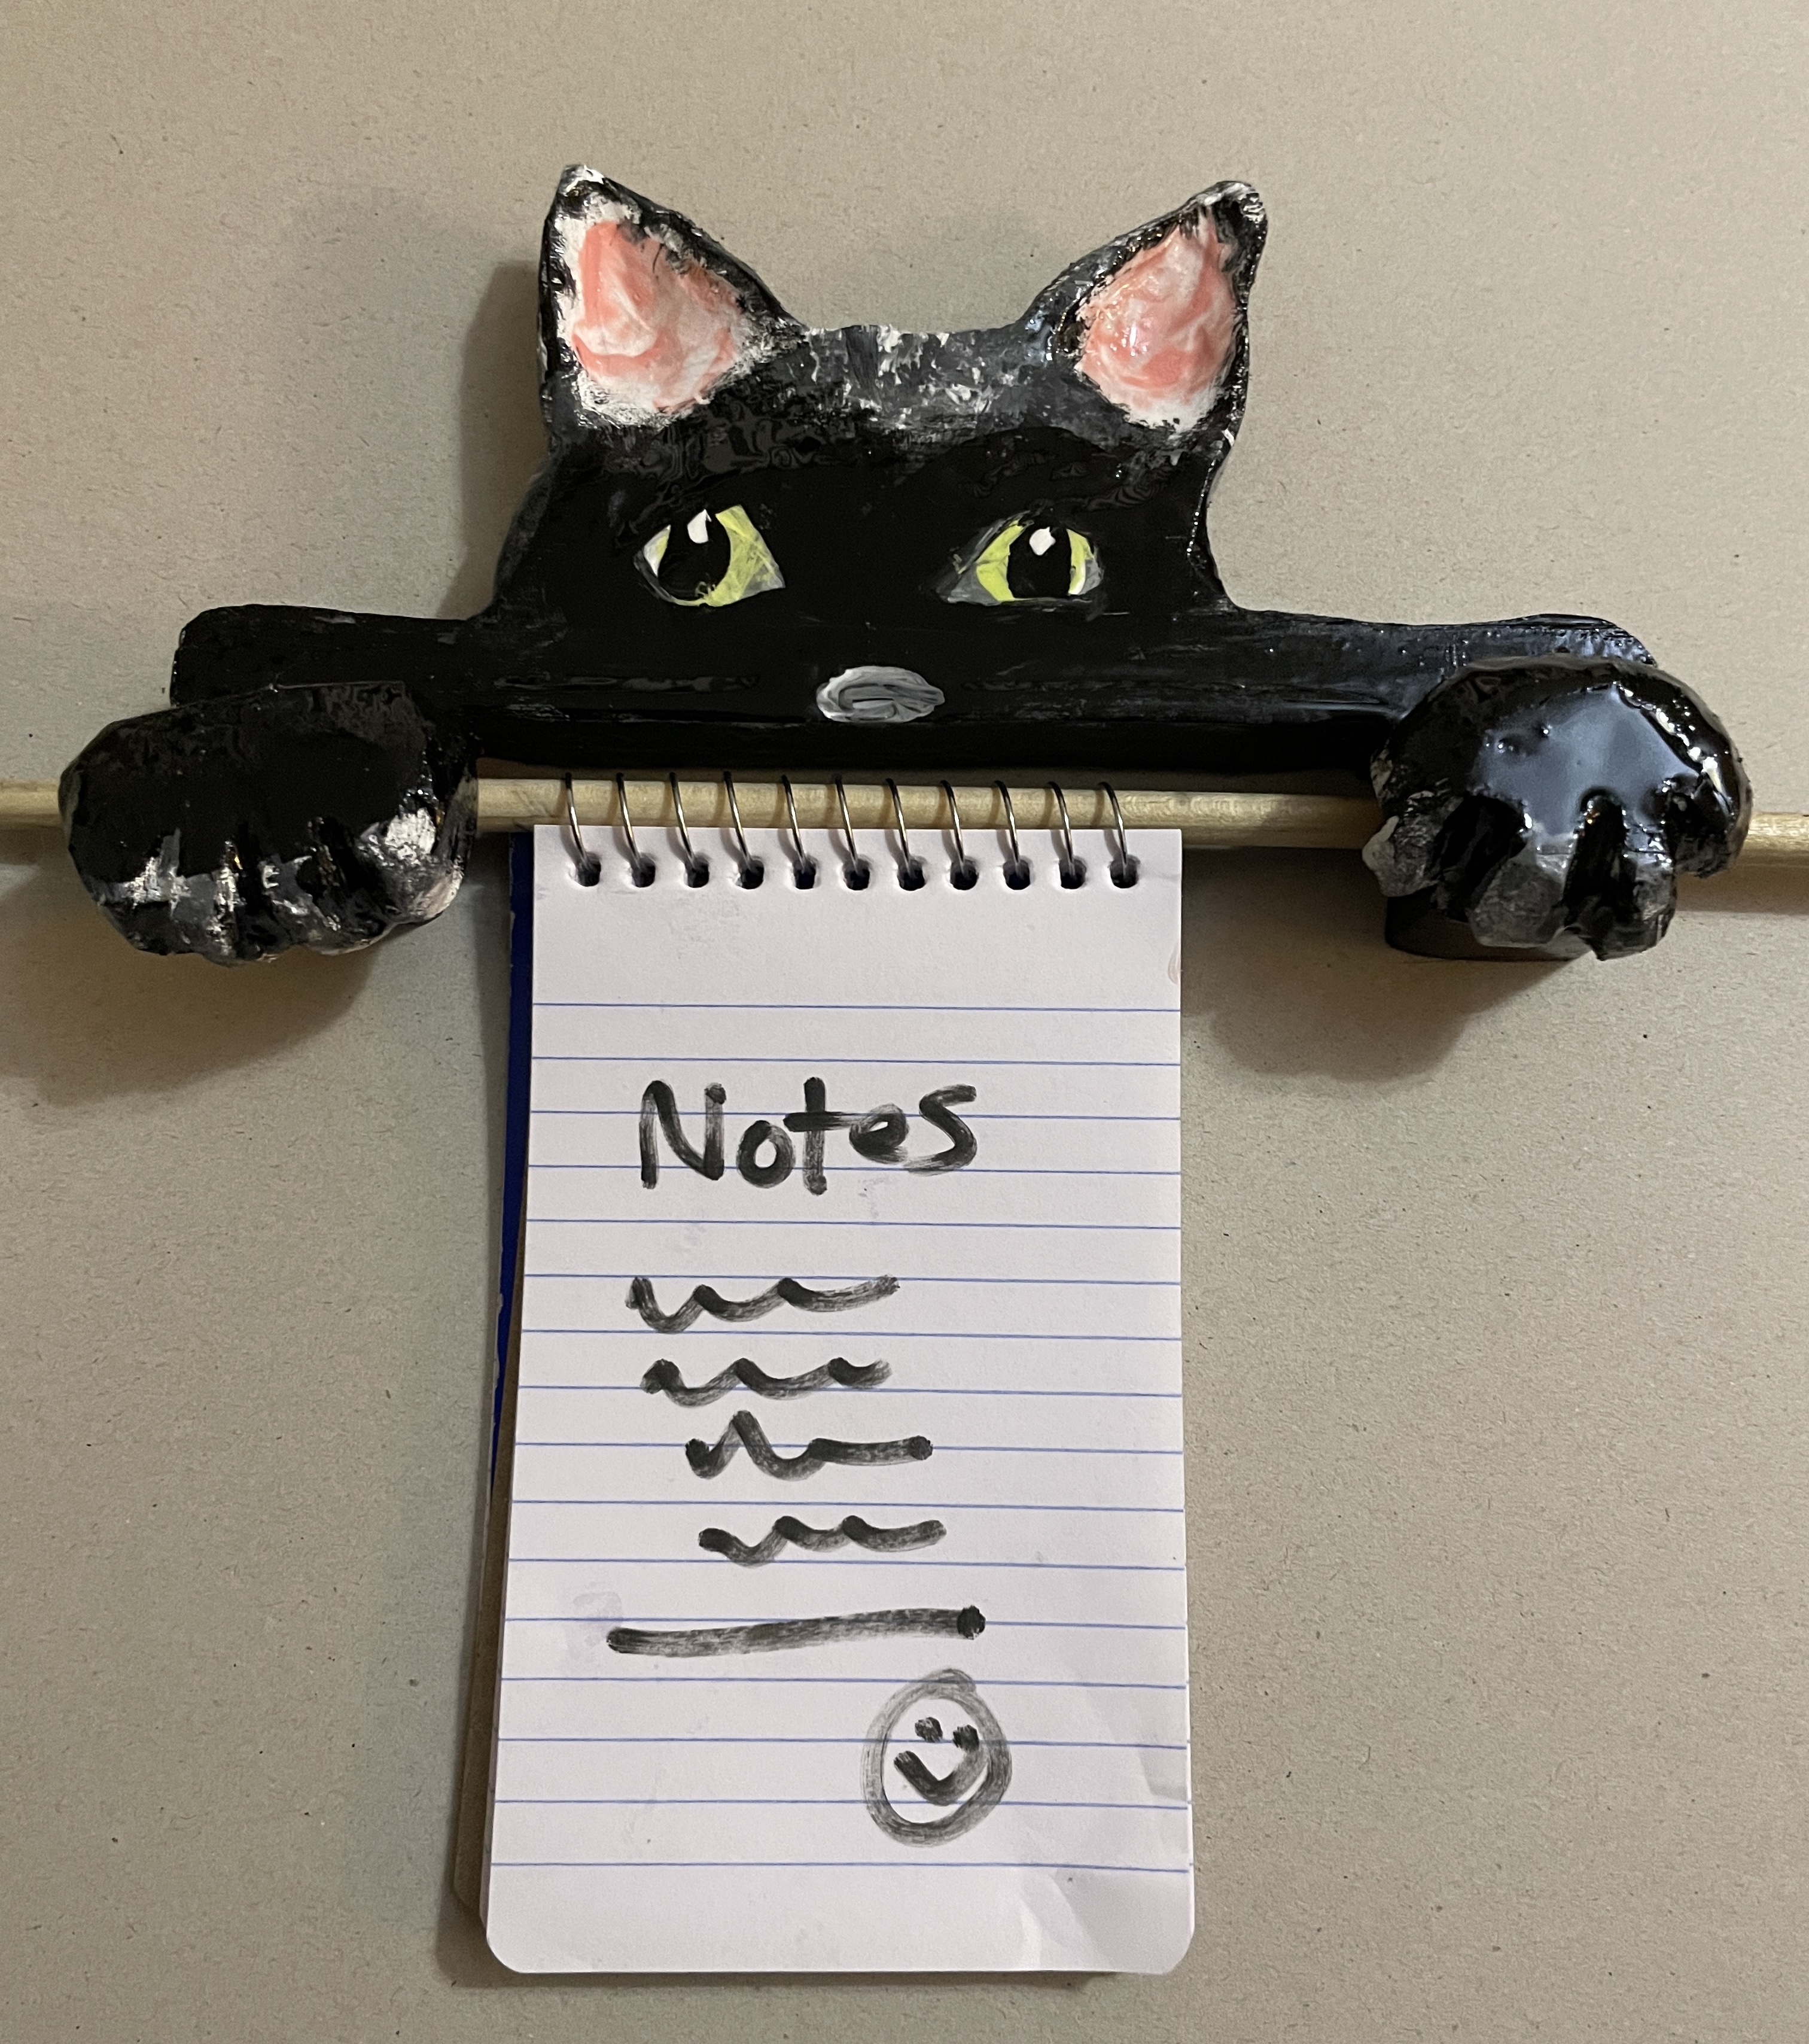
how to make a unique note holder

 Hi again.   Time for another quicky project that you can enjoy with or without kids.  We are going to whip out a little note holder.  This would go great in the kitchen for recipes and shopping lists, and that sort of thing.  I know I am always looking for a pen and paper to write down a number or put some items on a grocery list.  Stick this little note holder on the wall and it will always be there when you need it.  And it doesn't have to be a cat.   For you dog lovers, a dog will hold the note pad just as well.


Equipment and supplies

A minimum of 1" thick  piece of wood.  I used a 1 X 4 x about 2 1/2 foot long

Proxxon mini bandsaw or  Proxxon mini scroll saw 

Proxxon cordless mini belt sander

Proxxon OZI/E delta sander

Proxxon long neck angle grinder.  

Glue,  paint and  sealer

1/4" dowel,,,and 1/4 inch drill bit.-

sawtooth picture hanger 

  First, we need a pattern.  If you can draw it, I say Yay draw it, otherwise I often look at magazines and or the clip art on the computer.   I drew the one we are going to work on,  on a piece of paper.   See  the cat below.

After transferring the pattern onto the wood of your choice, it's off to the Proxxon scroll saw for cutting.   This scroll saw handles the cut-ins and corners without any problem, and is a joy to use.


Next, I used a 1/4" drill bit to drill holes to hold the dowel that will hold the note pad


You can stop here, and get out the paints, or  chose to shape the little kitty and I did so using the Proxxon cordless long angle grinder.  I first ground out some wood from the front of his ear, then I worked on the backside.  Take your time and enjoy the process.   Remember to keep your holding hand away from the cutters.  


A little smoothing with the Proxxon cordless mini belt sander, and the Proxxon OZI/E delta sander. 


Now grab the kiddies and let;s paint this kitty!


Then stick the dowel through one hole, then through the wire spiral of the little note pad and out the other side.  It should fit tight enough to hold the dowel.  No need for glue. Glue the little feet to the front of the bridge.   Spray a little sealant and call it done.  If you want to hang it just fasten a saw toothed picture hanger on the back.  


Thanks for visiting.   Leave me a comment if you would.   If you have a project in mind, you want me to do put it in the comments and likely I will try it.  
Be safe, Have fun, make something.   Carol
Thanks Proxxon.  Love the little tools.


Saturday, February 4, 2023

How to make a little bee house

Well Hi everybody.   Boy has it been cold.  Nothing like a good blast of winter to make me start dreaming of spring.  I'm anxious to plant my garden but I guess since the ground is all white it might be a little early.  But I was reading about bees and how the more the merrier when it comes to the garden.  So, to encourage the little buggers, (I say that fondly), I want to make a bee house.  I read about that too.  Amazing how much reading you can do when the ice outside prevents you from leaving home.  Anyway., bee houses encourage bachelor bees to come to your garden.  These are bees that don't belong to a hive.   I never knew there was such a thing. Live and learn.  So, let's make them a home where they will be happy, and they will pollinate your garden in exchange. 


Equipment and Supplies


First, we are going to make the house.   It's a simple pattern. Use the pattern below to cut your pieces.  I used the Proxxon mini table saw to do most of the cutting for the structure. The table saw always cuts straight and true.


  I assembled the carcass using wood glue and clamps, then I let it dry really good and then added screws for strength.


Note- the back and bottom are inside the sides.

Next, we will dd the roof and secure it well.  By making one roof side shorter by 1/2" there is no need to miter the roof angle.  It is called a butt joint.

Then we want to fill up the front with anything bees will be able to lodge in.  I used bamboo, because I had some.  Anything that will leave spaces a bee can get in should work.   I used the proxxon mini chop saw to cut my little tubes to length which was 3"   I needed a whole bunch of them (30-40) to fill up the house, so I made a little "stop" so I didn't have to measure each one. (see below), I used hot glue to secure them to the frame,

I couldn't resist decorating the top a little bit.

To mount the bee house, I added a thin wooden slat to the back which is long enough to nail to a fence post or tree.    

All done!   Come on spring and come on bees!


Thanks for visiting, come back soon for more!

Thanks Proxxon, I am loving your tools!  Carol W.

Thursday, December 1, 2022

How to make a little wooden Christmas deer

 Hi folks,  I know you have all seen them, and they come in multiple shapes and sizes, but I am going to give you step by step instructions on how to easily make them.  Make one,or make a dozen.   You guessed it we are going to make that cute little stand-up deer.


Equipment and Supplies
Piece of thin wood large enough to cut all your pattern pieces.  1/8" to 1/2" thick
tape, pencil, carbon paper
wood sealer lacquer, varnish or paint.

Ok, let's get started on this quick, easy, kid friendly, project.

I will tell you how I did it.

1.  First thing I did was to make myself a pattern.  Simply draw a deer the size you want on paper.
The legs and antlers will go on east to west and the body will be north to south.   In other words look how it is put together.  You need little slits to slide the legs into and the antlers on.   See my drawing and you will get the picture.
  

2.  Next I transferred my pattern onto the wood I chose.  **just a note watch which way the wood grain runs and try to have the skinny legs run with the grain.   Some woods\, especially cedar will come apart at the wood grain when you cut across them on small pieces**

I used carbon paper to transfer my pattern.


3.  I used the Proxxon mini scroll saw to cut out my patterns.


4.  I sanded everything using the Proxxon OZI/E delta sander.   Love that tool.  It gets into places other sanders couldn't.


5.  Finish them off with sealer, paint, or varnish 
and they are almost done.

6.  Slip the legs into the slots.   Slip the antlers on, and they are done.  So easy you can make a dozen.  And....you can make them any size, simply draw the pattern bigger or smaller.

Here is one in cedarandaand this one is an oak veneer.  

Well, that is it.   It was fun and very quick.  I hope you enjoyed it.  It's not original but it was my drawing.    Be safe and come back.  Thanks for visiting.   Thanks, Proxxon, great company!  

till next time.......Carol

Thursday, November 17, 2022

How to make a silly eyeglass holder

Hello Readers, DIY'ers, and crafty people.


Now I can generally find me a pair of glasses when needed, and I know where to put them when I don't need them.  And there you go.   It is a short little afternoon project.

Today I have a little project you might call silly or fun, but honestly it helps me in my quest to finally get my act together and be organized.  Ha Ha. that will be the day.  But I still love the idea of everything having it's place in this world.  And I have made a little place for my many pairs of dollar store reading glasses.  It is really easy.  I think the kids will love it.
Equipment and supplies:
wood glue, 
1/2: dowel
1/2"drill bit
1" x 4" x 12: piece of scrap wood.
1/4" thick scrap wood for details.  

First thing is to draw the outline of your pattern onto your 12" piece of wood.   You can draw the details as well which will come in handy when you start to paint.

Next using the Proxxon mini bandsaw or the Proxxon mini scroll saw cut out the perimeter of your pattern.  


Next sand it well.  In the picture below I am using the Proxxon cordless mini belt sander.


On the bottom where the little statue will rest on the table I made a cut on the proxxon mini bandsaw with the table tilted slightly so that he will lean back. 


I made a small support I will glue onto the back so he will stand. Just cut out a triangle with approx. 2-3" sides.  (Something for him to lean on)  
Cut your dowel "noses" about 1 1/2" long.  I had 4 faces so I needed 4 of these.

Drill 1/2" holes approximately 1/2 way through the faces where the noses will fit.  I aimed the drill at a slight upward angle, so his nose was tipped a little.


\
I used plaid paints to paint my critters.

Pop in the noses.  Use a little glue if necessary to secure them.

For added interest I cut out a few pieces using the Proxxonj mini scroll saw that will add a little dimension to my guys.  (ears for the cat, eyes for the scarecrow, mustache for the man etc)

Then glue them on.  

Put on the glasses and see how cute it is.  


Thanks for visiting.    Till next time.  Make something just for fun.     Carol

Thanks Proxxon.