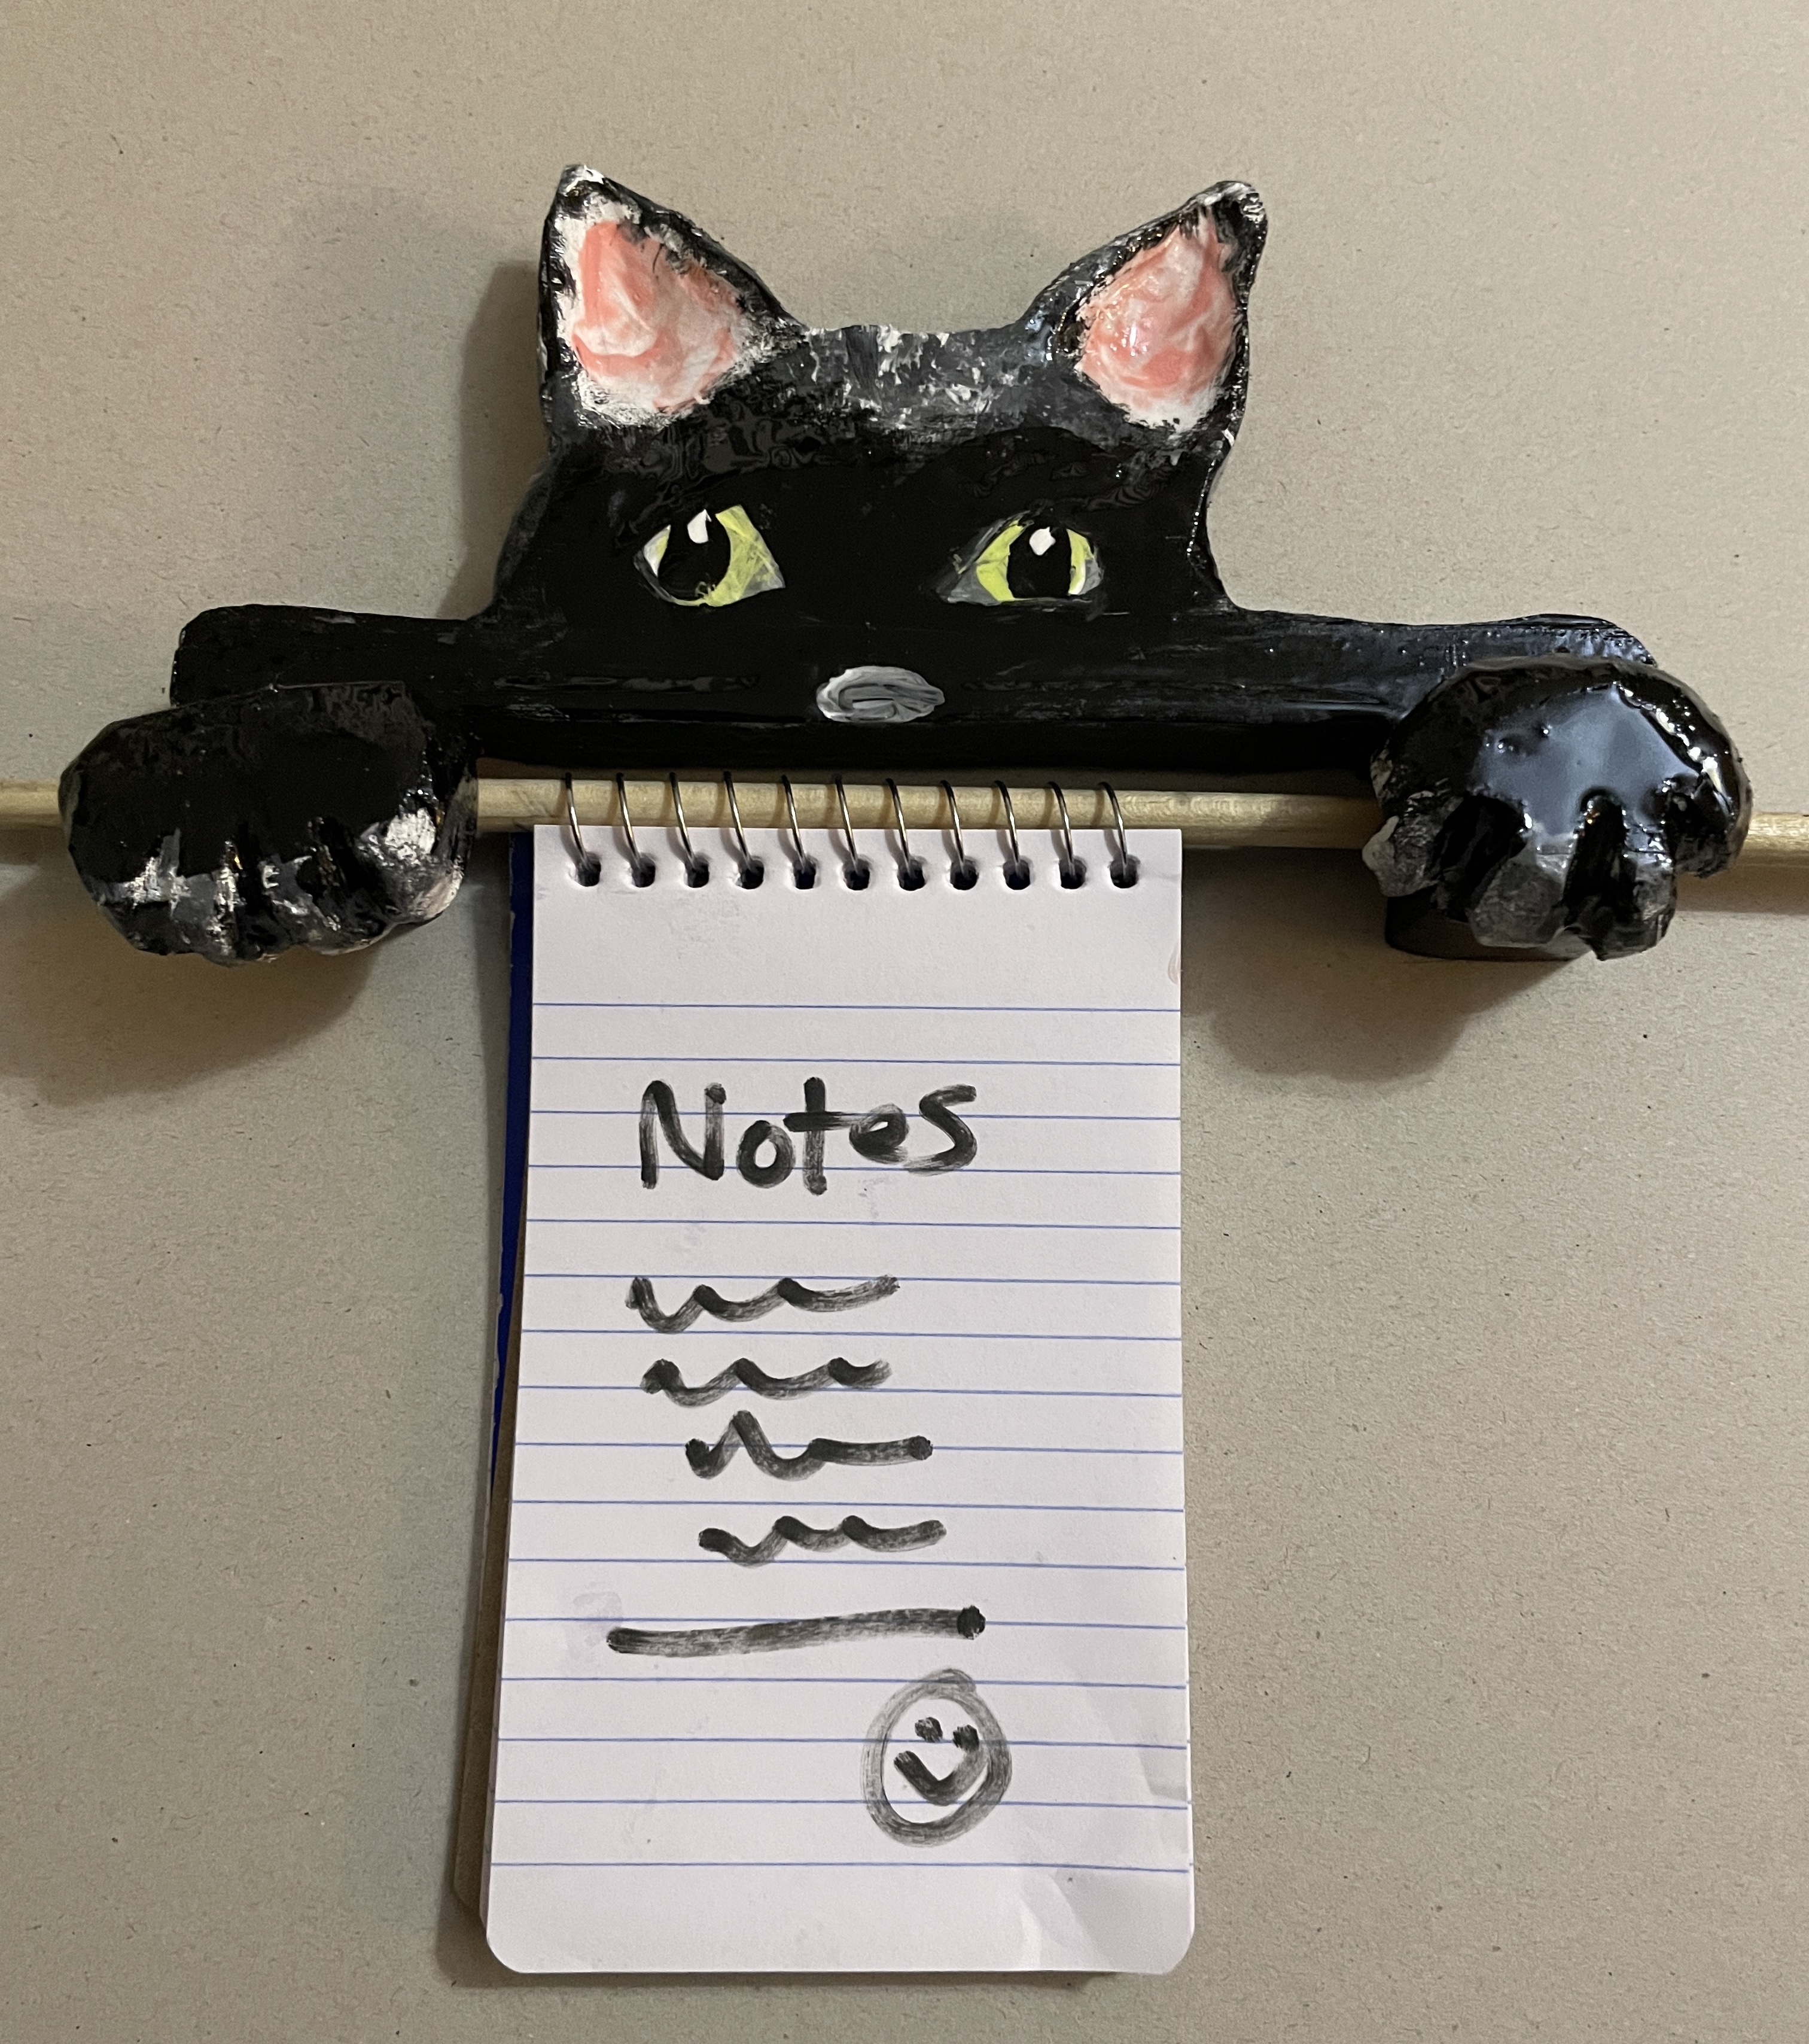
Hi again. Time for another quicky project that you can enjoy with or without kids. We are going to whip out a little note holder. This would go great in the kitchen for recipes and shopping lists, and that sort of thing. I know I am always looking for a pen and paper to write down a number or put some items on a grocery list. Stick this little note holder on the wall and it will always be there when you need it. And it doesn't have to be a cat. For you dog lovers, a dog will hold the note pad just as well.
Equipment and supplies
A minimum of 1" thick piece of wood. I used a 1 X 4 x about 2 1/2 foot long
Proxxon mini bandsaw or Proxxon mini scroll saw
Proxxon cordless mini belt sander
Proxxon long neck angle grinder.
Glue, paint and sealer
1/4" dowel,,,and 1/4 inch drill bit.-
sawtooth picture hanger
First, we need a pattern. If you can draw it, I say Yay draw it, otherwise I often look at magazines and or the clip art on the computer. I drew the one we are going to work on, on a piece of paper. See the cat below.
.JPG)
After transferring the pattern onto the wood of your choice, it's off to the Proxxon scroll saw for cutting. This scroll saw handles the cut-ins and corners without any problem, and is a joy to use.


Next, I used a 1/4" drill bit to drill holes to hold the dowel that will hold the note pad


1 comment:
Very cute and useful also
Post a Comment