Saturday, August 26, 2017

An easy word plaque made with Proxxon Tools

This week I took a pre-made wooden plaque and created something awesome with the help of my Proxxon Delta Sander. I'm going to say it again I know but, Proxxon Tools have made creating a whole lot easier for me. These tools are made to last forever and they are lightweight and small enough to hold easily. The table top tools take up less space and operate like a dream. You should check out these tools as soon as possible 'cause I know you're going to want to add a few to your tool box.

Items needed for this project are:

Proxxon Delta Sander
Wooden Plaque
Plaid Coastal Paints
Plaid Stencil
Flower Embellishments
Foam paint brush
Pouncer
Glue

To begin with I sanded the plaque smooth, especially where my stencil was going to be used.
I then used my Plaid Coastal Blue Paint to cover the plaque and pounced the Plaid Coastal White Paint around the edges.


 I laid my Plaid Stencil on the plaque and pounced the words "Be Your Own Kind of Beautiful" on the plaque and arranged my flowers (and a butterfly) strategically on the plaque and voila' there's an awesome piece to sit or hang somewhere.

You don't have to be a professional to make this plaque and you don't have to have special skills to use the Proxxon Tools or even the Plaid Paints and Stencils. Give yourself permission to try something new and to purchase a tool from www.proxxon.com. You can get an early start on your Christmas gifts!

Barbara


Friday, August 25, 2017

How to make a Hanging Garden from Gourds Scraps

Misty Orlove   


  How to make a Hanging Garden from Gourd Scraps

(The top of this gourd will be used for a Thunder Gourd)

    This project is fairly simple and can be made in a few hours

with  my Proxxon tools.

            Before we start, let me say, this project can be as a triple, double, or single garden.

The Finished Project.
                                     

Supplies and Equipment


1. Three bowl shapes gourd pieces sm. med. and lg.
2. chain or hemp I used 78 inches of chain
3.  (9) Grommets ( Optional)
4.  (9 ) Split rings 1 /1/4"
5. (1) Lg. S hooks add one for each free hanging basket.
6. Drill
9. A Mask or respirator
10. Wood Burner ( Optional)
11. Can paint the bottom or I  use (Alcohol Ink Optional)
12. Something that will cut chain and pliers to squeeze the bottom of the s hook shut so it wont slide  out of the chain.  


Our first step in making this garden is cutting the bowl shape containers.

Using my Proxxon Jig Saw I am able to do this fast and safely.
Note the line in front of the saw, that is where I decided I wanted the cut to be.
Now it is just a matter if following that line around the gourd pieces.


Second step of this project is to drill holes for the grommets. Measure your bowl around
and divide into thirds, this is where you want to drill your hole. 
Make sure to drill straight down not at a slant. That way the bowls will
hang evenly.  I used the grommets to keep the chain from breaking through the gourd. 


Third step is to insert the Grommet into the hole. If your gourd is too thick (Mine was)
you may have a small portion of metal on the inside which you can cover with air dry clay or Apoxy putty
This keeps the sharp edges from harming anyone. If it is a thin gourd attach the back side of the grommet to the out side ring already in place..

Grommets in place

Now add your split rings to the grommets. Open the slit just enough to slide the ring through.

Next I sanded the inside of the gourd with my Proxxon Delta Sander and painted it green as I was going to plant it with flowers. Before I painted,  I sprayed the inside with matte spray to seal the gourd. This helps it not soak up as much paint.  I used Plaid Sap Green.
Don't forget your mask.


Decision time. . . do you want to add pattern and dye or paint to the outside now? or wait until the chain is on.?
I dyed mine with Rust Alcohol Ink at this point. I dried it with a heat gun, (required with the ink)   I buffed it and free handed a pattern in white pencil on each bowl. Then I wood burned
the pattern and erased the pencil lines. I sprayed mine with Krylon triple thick crystal clear. 

Now I added the chains to each of the bowls checking to make sure I was keeping the bowls straight.
If you have a small difference in length you can adjust by shorting one or more links. Just check before cutting.
This hanging garden project can be used to hold many things.
Vegetables, Fruits, Planted Flowers, Succulents or Dried Arrangements. I am sure you could come up with additional items.

Hope you have enjoyed this project and if it is a bit much you could do a single one to start.
Until Next Month don't forget to have fun and visit Proxxon and look around you may see something you really would like to have.


Sunday, August 20, 2017

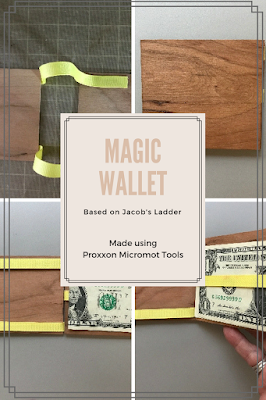
How to Make a Magic Wallet

This magic wallet puzzle toy uses the same concept as a Jacob's ladder toy. But, I think it's a lot more fun!!
Magic Wallet

Supplies and Equipment to Make a Magic Wallet

  • Four 3" x 3¼" x 1/16" wood blanks (These measurements are for U. S. currency, so adjust them for other currencies.)
  • 21" length of 3/8" to 1/2" wide ribbon, cut in three 7" lengths
  • Proxxon Table Saw FET
  • Proxxon Delta Sander
  • Liquid wood adhesive
  • Clamps

Instructions to Make a Magic Wallet

  1. Use the table saw to cut four blanks a bit larger than a folded bill.
     
  2. For U.S. currency I cut the blanks 3"W x 3¼"L. Adjust these measurements based on your currency.
  3. Sand the blanks with the Delta sander.
  4. The finished wallet has two blanks on each side. Decide which sides of your blanks will be the wrong (inside), and mark them.
  5. Glue the first set of ribbon straps on the wrong (inside) side of blank 1.
  6. Fold the straps to the right (outside) side of blank 1.
  7. Place blank 2 on top of blank 1, wrong (inside) side up. Glue the straps to blank 2.
  8. This is what your magic wallet should look like at this point.
  9. Thread the center strap in place.
  10. Glue both ends in place as shown.
  11. Spread wood glue over the surface of both blanks.
  12. Glue blanks 3 and 4 in place. Clamp until the glue is dry.

How the Magic Wallet Works

  1. Lay a folded bill on one half of the wallet.
  2. Fold the other half of the wallet over to close the wallet.
  3. Open the wallet, and the bill will be captured under a strap/s.
  4. Close the wallet again.
  5. Open from the opposite side, and the bill will now be under the opposite strap/s. 
After a bit of practice opening and closing the wallet, challenge a friend. If you can get their folded bill under the straps without touching it, you get to keep it. Have them place the folded bill in the wallet, then amaze them when you close, then open the wallet!!

Carole

Friday, August 18, 2017

How to create a festive pumpkin

Hi everyone Steph Ackerman here today and I've got Halloween on my mind. 

I picked up a pumpkin sign last year knowing that I would find a way to alter it in some fashion.  When I received my newest tool - the Bench Drill Press - I knew exactly what I wanted to do.


I began by using the Delta Sander to remove the varnish like finish on the pumpkin. 


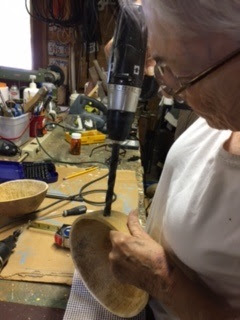
I was quite intimidated when I received the Bench Drill Press, but I couldn't believe how easy it was to use.  Just insert a drill bit, adjust the height of the drill based on the length of the drill bit, line up the item, turn on the drill press and go.


I quickly and easily drilled holes all around my pumpkin!  It was super easy and not at all intimidating.


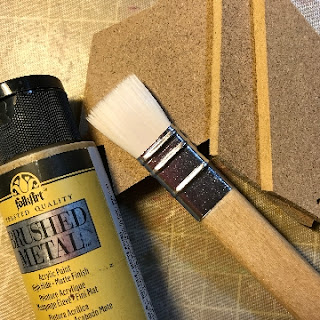
Once I had all the holes drilled, I painted it with Plaid Milk Paint in Tavern Ale and then dry brushed on FolkArt Brushed Metal acrylic paint in  Brushed Gold.  Finally I dry brushed on FolkArt acrylic paint in Classic Green in a streaky manner.  I was not looking for perfection; in fact, I was looking for imperfection as no pumpkin is perfect!


While waiting fo the pumpkin to dry, I created leaves from Makin'sⓇ clay.  I added texture to the leaves using Makin'sⓇ Clay Texture Sheets, then painted on assorted colors of FolkArt acrylic paints, blending the colors with a baby wipe. 


I adhered the leaves to the pumpkin top along with raffia.


I adhered mesh along the bottom edge of the pumpkin and mixed in some raffia.  Then I inserted the lights in the holes I made.


What do you think?

I am definitely using the Drill Press again and have lots of projects in mind.


Friday, August 11, 2017

How to make a simple lightbox

Hi everybody, I'm Carol.  I'm going to show you how to make a simple light box today using Proxxon tools.    These are just the best little tools!

This was an easy project to make.  It is a simple light box.  So, what is a lightbox?  Well let me tell you.   Have you ever needed to copy a pattern, maybe from a photo of some previous work you've done and want to do again but really don't want to take the time and effort to redraw it?  Have you ever tried to hold the picture to the window and try to trace it from that awkward position or worse yet have to use carbon paper?  This lightbox is truly a crafter's friend.  You can literally place any picture or pattern, no matter how dark or light onto the Plexiglas top, slap you paper on top and see it as clearly as if you were looking at the picture.  Trace away.   I have placed 140 Lb watercolor paper over my pattern and was able to see it clear enough to draw all the details. 

The light source I bought from a hardware store.  It was intended to be mounted on a bathroom or kitchen ceiling.  It has extremely bright LED lights, but the cover is flimsy and fragile, hence the need for a box. 

Supplies needed:

Light source. 
Electric wire with plug for outlet   (a switch in line is nice but not necessary)

1 x 4 x 64" pine board  (actual measurement 3/4 x 4 x 64)
cut (2) 16 " lengths and (2) 15" pieces for the sides.

1/4" plywood sheet cut to 16 x 16"

1/4"  plexiglass sheet cut to 15 1/2 x 15 1/2"


Electric drill with 3/8' drill bit

Wood glue

Wood screws

Here is a picture of the light source I chose to use


The first thing I did was cut all the pieces to size as indicated above.   The Proxxon table saw did a really fine job of cutting that heavy Plexiglas


Be sure to put a hole in one of the sides that you will need to run your wire through.  Slide the wire through the hole and connect it to the wires of the light.  Note, I put a knot in the wire on the inside of the box so that if it gets pulled on it won't disconnect where the wires are joined.  Be sure to wrap the connections with electrical tape and or wire nuts to prevent short circuits.  I used both, just because.  Better safe than sorry. 

Now comes the nifty part.  I measured down from the tops of the board sides about 1/2" and made a reference line on all 4 sides.  I made another line 1/4 down from that.   I used the cutting blade on my Proxxon delta sander to cut on the lines about 1/4" deep.  I popped the wood out with a screwdriver leaving a 1/4 wide   and 1/4" deep groove on all four sides.  This is where the Plexiglas will sit.  It takes a little patience but works well. 


Next I inserted the Plexiglas into the slots on all 4 sides then glued the edges of the 15" boards to the face of the 16 " boards and clamped them square.   After this dried I predrilled some screw holes with my rotary tool and secured the sides with wood screws for added strength. 


I put on the bottom with glue and screws.   Everything gets sanded using my proxxon delta sander.   This tool is so versatile!  Getting into the cracks and corners is a breeze.  No more splinters for me, ever!


I painted it all white then added some green and yellow around the edges just for fun.  I like those colors.  Check out the video to see this light box in action. 


Sunday, August 6, 2017

How to Make Five Pointed Patchwork Star

This five pointed patchwork star is such a versatile pattern. It can be used as a decorative piece, a coaster, or a trivet depending on the size you make it. There are also many decorating options depending on how you paint it. How about red, white and blue for a patriotic theme? Or, each point a different color to resemble a quilted star? Silver and white tones would be perfect for wedding decorations. Of course, gold metallics are ideal for Christmas ornaments and display pieces.
Finished Five Pointed Patchwork Star

Supplies and Equipment for Making the Five Pointed Patchwork Star

Instructions for Making the Five Pointed Patchwork Star

  1. Cut out star point pattern. You can vary the size of the star by reducing or increasing the size. I recommend cutting the template out of substantial cardstock or acetate so it maintains its shape through multiple tracings.
  2. Trace the template onto your wood. I traced a column of star points the entire length of my piece of MDF.
    Template and Pattern on MDF
  3. I used the table saw to cut the column of star point patterns. Here you can see that I'm adjusting the blade height to be just above the thickness of the MDF.
    Setting Saw Blade Height
  4. I moved to the band saw to cut out the star points. Note: This could also be done on the scroll saw.
    Cutting Shapes on Band Saw
  5. Drill the holes for attaching the star points to one another using the Professional Rotary Tool and Drill Stand. I used a 1/8" HSS twist drill bit with brad point.
    Drilling Holes
  6. Paint each star point. I used FolkArt Brushed Gold Brushed Metal Acrylic Paint.
    Painting Star Points with FolkArt Brushed Metal Acrylic Paint
  7. When the paint is dry, glue the star points together with wood glue. This step is not absolutely necessary, but it does give the finished patchwork star extra strength.
    Gluing Star Points Together
  8. With wire cutters, cut the brass wire into 1½" lengths. Note: If you increase or decrease the size of the star point template or the thickness of the wood, you will need to adjust the length of the brass wires. Bend the brass wires to form a U-shaped staple.
    U-shaped staple formed from brass wire
  9. When the glue is dry, working from the front of the star insert a staple into holes on adjacent star points. 
    Inserting staple in adjacent star points
  10. Holding the staple in place, turn the star over and flatten the ends.
    Flatten staple on reverse side of star
Your five pointed patchwork star is complete—ready to be a used as a decoration, an ornament, or a trivet.
Five Pointed Patchwork Star Trivet