Showing posts with label FolkArt. Show all posts

Thursday, August 13, 2020

How to make a Halloween Pumpkin


 Oh it is hot!   Dog days of summer are upon us.  You know what that means...fall is coming and so is Halloween!!!     I know it's a bit early but with crafting we have to start early.  Today we are going to make a pumpkin.   I was going to say "little pumpkin", but you can make it as big or as little as you want.


Supplies and Equipment/

Wood of your choosing (enough to cut out 8-12  pumpkin ribs) plus 2 circles.   (I used 1/4" birch plywood because mine was going to be a small centerpiece)

Yard scrap (for pumpkin stem)

Wood glue

wood clamps or clothespins if small.

Proxxon mini bandsaw with scroll saw blade or Proxxon mini scroll saw.

Proxxon OZI/E delta sander

Plaid paints and or other embellishments

pencil and tracing paper.


Here is the pattern I started with.  I fit 2 ribs in a small square.   I will need to repeat this pattern 4 or more times to make 8 - 12 ribs.   cut 2 circles in proportion to your rib pieces.


I traced my pattern onto my wood piece then proceeded to cut them out.   I am using the Proxxon mini band saw in the picture below.   It cuts the tightest curves.  I am impressed.  This is the first time I have used this saw blade.   WOW!


I got all my pieces cut, and then I sand them using the Proxxon OZIE delta sander.  I love how it gets into all the curves.  It has adjustable speeds too.   If your cutting is not perfect don't worry.  Pumpkins are very forgiving.


Next comes the part that is a little bit tricky.  If I can do it, you can, it takes just a little bit of patience.   We are going to glue it all together.   Use enough glue.   Let it get just a little bit sticky before you position your piece so it will stick some.    I used clothes pins to hold mine.  

Glue the bottom of the "ribs" to underneath the circle piece  as in the picture below.   Let this dry.   (Note- the tops of the "ribs" are lining up)    I did this 2 at a time and let dry in between.  (takes some finger dexterity)


I glued the second circle to the underside of  the top of the pumpkin.
Then I painted the pumpkin using Plaid paints.  I got my stem ready to go when the paint dries.


All done.   I painted a little egg to sit on the circle.   If I had made my pumpkin a little bigger I would place a candle on the stand.   I plan to make one about 12"-14" tall to sit on the porch this year.

Thanks for visiting.   Thank you Proxxon tools and Plaid paints.   I work with the best!

Catch ya next time.   Take care, and please be safe!!!   Carol


Wednesday, November 7, 2018

Christmas Ornaments by Steph

Hi everyone, Steph Ackerman here today with a set of Christmas ornaments.


Supplies:
Proxxon Scroll Saw
Proxxon Delta Sander
Rinea Foiled Paper
Spellbinders Dies

Who doesn't love decorating for Christmas?  Using assorted tools, you can create an amazing assortment of ornaments.


Draw the pattern on the wood, then cut the ornaments using the Scroll Saw.


Punch holes in the tops using the Drill Press so you can hang the ornaments once decorated.


Sand each ornament with the Delta Sander.


Wanting different colored ornaments, I painted each with Folk Art Color Shift paints. Remember to paint both sides of the ornaments.


Once they dried, I cut Rinea Silver Starstruck Foil to fit the top of each.


Next, I decorated each ornament by die cutting several different colors of Rinea Foils.  Ribbon was tied to each ornament so they can hang wherever you want them.

Thanks for stopping by.


Sunday, April 15, 2018

How to Make a Flock of Shelf Birds

Brighten your corner of the world with this flock of adorable shelf birds. I love the contrast between the painted bird bodies and the waxed beaks. This is a great project for learning more about your Proxxon Micromot tools.

Supplies and Equipment for Making the Shelf Birds

  1. Set the height of the table saw blade to accommodate the ¾" wood.
  2. Use the table saw to cut five 1" wide pieces of your ¾" wood. These will be the bodies of the birds.
  3. Cut out each of the birds and beaks from the pattern.
  4. Trace the shapes of the heads onto the ¾" lengths.
  5. Cut the head shapes using the scroll saw.
  6. Measure and mark the height of each bird, and cut to length using the band saw.
  7. Trace the shapes of the bird beaks onto a piece of the ¾" wood, and cut these using the scroll saw or band saw. The straight edges can be cut on the band saw; curves on the scroll saw.
  8. Sand each bird body and beak on the disc sander or the Delta sander.
  9. Measure and mark holes on the edges of the body and beak pieces for the dowel rods that will attach the beak to the body.
  10. Mount the rotary tool in the drill stand. Use the precision depth gauge on the drill stand to drill holes with the rotary tool that are no deeper than 5cm deep. Use a 1/8" brad point drill bit.
  11. Cut five 5/8" lengths of dowel rod. This length allows for a small gap between the beak and body when assembled.
  12. Paint the bird bodies with FolkArt Home Decor Chalk Paints.
  13. Coat the bird beaks with FolkArt Home Decor Wax. Let dry overnight and buff with a soft cloth.
  14. Paint the birds' eye using FolkArt Color Shift Black Flash paint. Use a stylus of end of a paint brush to dot the eyes in place.
  15. Apply a small amount of liquid glue to the end of a dowel rod piece, and insert in bird body. Apply glue to the opposite end, and insert in the beak.
  16. Enjoy your flock of shelf birds.
Carole

Sunday, April 1, 2018

How to Make a Key Holder to Organize Your Keys

Get organized and put an end to key clutter with this handy key holder.

Supplies to Make the Key Holder

  • Piece of wood or MDF 4" x 4" x ¾" (your size can vary depending on how may keys you want to accommodate)
  • Acrylic blank for engraving
  • Two small brass screws
  • FolkArt Home Decor Clear Wax

Equipment to Make the Key Holder

Engraving the Blank

  1. Select the letter plates for engraving, and place them in the guide strip of the engraving device.
  2. Position the engraving blank, and securely clamp in place.
  3. Position the guide marker into the first letter blank, and begin engraving.
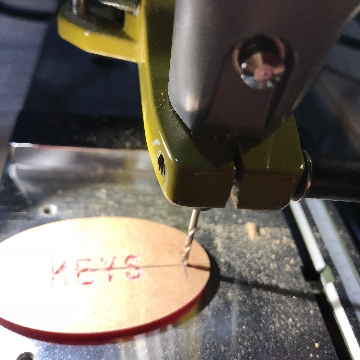
  4. Mark the position of the holes for attaching the engraved blank to the key holder. Drill the mounting holes using the professional rotary tool and drill stand.
Note: Many acrylic blanks come with a protective layer. This should be left in place during the engraving process, and removed when the engraving in complete. 

Making the Key Holder

  1. Select your piece of wood. Your dimensions can be different than mine. Add width to accommodate more keys. Add height depending upon the number of slots that you desire. However, the wood needs to be at least ¾" thick to accommodate the slots.
  2. Adjust the angle of the table saw blade to 20°.
  3. Cut as many slots as necessary to accommodate your keys. The slots on this project are 1¼" apart.
  4. Use the Kapro Measure Mate to measure and mark the height of your key holder. Mine is 4" high.
  5. Use the band saw to cut the wood to length.
  6. Measure, mark, and drill holes for mounting the engraved blank.
  7. Sand any rough edges on the disc sander.
  8. Apply a coat of FolkArt Home Decor Wax to the key holder. Dry overnight, then buff with a soft cloth.
  9. Add your choice of hanging hardware on the back side of the key holder.
  10. Remove any protective film from the engraved blank and mount the blank onto the key holder.
  11. Eliminate your key clutter with your new key holder.
Carole

Sunday, December 3, 2017

How to Make a Windowsill Village Using Scrap Wood

I love involving my grand daughters in my projects, and this windowsill village was a great hit with them. Not only did they get to paint the buildings, but they had a toy village when the project is complete. Added bonus for me: it was made from scraps of wood left over from previous projects.
Windowsill Village

Supplies and Equipment:

  1. Gather your wood scraps and leftovers. 
  2. Decide on the size of your village buildings. There is no exact size for the village buildings. Here are the measurement for mine:
      • Pink: 4¼" x ¾" x ½"
      • Melon: 2" x ¾" x ¾"
      • Lavender: 4¾" x 5/8" x ¾"
      • Chartreuse: 3¼" x 1" x ¾"
      • Purple: 1½" x ¾" x ¾"
      • Blue: 3¾" x ¾" x 5/8" 
  3. Use the bandsaw to cut the building shapes.
  4. Sand each of the shapes on the disc sander. Use the angle gauge to accurately sand roof lines.
  5. Use FolkArt ColorShift acrylic paints to paint each building.


  6. Add windows and doors. I cut vinyl on my Zing electronic cutter, but you could add windows and doors with acrylic paints or permanent markers. You could also omit the windows and doors, and sand edges for a rustic look.
  7. Seal everything with a coat of Mod Podge.
  8. Enjoy your windowsill village.