Showing posts with label Proxxon Micro Band Saw. Show all posts

Saturday, January 6, 2024

How to make a dollhouse chair.

Hi everybody!   Guess you survived the holidays!    Time to get going onto something new in this brand-new year!   I'm in the process of helping a friend. refurbish an old doll house.  We have been working mostly on the structure and exterior, but now we are giving that a little rest and thinking about the interior. So, my project today is to make a little chair for this little house. It's very first piece of furniture.\


Ok, Let's get started, I saw a design for a chair and have redone it to fit my needs.   See below for my plan.
I see that it could have been darker,  sorry!
So the first step was to draw the pattern, as above.  This little chair is going to be about 4" tall.
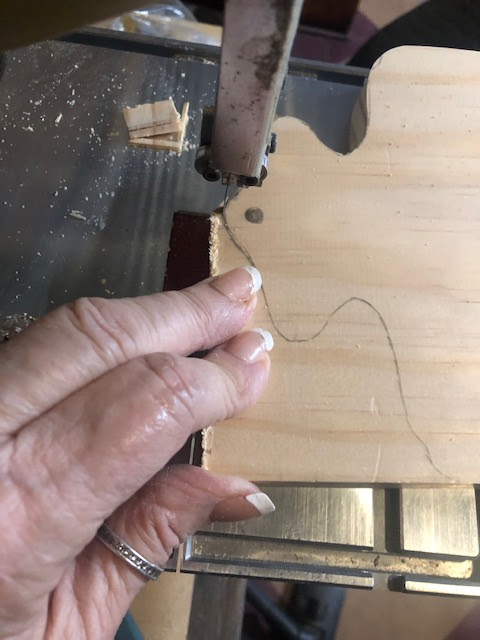
Next it gets transferred to the 1/4" poplar plywood I am using and I begin to cut it out using the Proxxon mini band saw.   A scroll saw would work just as well, (maybe better), but I just love the little Proxxon band saw.   Anyway, there are parts of this I do take to the Proxxon mini scroll saw as it works better on the tight curves.
]


I need to tell you on the patterns there are small tabs and slots where things will fit together.  This makes gluing so much easier.  After all is done there might be a bit of tab showing but that can easily be sanded off.  I like to use the Proxxon delta sander for this and pretty much all my sanding needs.


For the inside cuts on the chair back, I drilled some holes ahead of taking it to the scroll saw as a shortcut.  You do have to drill a hole in it someplace anyway, so it might as well make it do something.  Then I released the sawblade on the Proxxon scroll saw and threaded it through the hole to cut the sides.  The Proxxon scroll saw can use blades with pins.  This makes changing blades or releasing and replacing blade for inside cuts very easy!
]````````````````````````````````


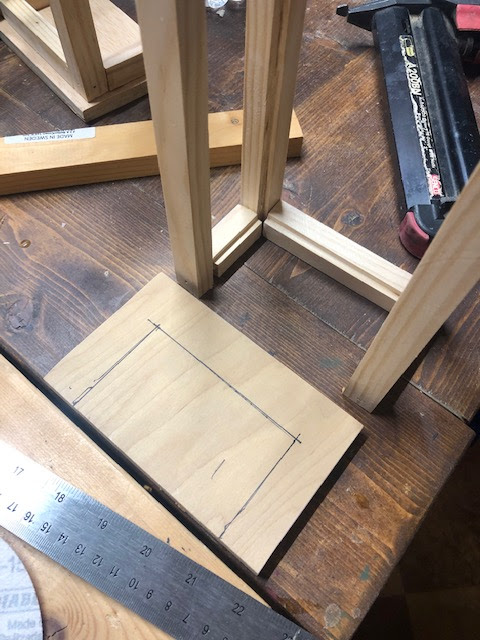
Once we get all our pieces cut and sanded it's time for gluing.  This can be little tricky but small clamps really help. 


And now we got a chair.  It's pretty sturdy and will look nice when I finish sanding and painting it.
]


There, Now, there is a place to sit on the porch.😁

I really enjoyed making the little chair and look forward to constructing some more furniture for this many-roomed dollhouse.

Thanks for visiting.  Hope to see you back next time.  Carol.
Play safe everybody.!

Thanks Proxxon, I'm still loving your tools.

Saturday, June 10, 2023

Building An Arbor


Hi everyone!  We've had a lot going on here at the Colaizzi homestead.  We had a new deck put on our new pool.  There was a lot of scraps leftover of the treated lumber and I asked the builder to leave everything in hopes I could make something from them.  I thought I'd try building an arbor that will eventually be put in front of the gate to my garden.  Follow along with me and see how I built it with the help of my Proxxon tools.

Supplies:
 Treated lumber... 2x4s, 2x6s, 1x2s
 Lag Bolts  8 (3.5" long)
 Screws...1.25",  3"
 Brad Nailer and Brads

I had treated 2x4s that I cut with my miter saw but these could easily have been cut to size at the store you purchase the wood at.  I started with 2 pieces 7' long and 2 pieces 24" long.  I measured down 4" from the top and 8" from the bottom on the 2x4s.  These marks are where I put the 24" pieces and screwed them together. Using the Proxxon Table Saw, I then cut a piece of 1x2 lumber 63" long. I inserted it inside and nailed it in with the brad nailer.  This piece formed a ledge for all the lattice to lay on and get nailed in with the brad nailer.


I used the brad nailer for all the vertical and horizontal pieces but later I used small wood screws at the intersections.  Repeat this and make two sides.

Using the scroll saw I cut two 2x6s  60'long.  These will be the headers that will connect the two side panels. I drew a design on each end of the headers and cut out with the Proxxon Micro Band Saw.


I laid the two sides on end on the ground and laid the headers across measuring in 9" on each end.  These got attached with lag bolts.  Once one side was complete, I flipped it over and attached the back side.  Now the arbor was able to be stood up.


Next the corner brackets were cut out of 2x6s using the Proxxon Band Saw and attached with 3" screws to the upper corners.


At this point I ran out of 2x6 wood so I do have to add the back braces when I get more wood...I did attach the front corner braces with 3 1/2" screws.


Lastly I cut 8 pies of the 1x2" slats for the top using the Proxxon Table Saw.  These were spaced out across the top and attached with small screws.


For now It's finished until I can find the wood for the back corner braces. I am eventually going to stain or paint it, but treated lumber needs to dry before putting any finish on.  Thanks for following along with me as I made this fun project :-) 
Colleen


Sunday, April 9, 2023

Making A Colonial Candle Sconce Using Proxxon Tools


Hi friends!  As always, I like to build things for my old colonial farmhouse. I had seen a pair of these candle sconces in a home of a Facebook friend.  Although hers were to large for where I wanted them.  I decided to try and make a similar but smaller version.  Follow along with me and I'll show you how I made them.


Supplies:

   3/4" pine boards  8" wide
   1/2" birch plywood
   Proxxon Micro Bandsaw MBS 115/E
   Proxxon Table Saw FET
   Proxxon Disc Sander TSG 250/E
   Proxxon Cordless Belt Sander BS/A
   Brad nailer and brads
   Wood glue
   Paint
   Glass and mirror
   Drill and drill bit


To begin with I drew my pattern then transferred it to my 8" board. I started cutting it out with the belt sander and finished cutting it with the scroll saw due to some of the tighter cuts that were needed.


When the backboard was cut, I used the belt sander to smooth some of the curved edges and the disc sander to smooth the long sides.


Now to figure how to build the box that the candle will sit in. Using the table saw I set the guard so I could cut perfectly square pieces.  3/4' x 3/4"pine.  I ran long strips of this, as I know I'm going to need a lot.  Then I lowered the blade on the table saw to 1/8".  I ran each strip through cutting a notch. Turned that same strip opposite and ran through again to cut out the notch completely.  This notch will enable the glass to fit in.


Next, I cut my pieces to length according to my pattern using the table saw. I started laying out the pieces of my box. After I was satisfied with my layout I glued and nailed the pieces together.


The next step was making a top and bottom for the box.  Using the table saw I cut out two pieces of the 1/2" birch plywood.  The piece for the top also had to be cut out so when everything is assembled, I could reach my hand in to insert the candle.  I used the band saw to make those cuts and smoothed the edges off with the belt sander. I nailed and glued the top and bottom on the box. I then checked it against the back board but can't attach it yet till the glass gets inserted.


Before I could put everything together, I cut my glass to fit. 


I painted the box and backboard black then put the glass in using a small bead of silicone.  I decided to screw the box to the backboard incase the glass ever got broken it would be easy to open and repair. 


I did end up cutting a piece of mirror for the back.  I just attached it with silicone.  I hope you like watching me build my sconce.  I'm in the process of making a second one now so I have a pair for on my wall.  As always, thanks for following along with me.

Colleen :-)