Friday, December 20, 2019

Homemade Christmas tree

🎄🎅Ho Ho Ho🤶🎄

Once again it is the season for all things jolly!!   Merry Christmas to all of you!!!  
Today I want to show you how to make a cute little Christmas tree.    And the good news is...it isn't going to hardly cost a thing.   We are going to use some scraps and yard waste.  

               From this↓                                                                                                                     to this ↓


Equipment and supplies

cut offs from pruning trees  Pieces approx 12" long and 1/2" in diameter
Sturdy wire 12 -  14 gauge   approx 18 "
scrap wood 1/4" thick (for star)
2 square pieces approx. 4" x 4" for stand
decor of your choice  (think dollar tree for small ornaments)

First thing I did was to collect quite a few straight pieces of limbs that I had pruned off a hydrangea bush.

Using a measuring tool I measured 4 each of 14" 12" 10" 8" 6" 4" and 2" and cut them to size using my Proxxon mini scroll saw.

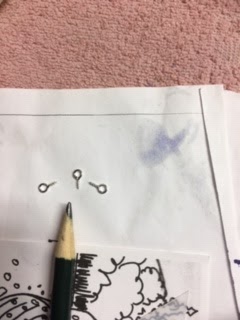
I laid them out in the shape of a Christmas tree then used a straight edge to draw a line down the middle of them all   (see picture below)   Using white paint (my pencil line did not show) I made a dot at the center of each little limb.


Now using the Proxxon mini drill press I drilled a hole (the same size as my wire) into the center of each limb piece.
1

3


Note the brad point bit in picture 1 above.   This keeps the drill bit from skipping off the rounded surface of the twig.   Proxxon makes a nice set of these (HSS twist drill set with brad point  No 20 876) to go with this mini drill press
In the middle picture I was holding the twig but I found it much easier to let the Proxxon machine vise MS 4 do the holding for me.  This keeps it absolutely steady during the drilling process.


Next I took a slightly larger limb and cut it to about 2 " as this will be the trunk of my Christmas tree.  I used the Proxxon mini drill press to drill a hole down the middle of it as well.

I cut out my star and my 2 pieces of 4" x 4" pieces for the stand using Proxxon's mini scroll saw.    The star gets a hole drilled half way though it and one piece of the stand gets a hole in the center.  I do all this on the Proxxon mini drill press.  The piece of the stand with the hole gets a slot where the wire will fit.

Thread the wire up through the first stand piece then the "trunk" piece and up through the branches starting with the largest to the smallest.  End with putting the wire into the star and gluing it there.  Push all the branches up tight to the star then bend the remaining wire at the bottom.  Cut it off and let it slip into the slit you cut in the base piece.

glue the second 4 x 4 base piece over the first one.  This will cover the wire and keep it secure and it is a nice flat surface for the tree to sit on.

Spread out the branches so it looks nice.
Now paint and decorate your tree.   I used Plaid Paints for the bright colors.  Green for the tree then I added some white to the ends as snow.     I added small Christmas ornaments I got at the dollar tree store.

How's that for a homemade Christmas tree?   It looks cute on a table.   Could be used as a center piece.   It can be made whatever size you like.

Ok, now I am ready for Christmas.   It is always fun to make something.  It helps me get in the mood.  You all have a great Christmas now.  Ya hear...…   Thanks for visiting.  Thanks Proxxon and Plaid!
          See you next year...Carol

Wednesday, December 18, 2019

Believe Christmas Sled

Hi everyone, Steph Ackerman here today using Proxxon tools to alter a Christmas sled.


I found this sled at a garage sale and knew it needed some love!    I started by sanding it with the Delta Sander before painting it with Plaid Paint


Once dry, I decided to use the Power Carver to add details along the sides of the sled.


Placing a stencil on the base, I added a brick pattern with modeling paste.


Once dry, I spritzed the sled with Fireworks! Lady Bug Shimmery Craft Spray.  Some detailing was added with white paint.


I had a metal word which I sanded with the Pensander so paint would adhere.


Believe was painted with gold paint.  While waiting for it to dry, I added assorted papers from my stash to create my design.  Pointsettias and leaves were adhered, then Believe was added across the sled.


What do you think?  Are you ready for Christmas yet?

Thanks for stopping by.


Sunday, December 15, 2019

How to Make a Wooden Cheese Knife

This wooden cheese knife is a great way to combine two things that I love—beautiful woods and delicious cheese. And, it is a project that can be completed in a short period of time.

Supplies and Equipment for Making a Wooden Cheese Knife

Instructions for Making a Wooden Cheese Knife

  1. Trace the outline of a knife onto the hardwood blank.
  2. Use the band saw to cut out the knife blank. This can also be done using the Proxxon Scroll Saw DS 460.
  3. Shape the rounded end of the handle on the disc sander.
  4. Use the Delta sander to shape and bevel the blade. Use progressively finer grits of sandpaper, starting with 80 grit, then 150 grit, and 240 grit.
  5. For a super smooth finish, hand sand using 320 and 440 grit sandpapers.
  6. Polish with a food safe oil.
  7. Enjoy!!

Carole

Saturday, December 7, 2019

Let It Snow Banner

Hi everyone, Steph Ackerman here today using Proxxon tools to create a snow panel.


There are so many options with scraps of wood so I decided to create a winter themed banner.
Using the Micro Bandsaw, I cut up strips of left over plywood into irregular squares.


I quickly sanded each piece with the Disk Sander.


Using Plaid Paints, I painted each piece and adhered each square to a strip of plywood.


I created a snowy effect using a stencil with modeling past, then added the letters on top.  To complete my snow theme, I added clay elements.

Using the Bench Drill Press, I drilled a hole in the top and added ribbon to hang the panel.

Happy Holidays.

Thanks for stopping by.


Friday, December 6, 2019

Ho Ho Ho Christmas decor

Christmas is coming!!!
And we still have time to make some décor!
Today I have a simple but cute project that you can make in no time at all, and you probably have all you need to decorate it in your Christmas box.   I realize we all have a lot of decorations we use every year, but isn't it fun to have something new to set out?, and the fact that you made it makes it even more special.  Let the kids do the painting and you have a family treasure to pass down through the ages.

Supplies and Equipment:
1/4" - 1/2" scrap wood, large enough for your pattern
Small awl.
3 jingle bells
3 short pieces of thin wire
3 small eye screws
glitter and adornments  (optional)
hanger of your choice.

To get started I simply drew out a pattern I thought would be cute.  
I used graph paper to help me keep the HO HOs all the same size.  👷

I traced the pattern onto my piece of wood then cut it out first using the Proxxon mini bandsaw, (which cuts like butter) to do the long straight pieces.   I then turned to the Proxxon mini scroll saw to do the sharper inside cuts.   I could have used Proxxon's extra thin bandsaw blade to do the whole thing as it makes really sharp turns like a scroll saw, but I did it this way.


Next I sanded it all using Proxxon's OZI/E delta sander to get into all the nooks and crannys.  It's triangle shaped head really helps get the job done.


Using an awl I poked starter holes in the tip of the candy canes and inserted small eye hooks.   These are really small eyehooks as you can see.  


PAINTING

I first painted it all, front, back and sides, using Plaid icy white paint.  Next I painted the top and bottom HO's red and the middle HO green.  I used white to embellish them and paint the stripes on the candy canes.                Plaid makes beautiful paints!


Using my 3 pieces of thin wire I attached my Jingle bells to the eye hooks.  Oh and I added a little glitter for  some bling.   Sorry it doesn't show up well in this picture.  

Lastly, I attached a saw tooth picture hanger on the back.   You could alternately hang it with some wire.   It looks really nice on the door and the jingle lets you know you have somebody coming in.       Is it Santa?...?      no, he comes down the chimney silly.  


I told you it was easy.  Hope you choose to make one for yourself.
Thank you Proxxon and Plaid, our sponsors.  

Enjoy the Holiday season.     Carol


I

3

Sunday, December 1, 2019

How to Carve Salt Scoops

Carving is easier with the Proxxon Carver MSG. Use this pattern to carve your own salt scoops.

Supplies and Equipment for Carving Salt Scoops

Instructions for Carving Salt Scoops

  1. Print the scoop pattern.
    Scoop Pattern
  2. Prepare the blank by covering with painter's tape.
  3. Spray adhesive on the back of the pattern and mount to the prepared blank. The painter's tape makes it easy to mount the pattern and to remove it without leaving any sticky residue on the wood.
  4. Cut the basic shape of the scoop on the scroll saw.
  5. Carve out the bowl and handle of the scoop with the Proxxon Carver. Work slowly, removing small amounts of wood at a time. Let the carver do the work.
  6. Mount the rotary tool in the drill stand and rotate 90°. Insert a sanding drum in the rotary tool. Sand the surfaces of the carved scoop.
  7. Treat the finished scoop with food-safe oil. Oils for butcher blocks is perfect.
  8. Enjoy!!

Carole