Friday, October 27, 2017

A little flamingo to remember Florida by

I just got back, along with my husband and sister from a week long stay in Fort Walton Beach, FL and I have to say that it was fantastic. We stopped going and coming at my brother's house in Huntsville, AL. What a wonderful trip and wonderful time with my sister. I couldn't tell you just how much I appreciate this sister's friendship, but I digress. She does collect Flamingos though and when I was thinking of this project I thought of that and thought I would make a Flamingo to give her to remember the trip by.

Supplies needed for this project:

Proxxon Scroll Saw
Proxxon Belt Sander
Proxxon Drill & Drill Bit
Dowel Rod
Wooden Base
Left over pieces of wood
Acrylic Paints
Sea Shells
Glue
Paint Brushes
Pattern

I started out on this project by drawing a flamingo body and wing.

I then cut the pattern out of cardstock and used that as my template and traced the pattern out onto my wood pieces.
I cut out two wings.
And one body.
Once the pieces were cut out, I sanded all the edges and rounded them a bit to make them look almost hand carved. I also sanded the base because even though it was purchased it still had some rough edges. I love to use the belt sander because it's just much easier to me than using a large belt sander.
I then drilled two holes in the base of the project.
I also drilled two holes in the bottom of my flamingo to line up with the ones in the base. I also clipped off the dowel rods to be the right height.
Once that was complete I assembled the pieces of wood with glue and this is what the bare wood assembled looked like.
I then painted my flamingo, legs and base and glued sea shells around the bottom.
Both sides were painted and shells glued all round. I'm really hoping that my sister will like it and that every time she looks at it she remembers our trip.

Barbara


Thursday, October 26, 2017

How to make an autumn Holiday Barrel

How to make an Autumn Holiday Barrel

Today I'm going to show you how you can make a holiday barrel using proxxon tools.   As the weather cools I start thinking about the holidays, how bout you?   Christmas is coming quick, but first let's enjoy our fall holidays.   I'm thinking, Halloween and Thanksgiving... 
In my workshop, there is a old, small barrel that I have been tripping over for years.  Finally it's time to turn that into something festive.

Supplies and Equipment needed:

1 barrel, size optional
thin piece of wood to make top.  (my barrel was topless)
Proxxon rotary tool with cutting and grinding tips
Basic light fixture and lightbulb
electrical tape
Drill and drill bits

I started this by drawing some designs on my barrel.   I figured some pumpkins and give thanks would be good for Thanksgiving and a haunted house and bats for Halloween. 


 Ok, time to get out the paints and do a little painting.  I used plaid paints because they have such vivid colors.  For this project I watered them down a bit as I wanted them more like a wash.


Oak is a really tough wood and gets tougher with age.   I used multiple tools to cut and drill my holes.
A cool tool is the cutting head on the proxxon delta sander.

Cutting windows with the proxxon delta sander with cutting head attachment

I used that and  the proxxon rotary tool with various bits to cut and grind out some of the window holes.  I used a regular drill bit to outline the house and pumpkins with small holes.


  Now, lets cut out the top.  I traced around the perimeter of the barrel top then drew a circle 1/2" inside of that line. Using the proxxon scroll saw I easily cut the circle.  There is a groove in the barrel where the lid will sit.   I also drilled a 5/8" hole in the center where the light cord suspending the light  will go through.   (the size of this hole will be dependent on the light fixture being used.


proxxon scroll saw
the groove inside the barrel where the lid will sit.


I cut the light cord so that I can thread it through the top of the lid.  Then I spliced it back together  taking care to keep the polarization correct.


Pop the lid on with the light hanging inside, plug her in and light up the night!


This has been fun.   It really looks good on the porch on a dark night.
Happy holidays ya'all.


Friday, October 20, 2017

How  To make A Welcome To Our Home Plaque 

Finished Plaque.


How I start this plaque is to develop a design. Since it is fall I decided to go with that theme, besides, I love the colors.  Proxxon Scroll Saw is going to make this a snap.

I draw a shape I want for the plaque and leaves, then I play with it till I am happy with the layout. 


.  


Now I am ready to get the wood for the job.  I know we has a surplus of laminated flooring and decided to use some of that. This makes the project very inexpensive.


Plaque cut out. Lovely Color no paint needed. 

The Proxxon Scroll Saw makes short work of this with ease.

This Proxxon Delta mini sander is a favorite tool . While your sanding don't forget that you need to smooth the sides of the leaves. This tool makes getting into the curves and narrow areas no problem.

Now begins the painting. After the first two coats of white as a base I used Plaid Pickling paint # 5828 a soft yellow.  I picked the areas of the leaf that I wanted yellow leaving some areas white.


New Home Sign

Hi everyone, Steph Ackerman here today with a fun new sign I've created for my house.   It was easily created with the help of some amazing Proxxon Tools.


Using a bark edged panel, I sanded it with the Delta Sander.  Then I painted it with Folk Art Color Shift Acrylic Paint  - Yellow Flash.  Once dry, I added streaks of Folk Art Brushed Metal Paint - Silver.


I placed a Plaid Folk Art Stencil - Tropical Leaf Stencil - on the wood then painted leaves in assorted colors of  Folk Art Color Shift Acrylic Paint - Red Flash and Green Flash.


I moved the Leaf Stencil around the wood adding 3 leaves.


Once the sign dried, I used the Bench Drill Press to drill holes in the top edge. 


Using some left over numbers, I painted them with Folk Art Color Shift Paints in Green Flash and Red Flash and glued them to the sign.  Finally, I added some fuzzy trim and hung my sign.


Thanks for stopping by.


Sunday, October 15, 2017

How to Make a Rustic Lantern

This rustic lantern is a great project for a beginning work worker—and it uses those scraps that an experienced work worker accumulates. Just by changing the final finish on this rustic lantern, it fits with any home decor.

Supplies for Making the Rustic Lantern

  • Scrap lumber or MDF (I used ¾" MDF for my lantern.) to yield the following pieces:
    • Two 4" x 4" x ¾" squares
    • One 2¾" x 2¾" x ¾" square
    • One ¾" x ¾" x ¾"square
    • Four 8" x ¾" x ¾" columns
    • Eight 2" x ¾" x ¾" cross pieces
  • Clamps
  • Wood glue
  • Bronze spray paint
  • FolkArt Painted Finished Dark Rust Acrylic paint

Equipment for Making the Rustic Lantern

  1. Cut the two 4" squares and 2¾" square for the base and top of the lantern on the table saw. 
    The blade guard was removed for the photo. Always cut with the guard in place.
  2. Cut seven ¾" columns on the table saw with the longitudinal stop set for ¾" cuts. 
    The blade guard was removed for the photo. Always cut with the guard in place.
  3. Use the band saw to cut down three of the columns into 2" lengths for the cross pieces and the ¾" finial.
  4. These are the lantern pieces ready to assemble. Now would be the time to sand any rough areas using either the Delta sander or the disc sander. Since I used MDF, I didn't need to do any sanding.
  5. Begin assembling the lantern by gluing two columns and two cross pieces to form a frame. Make a second frame with the remaining columns and two more cross pieces. Clamp the frames until the glue dries.
  6. Glue and clamp the remaining four cross pieces in place to join the two frames.
  7. Assemble the top of the lantern:
    1. Measure and mark one of the 4" squares for the placement of the 2¾" square. You will need 5/8" allowance on each side of the 4" square.
    2. Measure and mark the center of the 2¾" square for the placement of the finial.
    3. Glue the 2¾" square to the 4" square, and glue the finial to the center of the 2¾" square. 
  8. Glue the lantern to the remaining 4" square base. Then, glue the top on the lantern.
  9. When the glue is dry, spray the lantern with bronze spray paint. allow the paint to dry thoroughly before adding the Painted Finishes coat.
  10. Use FolkArt Painted Finishes Dark Rust as the final coat. This adds the texture of rusted metal as well as adding color.
FolkArt Rust Painted Finishes acrylic paint
Texture of the Rust Painted Finishes
Be safe. Only use a real candle for display purposes. Enjoy your rustic lantern with a battery operated candle.

Friday, October 13, 2017

Another Reused, Repurposed, project to make a Chalkboard

Hi guys! Today I want to show you what I created by using a cabinet door, and my Proxxon Delta Sander and Proxxon Drill.

Items needed for this project: 

1 wooden cabinet door
Proxxon Delta Sander
Proxxon Drill
White Gesso
Chalkboard Paint
Indian Red Acrylic paint

Paint brushes
Plaid Mod Podge
Napkins with pattern of choice
2 heavy duty screw eyelets
hanger of choice (string, ribbon, rope etc)


I know, where did I come up with a new cabinet door? Well some years back, I purchased a box of cabinet door samples that I just hadn't used for anything until recently. This one was really great for this project. You can find all sorts of things in thrift shops, at yard sales, flea markets, you get the idea.
I used my Proxxon Delta Sander to smooth out any rough spots that might keep the chalkboard paint from being smooth to write on.
I then painted the inside of the door with the chalkboard paint. I painted on four coats to make sure that it wouldn't wear off very soon. I also painted the outside edge of the door with white gesso, two coats.
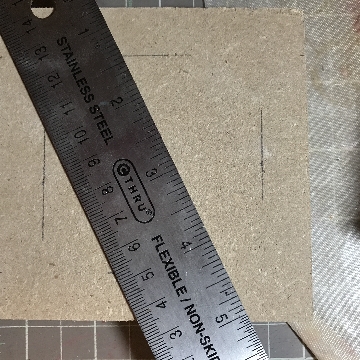
Once that was done I drilled two holes in the top of the cabinet door and screwed in the two eyelets. I also painted the outside edge of the door with Indian Red Acrylic paint.
After the gesso and chalkboard paint was completely dry, I used the Plaid Mod Podge to adhere the napkins to the outside of the chalkboard and I also put a coat of the Plaid Mod Podge over the top of the napkins to give it a sealed surface. I tied yellow ribbon through the eyelets and here's the finished product, a really awesome chalkboard.
Do you remember the towel holder that I made out of the rolling pin? Well lookie here they both match each other and can both be hung in the kitchen/dining area. I really like it that I made two pieces which go together, what do you think about it? Please leave me a comment below and please check out the tools that Proxxon has to offer at: www.proxxon.com.

Barbara