Showing posts with label Table Saw FET. Show all posts

Sunday, May 6, 2018

How to Make a Set of Nativity Silhouette Statues

It's never too early to plan for Christmas!! I try to make one Christmas decoration each month, and this month I'm making a set of nativity silhouette statues.

Supplies for the Nativity Silhouette Statues

Equipment for the Nativity Silhouette Statues

Instructions for the Nativity Silhouette Statues

  1. Using the band saw or table saw cut substrate to appropriate size. You can cut the pattern pieces apart to take advantage of better placement, or mount them on individual pieces of scrap lumber.
  2. Print the pattern. Cover the substrate with painter's tape; spray the reverse side of the pattern with spray adhesive; mount the pattern onto the covered substrate. The adhesive holds the pattern in place, and the painter's tape makes removal easy.

  3. Using the scroll saw, cut the silhouette shapes. When cutting the Christ child/manger piece, only cut a single line to separate the baby and the manger. A single cut ensures that the pieces will fit snugly after being cut.
  4. Sand any rough or uneven area on the disc sander. You may need to do some hand detail sanding on tight interior edges. 
  5. Paint the pieces and let dry. When painting the star piece, begin with a coat of the Brushed Gold Brushed Metal paint. When that is dry, add a coat of the Gold Glitterific paint to the star only.
  6. Now, you're ready for Christmas, even though it's not yet summer!!
Carole

Sunday, December 31, 2017

How to Make a Statement Piece of Jewelry

This piece of jewelry really does make a statement—as it should. Any statement piece is easy to identity because it is chunky, unique, and attention-grabbing. This statement necklace is meant to be the defining piece of your outfit. It will set you apart from the crowd.

Supplies for Making the Statement Necklace

  • 2" x 10" x ¼" piece of MDF
  • Four gold tone focal beads
  • Eight 6mm glass beads in a color to coordinate with you choice of napkin
  • Twelve 3mm to 4 mm glass beads in a color to coordinate with you choice of napkin
  • 12" to 15" 24 gauge brass jewelry wire
  • 14" to 20" gold tone jewelry chain (depending upon the length of your finished piece)
  • One jewelry clasp with jump rings
  • Gesso
  • Mod Podge
  • Napkin with design of your choice 
  • Classic Gold Liquid Leaf by Plaid Enterprises
  • Pattern for kite-shaped pieces

Equipment for Making the Statement Necklace

  1. Prepare and mount the pattern on the 2" x 10" piece of MDF. To apply the pattern to the MDF, cover the MDF with painter's tape, spray the reverse side of the pattern with adhesive spray, and adhere the pattern on top of the painter's tape. The painter's tape allows for easy removal of the pattern. 
  2. Cut the necklace pieces using either the band saw, table saw, or scroll saw.
  3. Sand the edges of the pieces on the disc sander.
  4. Measure and mark ¼" from the tip of the piece and half the width of the piece for drilling the hole to attach the piece to the necklace.
  5. Mount the marked piece in the machine vise and attach to the drill stand.
  6. Drill a hole for attaching the piece to the necklace.
  7. Repeat Steps 4 through 6 for each piece.
  8. Coat all pieces with gesso.
  9. Using Mod Podge and a napkin with a design of your choice, napkin collage the front of each piece.
  10. When the Mod Podge is dry, paint the edges and reverse side of each piece with Classic Gold Liquid Leaf.
  11. String MDF necklace pieces, focal beads, and glass beads on jewelry wire, and form a closed loop at each end of the wire.
  12. Attach 7" to 10" of jewelry chain to each end of the wire.
  13. Attach jewelry clasp to the ends of the chain.
  14. Wear your statement necklace, and enjoy all the compliments that you'll receive.

Sunday, December 17, 2017

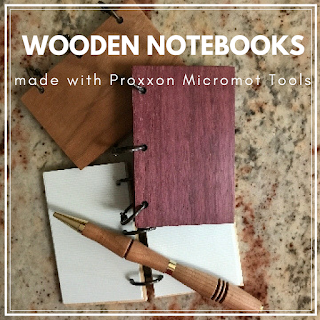
How to Make a Notebook with Exotic Wood Covers

I love the look and feel of exotic woods. The colors and the grain patterns are so interesting. This notebook uses exotic woods for the covers. This is an easy project for learning about your Proxxon Micromot tools.
Notebook with Exotic Wood Cover

Supplies and Equipment:

Instructions:

  1. Use the table saw to cut the blanks to size. These notebooks measure 3½" x 2¼", but you can adjust to fit your needs.
  2. Pair two blanks for the front and back covers of the notebook, and tape together with painter's tape. This helps to ensure exact sizing and measurements in the following steps. The tape stays in place until you are ready to assemble the notebook.
  3. Adjust the angle stop on the disc sander to 0°, and sand the edges of the blanks. (The top and bottom surfaces of my blanks were already beautifully finished, so I didn't need to sand them. If you need to sand these surfaces, do so before pairing the front and back covers.)
  4. Measure and mark the vertical line for the placement of the holes. On my 3½" x 2¼" notebooks this line is 3/8" from the edge.
  5. Along the vertical line you marked in Step 4, measure and mark the placement of the holes.
  6. Place a piece of waste wood under the paired blanks. This prevents tear-out on the bottom blank when drilling the holes.
  7. Drill the holes using the Professional Rotary Tool mounted in the Drill Stand and a brad point drill bit slightly larger than your binder rings. A brad point drill bit allows for very accurate placement of the bit.
  8. Cut paper slightly smaller than the wooden covers. I used a stock of paper about ¼" thick. Assemble the pages and covers. For my book I used ½" binder rings. If you are making a larger book or a thicker book, you will need to adjust the size of the binder rings to accommodate the thickness of the pages.

Sunday, November 5, 2017

How to Make a Gift Card Holder Using Exotic Woods

This gift card holder is sure to be a hit during the upcoming holiday gift giving season. Made from exotic woods, these double as beautiful tree ornaments.

Supplies for Making the Gift Card Holder

  • Piece of wood 1/8"  x 12" x 3". Select a wood with beautiful color and/or graining such as purpleheart, bubinga, zebra wood, curly maple, etc.
  • Wood glue
  • Clamps
  • 12" length 1/8" ribbon

Equipment for Making the Gift Card Holder

Instructions for Making the Gift Card Holder

  1. Use the table saw to cut two 2½" x 3¾" x 1/8" pieces from your selected wood stock.
  2. Use the band saw to cut two 1/8" x 1/8" x 4" and one 1/8" x 1/8" x 3 pieces for the inner spacer frame. Alternatively, this spacer can be cut as a one-piece U shape using the Proxxon Scroll Saw DSH/E with outside dimensions measuring 3¾" x 2½" x 1/8". For this tutorial I chose to use a three-piece frame spacer.
  3. Set the angle gauge on the table saw to 45° and cut the angles on the three frame spacer pieces—two pieces measuring 3¾" long and one piece measuring 2½" long.
  4. Glue and clamp the inner frame to one of the 2½" x 3¾" x 1/8" pieces. Set aside for glue to dry.

  5. Glue remaining 2½" x 3¾" x 1/8" piece to the top of the inner frame spacer. Set aside for glue to dry.
  6. Sand the completed piece on the disc sander or sand with the Proxxon Delta Sander OZI/E.
  7. Measure and mark the center of the top of the holder, and drill a hole through both top and bottom pieces for a ribbon hanger.
  8. Slide the gift card into the holder; thread the ribbon through the holes to secure the card; tie the ribbon ends to form a hanger.
Carole

Sunday, October 15, 2017

How to Make a Rustic Lantern

This rustic lantern is a great project for a beginning work worker—and it uses those scraps that an experienced work worker accumulates. Just by changing the final finish on this rustic lantern, it fits with any home decor.

Supplies for Making the Rustic Lantern

  • Scrap lumber or MDF (I used ¾" MDF for my lantern.) to yield the following pieces:
    • Two 4" x 4" x ¾" squares
    • One 2¾" x 2¾" x ¾" square
    • One ¾" x ¾" x ¾"square
    • Four 8" x ¾" x ¾" columns
    • Eight 2" x ¾" x ¾" cross pieces
  • Clamps
  • Wood glue
  • Bronze spray paint
  • FolkArt Painted Finished Dark Rust Acrylic paint

Equipment for Making the Rustic Lantern

  1. Cut the two 4" squares and 2¾" square for the base and top of the lantern on the table saw. 
    The blade guard was removed for the photo. Always cut with the guard in place.
  2. Cut seven ¾" columns on the table saw with the longitudinal stop set for ¾" cuts. 
    The blade guard was removed for the photo. Always cut with the guard in place.
  3. Use the band saw to cut down three of the columns into 2" lengths for the cross pieces and the ¾" finial.
  4. These are the lantern pieces ready to assemble. Now would be the time to sand any rough areas using either the Delta sander or the disc sander. Since I used MDF, I didn't need to do any sanding.
  5. Begin assembling the lantern by gluing two columns and two cross pieces to form a frame. Make a second frame with the remaining columns and two more cross pieces. Clamp the frames until the glue dries.
  6. Glue and clamp the remaining four cross pieces in place to join the two frames.
  7. Assemble the top of the lantern:
    1. Measure and mark one of the 4" squares for the placement of the 2¾" square. You will need 5/8" allowance on each side of the 4" square.
    2. Measure and mark the center of the 2¾" square for the placement of the finial.
    3. Glue the 2¾" square to the 4" square, and glue the finial to the center of the 2¾" square. 
  8. Glue the lantern to the remaining 4" square base. Then, glue the top on the lantern.
  9. When the glue is dry, spray the lantern with bronze spray paint. allow the paint to dry thoroughly before adding the Painted Finishes coat.
  10. Use FolkArt Painted Finishes Dark Rust as the final coat. This adds the texture of rusted metal as well as adding color.
FolkArt Rust Painted Finishes acrylic paint
Texture of the Rust Painted Finishes
Be safe. Only use a real candle for display purposes. Enjoy your rustic lantern with a battery operated candle.

Monday, October 2, 2017

How to Make a Triangular Picture Frame

Who said that picture frames have to be rectangular??? What about a triangular picture frame? A triangular frame is easy to make, and perfect decorated as a Christmas tree.

Finished Triangular Picture Frame

Supplies to Make a Triangular Picture Frame:

Equipment to Make a Triangular Picture Frame:

Instruction for Making a Triangular Picture Frame:

  1. Decide on the dimensions of your frame. The sides of my equilateral triangle measure 6½", and I cut the MDF into ½" widths. 
  2. The rabbet is a step-shaped recess cut along the back edge of the frame to receive the protective acetate, photo, and backing. To make the rabbet: Adjust the blade height on the table saw to about 1/8". Make a cut 3/8" from the edge of the board. Make successive, parallel cuts moving toward the edge of the board.
  3. Cut three ½" wide strips for the sides of the frame. These need to be cut longer than your desired finished length to allow for cutting the corner angles. Since I was using scrap, I cut my strips to about 8½".
  4. Set the angle gauge on the table saw to 60°.
  5. With the strip help securely against the angle gauge, make the corner cuts. After making the first cut, measure and mark your desired length along the edge of the strip opposite the rabbet. Repeat for the remaining two sides.
  6. Use wood glue to glue the three sides together.
  7. On the back side of the frame, mark the center of the bottom strip. Drill a hole for the support piece, taking care not to drill all the way through to the front of the frame.
  8. Print the star pattern and adhere to the small scrap piece of MDF. Cover the surface of the MDF with painter's tape. Next, spray the back of the pattern with spray adhesive, and adhere pattern to top of the painter's tape. The spray adhesive holds the pattern in place, and the painter's tape makes for easy removal. Cut the stars on the band saw.
  9. If necessary, sand any rough or uneven edges with the Delta sander. Often when using MDF, you don't need to do any sanding.
  10. Cover the frame and star with a cost of gesso.
  11.  When the gesso is dry, paint the pieces. When the pieces are dry glue the star to the top of the frame.
  12. Cut acetate, photo, and cardstock to fit the frame. I secured these in place with a bead of hot glue.
  13. Insert a skewer or toothpick in the hole you drilled on the bottom strip of the frame to serve as a support. 
  14. Enjoy your triangular frames!!