Showing posts with label drill stand. Show all posts

Sunday, January 6, 2019

How to Make a Hardwood Cheese Spreader

Two of the things that I love—beautiful hardwoods and cheese—brought together. This cheese spreader/butter knife is a great project to get to know your machines.

Supplies and Equipment for Making the Hardwood Cheese Spreader

Instructions for Making the Hardwood Cheese Spreader

  1. Decide on the size for your cheese spread. Mine is small—just 4" long x ½" at its widest. Design the shape you want using a computer design program, or sketch your design with paper and pencil. You could also trace the outline of a butter knife or cheese spreader that you already have, and make adjustment as desired. When you're happy with your design, print it.
  2. Prepare your hardwood blank by covering with painter's tape. This makes removing the pattern easy.
  3. Lightly cover the reverse side of the pattern with adhesive spray, and mount on your prepared wood blank. It is important that length of the spreader is parallel with the grain.
  4. Use either the bandsaw or scroll saw to cut out the basic shape.
  5. You'll have a rough shaped spreader.
  6. Use the disc sander for initial shaping.
  7. Change the orientation of the drill stand from vertical to horizontal. Insert a sanding band in the rotary tool, and mount in the drill stand.
  8. Continue sanding the cheese spreader, refining the shape, and tapering the cutting edge using the drill stand and rotary tool fitting with a sanding band. If necessary, hand sand with fine grit sandpaper until the cheese spreader is as smooth as possible.
  9. Change the sanding band to a buffing/polishing tip.
  10. Liberally coat the cheese spreader with food safe wood oil. I used butcher black oil. Buff and polish the cheese spreader.

Carole

Sunday, April 15, 2018

How to Make a Flock of Shelf Birds

Brighten your corner of the world with this flock of adorable shelf birds. I love the contrast between the painted bird bodies and the waxed beaks. This is a great project for learning more about your Proxxon Micromot tools.

Supplies and Equipment for Making the Shelf Birds

  1. Set the height of the table saw blade to accommodate the ¾" wood.
  2. Use the table saw to cut five 1" wide pieces of your ¾" wood. These will be the bodies of the birds.
  3. Cut out each of the birds and beaks from the pattern.
  4. Trace the shapes of the heads onto the ¾" lengths.
  5. Cut the head shapes using the scroll saw.
  6. Measure and mark the height of each bird, and cut to length using the band saw.
  7. Trace the shapes of the bird beaks onto a piece of the ¾" wood, and cut these using the scroll saw or band saw. The straight edges can be cut on the band saw; curves on the scroll saw.
  8. Sand each bird body and beak on the disc sander or the Delta sander.
  9. Measure and mark holes on the edges of the body and beak pieces for the dowel rods that will attach the beak to the body.
  10. Mount the rotary tool in the drill stand. Use the precision depth gauge on the drill stand to drill holes with the rotary tool that are no deeper than 5cm deep. Use a 1/8" brad point drill bit.
  11. Cut five 5/8" lengths of dowel rod. This length allows for a small gap between the beak and body when assembled.
  12. Paint the bird bodies with FolkArt Home Decor Chalk Paints.
  13. Coat the bird beaks with FolkArt Home Decor Wax. Let dry overnight and buff with a soft cloth.
  14. Paint the birds' eye using FolkArt Color Shift Black Flash paint. Use a stylus of end of a paint brush to dot the eyes in place.
  15. Apply a small amount of liquid glue to the end of a dowel rod piece, and insert in bird body. Apply glue to the opposite end, and insert in the beak.
  16. Enjoy your flock of shelf birds.
Carole

Sunday, March 18, 2018

How to Make an Easter Napkin Holder

This clever Easter napkin holder is sure to be a hit with youngsters and oldsters alike. It adds the finishing touch on your dining table.

Supplies and Equipment to Make the Easter Napkin Holder

Instructions for Making the Easter Napkin Holder

  1. Select a pattern for your napkin holder. There are four different Easter-themed patterns included. I've selected the rabbit for this project.
  2. Using the band saw, cut your wood or MDF to size according to the pattern you select. 
  3. Adhere your pattern to the substrate using painter's tape and adhesive spray. Cover the substrate with painter's tape. Lightly spray the reverse side of the pattern with adhesive, and mount onto the covered substrate. The adhesive spray holds the pattern in place, and the painter's tape makes removal easy.
  4. Using the professional rotary tool and drill stand, drill a pilot hole for interior cuts. Make sure that the pilot hole is large enough to accommodate the scroll saw blade.
  5. Cut out the piece using the scroll saw.
  6. Sand any rough edges with the Delta sander.
  7. Gently insert a strong floral pin into the napkin holder to facilitate painting and drying.
  8. Coat the napkin holder with a layer of white gesso. 
  9. Hang to dry.
  10. When the gesso is thoroughly dry, decorate your napkin holder. I chose to napkin collage mine using matte Mod Podge. Alternatively, you could paint the napkin holder adding embellishments of your choice—be creative!!
  11. Enjoy your Easter napkin holder.

Carole

Sunday, December 31, 2017

How to Make a Statement Piece of Jewelry

This piece of jewelry really does make a statement—as it should. Any statement piece is easy to identity because it is chunky, unique, and attention-grabbing. This statement necklace is meant to be the defining piece of your outfit. It will set you apart from the crowd.

Supplies for Making the Statement Necklace

  • 2" x 10" x ¼" piece of MDF
  • Four gold tone focal beads
  • Eight 6mm glass beads in a color to coordinate with you choice of napkin
  • Twelve 3mm to 4 mm glass beads in a color to coordinate with you choice of napkin
  • 12" to 15" 24 gauge brass jewelry wire
  • 14" to 20" gold tone jewelry chain (depending upon the length of your finished piece)
  • One jewelry clasp with jump rings
  • Gesso
  • Mod Podge
  • Napkin with design of your choice 
  • Classic Gold Liquid Leaf by Plaid Enterprises
  • Pattern for kite-shaped pieces

Equipment for Making the Statement Necklace

  1. Prepare and mount the pattern on the 2" x 10" piece of MDF. To apply the pattern to the MDF, cover the MDF with painter's tape, spray the reverse side of the pattern with adhesive spray, and adhere the pattern on top of the painter's tape. The painter's tape allows for easy removal of the pattern. 
  2. Cut the necklace pieces using either the band saw, table saw, or scroll saw.
  3. Sand the edges of the pieces on the disc sander.
  4. Measure and mark ¼" from the tip of the piece and half the width of the piece for drilling the hole to attach the piece to the necklace.
  5. Mount the marked piece in the machine vise and attach to the drill stand.
  6. Drill a hole for attaching the piece to the necklace.
  7. Repeat Steps 4 through 6 for each piece.
  8. Coat all pieces with gesso.
  9. Using Mod Podge and a napkin with a design of your choice, napkin collage the front of each piece.
  10. When the Mod Podge is dry, paint the edges and reverse side of each piece with Classic Gold Liquid Leaf.
  11. String MDF necklace pieces, focal beads, and glass beads on jewelry wire, and form a closed loop at each end of the wire.
  12. Attach 7" to 10" of jewelry chain to each end of the wire.
  13. Attach jewelry clasp to the ends of the chain.
  14. Wear your statement necklace, and enjoy all the compliments that you'll receive.

Sunday, December 17, 2017

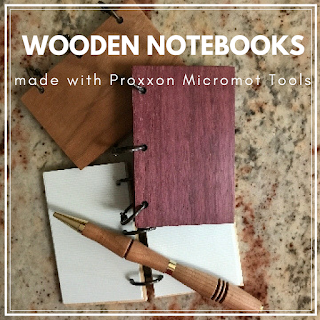
How to Make a Notebook with Exotic Wood Covers

I love the look and feel of exotic woods. The colors and the grain patterns are so interesting. This notebook uses exotic woods for the covers. This is an easy project for learning about your Proxxon Micromot tools.
Notebook with Exotic Wood Cover

Supplies and Equipment:

Instructions:

  1. Use the table saw to cut the blanks to size. These notebooks measure 3½" x 2¼", but you can adjust to fit your needs.
  2. Pair two blanks for the front and back covers of the notebook, and tape together with painter's tape. This helps to ensure exact sizing and measurements in the following steps. The tape stays in place until you are ready to assemble the notebook.
  3. Adjust the angle stop on the disc sander to 0°, and sand the edges of the blanks. (The top and bottom surfaces of my blanks were already beautifully finished, so I didn't need to sand them. If you need to sand these surfaces, do so before pairing the front and back covers.)
  4. Measure and mark the vertical line for the placement of the holes. On my 3½" x 2¼" notebooks this line is 3/8" from the edge.
  5. Along the vertical line you marked in Step 4, measure and mark the placement of the holes.
  6. Place a piece of waste wood under the paired blanks. This prevents tear-out on the bottom blank when drilling the holes.
  7. Drill the holes using the Professional Rotary Tool mounted in the Drill Stand and a brad point drill bit slightly larger than your binder rings. A brad point drill bit allows for very accurate placement of the bit.
  8. Cut paper slightly smaller than the wooden covers. I used a stock of paper about ¼" thick. Assemble the pages and covers. For my book I used ½" binder rings. If you are making a larger book or a thicker book, you will need to adjust the size of the binder rings to accommodate the thickness of the pages.