Showing posts with label plaid folk art brushed metal paints. Show all posts

Wednesday, December 6, 2017

Christmas Joy

Hi everyone, Steph Ackerman here today with a fun new Christmas sign I've created for my home this season.   It was easily created with the help of some amazing Proxxon Tools.  And with Christmas just a few weeks away, it's a great addition to my home's seasonal décor.


Using a plate as a template, I drew an ornament shape on plywood and just free handed the top of the ornament.


I used the Proxxon Jigsaw to cut out the ornament.


Once theornament was cut, I used the Delta Sander to sand down the rough edges.


Using Plaid Ultra Dye in Infra Red, I painted the ornament using a brush from the Plaid Ultra Dye Brush Pack.  Then I used a stencil with molding paste to create a 3 dimensional design.


Once the molding paste was dry, I replaced the stencil and sprayed on some glimmer mist.


Using the Precision Rotary Tool with a small bit, I drilled several holes in the panel.  I wanted to add some foliage and needed a way of anchoring the foliage in place.


I created a bow using the Bowdabra then tied the bow to the foliage. 


I wrapped thin wire around the foliage and then threaded it through the holes in the ornament.  Although it looks lovely, I felt my ornament needed a little "something".


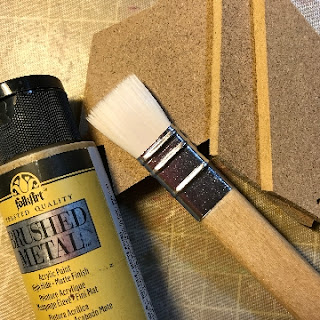
So I decided to paint the edges of the ornament with Folk Art Brushed Metal Acrylic Paint in Silver.  Then, Joy was die cut from cardstock and Rinea Foiled Paper and added.  Finally, foil was added to the top to finish the ornament look.  


Thanks for stopping by.


Friday, November 17, 2017

Let It Snow Sign

Hi everyone, Steph Ackerman here today with a fun new winter sign I've created for my house.   It was easily created with the help of some amazing Proxxon Tools.  I picked up this wood and metal sign in the clearance section because I knew it would be fun to alter.


Use a stencil to draw a snowman on a left over piece of a 12" x 12" panel of  Smoothfoam.  Alternatively, you could also freehand the snowman.


Using the Proxxon Hot Wire Cutter, I quickly cut off what I did not need.  If you haven't tried the Hot Wire Cutter yet, I will tell you that it heats up quickly and then cuts through Smoothfoam like it's butter. 


After removing the excess panel, I began cutting around the snowman.  The Hot Wire Cutter cuts so smoothly and easily.  Even the tiniest of areas are no problem to cut!  I always save my scraps because you never know when you'll need them!


I decided to upcycle the wood and metal sign so I painted it with gesso. I also painted the snowman with gesso. 


Using Plaid Metallic Paints in Antique Gold, Gunmetal Grey and Black, I painted both the snowman and the sign. 


Once the sign was dry, I used a stencil with molding paste to add stars to the background.  Then I added molding paste along the bottom to create the snow effect.


I then finished the snowman, tying a scarf around his neck.  A scrap of ribbon was added to create a nose and wiggly eyes were added.   Holly, ribbon and a pom pom finished him off.  


Let it Snow was die cut from white cardstock.  While still in the die, I painted the words with Antique Gold, the holly with Green Flash and the berries with Red Flash.


I added all elements to the sign with liquid adhesive.


Thanks for stopping by.

Friday, October 20, 2017

New Home Sign

Hi everyone, Steph Ackerman here today with a fun new sign I've created for my house.   It was easily created with the help of some amazing Proxxon Tools.


Using a bark edged panel, I sanded it with the Delta Sander.  Then I painted it with Folk Art Color Shift Acrylic Paint  - Yellow Flash.  Once dry, I added streaks of Folk Art Brushed Metal Paint - Silver.


I placed a Plaid Folk Art Stencil - Tropical Leaf Stencil - on the wood then painted leaves in assorted colors of  Folk Art Color Shift Acrylic Paint - Red Flash and Green Flash.


I moved the Leaf Stencil around the wood adding 3 leaves.


Once the sign dried, I used the Bench Drill Press to drill holes in the top edge. 


Using some left over numbers, I painted them with Folk Art Color Shift Paints in Green Flash and Red Flash and glued them to the sign.  Finally, I added some fuzzy trim and hung my sign.


Thanks for stopping by.


Friday, September 15, 2017

Stencilled Fall Platter

Hi everyone Steph Ackerman here today working with my Proxxon Tools and Plaid Paints and stencils to create a fun Fall Platter.

The air is cooler.  The days are shorter.  It's officially Fall and time to get ready for the season.


I thought I'd create a Fall Platter that could be used for a variety of purposes from holding holiday decorations.


Perhaps even to hold seasonal fruits and veggies.


I began by sanding the platter with the Delta Sander, definitely my go-too tool for all my projects.


Next, I used the Pen Sander to sand the edges.  This tool is perfect for all those little areas you need to sand.


Once sanded, I began by painting the platter with Folk Art Milk Paint in Tavern Ale.


Next, I painted the bottom of the platter with Folk Art Milk Paint in Absinthe.


I decorated the platter with a Folk Art Stencil.  Using a foam brush, I mixed  Folk Art Brushed Metal Acrylic Paints in  Brushed Copper and Brushed Gold and Folk Art Color Shift Acrylic Paint in Red Flash and Green Flash.    These colors are truly vibrant and showcase the colors of the season.

Once dry, I painted on a layer of Milk Paint Finishing Oil and allowed it to dry.


I love how this platter turned out and see lots of ways to use it this season.

Thanks for stopping by.


Sunday, August 6, 2017

How to Make Five Pointed Patchwork Star

This five pointed patchwork star is such a versatile pattern. It can be used as a decorative piece, a coaster, or a trivet depending on the size you make it. There are also many decorating options depending on how you paint it. How about red, white and blue for a patriotic theme? Or, each point a different color to resemble a quilted star? Silver and white tones would be perfect for wedding decorations. Of course, gold metallics are ideal for Christmas ornaments and display pieces.
Finished Five Pointed Patchwork Star

Supplies and Equipment for Making the Five Pointed Patchwork Star

Instructions for Making the Five Pointed Patchwork Star

  1. Cut out star point pattern. You can vary the size of the star by reducing or increasing the size. I recommend cutting the template out of substantial cardstock or acetate so it maintains its shape through multiple tracings.
  2. Trace the template onto your wood. I traced a column of star points the entire length of my piece of MDF.
    Template and Pattern on MDF
  3. I used the table saw to cut the column of star point patterns. Here you can see that I'm adjusting the blade height to be just above the thickness of the MDF.
    Setting Saw Blade Height
  4. I moved to the band saw to cut out the star points. Note: This could also be done on the scroll saw.
    Cutting Shapes on Band Saw
  5. Drill the holes for attaching the star points to one another using the Professional Rotary Tool and Drill Stand. I used a 1/8" HSS twist drill bit with brad point.
    Drilling Holes
  6. Paint each star point. I used FolkArt Brushed Gold Brushed Metal Acrylic Paint.
    Painting Star Points with FolkArt Brushed Metal Acrylic Paint
  7. When the paint is dry, glue the star points together with wood glue. This step is not absolutely necessary, but it does give the finished patchwork star extra strength.
    Gluing Star Points Together
  8. With wire cutters, cut the brass wire into 1½" lengths. Note: If you increase or decrease the size of the star point template or the thickness of the wood, you will need to adjust the length of the brass wires. Bend the brass wires to form a U-shaped staple.
    U-shaped staple formed from brass wire
  9. When the glue is dry, working from the front of the star insert a staple into holes on adjacent star points. 
    Inserting staple in adjacent star points
  10. Holding the staple in place, turn the star over and flatten the ends.
    Flatten staple on reverse side of star
Your five pointed patchwork star is complete—ready to be a used as a decoration, an ornament, or a trivet.
Five Pointed Patchwork Star Trivet

Monday, May 15, 2017

"Faith In A Box"~ Proxxon and Plaid Paints Design Team Project by Sherri Welser

"Faith In A Box"


 With Proxxon  Tools and Plaid  Folk Art Paints
by Sherri Welser

Creating this unique and fun wooden box project  " Faith In A Box"with Proxxon Tools and Plaid paints!  I love sweet little wooden boxes and wanted to find a way to paint and embellish and create that "Vintage" look. Using Plaid Folk Art  Brushed  metal paints , Proxxon Delta Sander, fun techniques and embellishments, I was very pleased with the outcome!

~Supplies~ 
Wooden box ( hinged) Approx 5 x 3
Tissue paper ~Vintage design
Mat medium gel
Clear crackle paint
Sepia stamp pad
Bits and pieces of old jewelry
Inspiration metal words
E-6000 adhesive

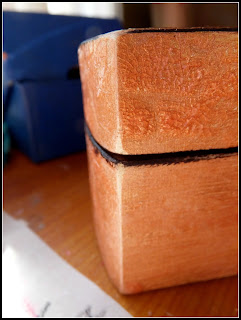
1) Paint the wooden box with  the copper metallic paint.

2)Brush the clear crackle gel over the paint and let dry.

3) Cover the inside of the box with the tissue paper. Gluing down with the mat medium.

4) Using  the Proxxon Delta sander, sand the corners and edges to create that "worn look"


5)When crackle paint is dry, randomly brush the outside with the sepia ink pad to create that aged look. Add some of the  Gold Brushed  metallic paint for highlights.


6)Decorate the top and front of the box with metal inspirational words and jewelry pieces gluing in place with the E-6000 adhesive.


You now have a sweet little box of your own to store special trinkets!