Showing posts with label Hot Wire Cutter. Show all posts

Wednesday, October 2, 2019

Fall Basket

Hi everyone, Steph Ackerman here today sharing a new fall project.


Taking a paper mache pumpkin, I used the Rotary Precision Tool to drill several contiguous holes in the pumpkin - long enough to get the Jigsaw blade inside the pumpkin.


The Jigsaw cut the pumpkin without issue.


Since I had raggedy edges, I used the Delta Sander to sand down the edges.


I ran a bead of adhesive around the edge of the pumpkin and placed a pleated strip of burlap.  I used paper clips to hold the burlap in place until the glue dried.


While waiting for the glue to dry, I used the Hot Wire Cutter to cut a circle from Smoothfoam that would be placed in the bottom of the pumpkin.


  Then I gathered some silk flowers and placed them inside the basket.


 Thanks for stopping by.


Wednesday, September 4, 2019

How To Create a Fall Sign

Hi everyone, Steph Ackerman here today showing you how to create a fall sign.


Drawing a leaf on Smoothfoam, I used the Hot Wire Cutter to cut the leaf. 


I wanted the leaf a little thinner so I cut the leaf  in half with the Hot Wire Cutter.


I painted the leaves and the plaque with Folk Art Paint.


Using a Plaid stencil, I added a design with modeling paste


 Once dry, I used the Bench Drill Press to add holes in the top of the sign.


For additional colors, I spritzed the sign with Fireworks Shimmery Craft Sprays and used a baby wipe to remove some of the colors.  I also spritzed the leaves to make them more realistic.


String was added in the holes.  The phrase was stamped with brown ink and die cut.  The phrase was matted with a larger die using Rinea Marigold Foiled Paper.


Finally, I added Gold Stickles as the veins.

Happy Fall.

Thanks for stopping by.


Wednesday, February 6, 2019

A Review of the Hot Wire Cutter

Hi everyone, Steph Ackerman here with another Proxxon review.  Today, I will share with you one of my favorite go to tools - the Hot Wire Cutter.  It was also one of the very first tools I got from Proxxon. 


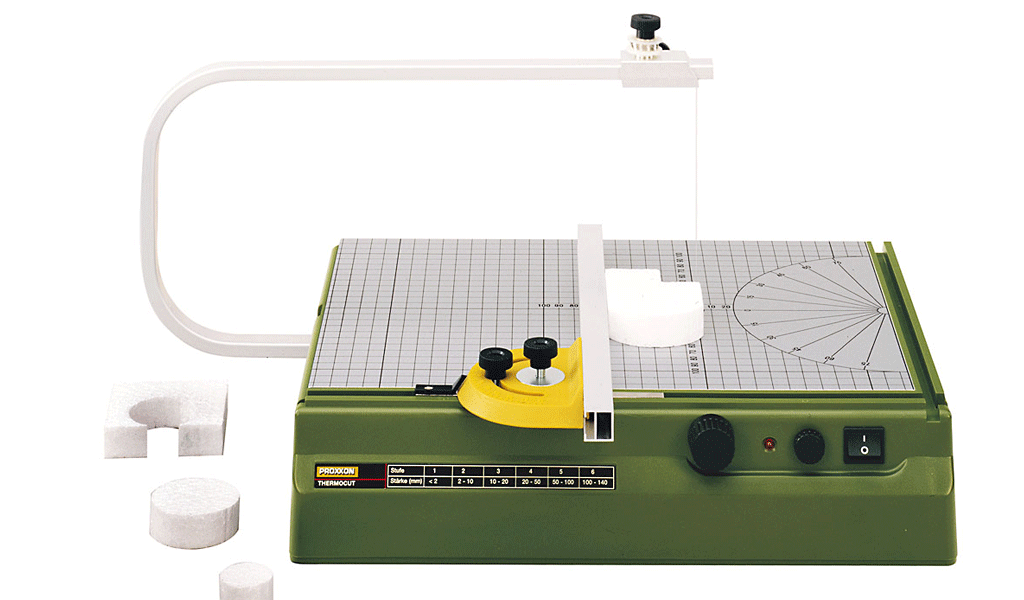
The Hot Wire Cutter is a bench top unit approximately 15 1/2" x 11", allowing ample room to cut foam of any size.  The grid printed on the unit allows for even cutting.  The arm, extending approximately 5" over the unit, holds the wire and it is easily repositionable to cut a variety of angles.  The wire heats in less than one second so you can cut foam immediately.  The LED light reminds you not to ouch the wire.  The unit comes with approximately 90' of wire so it will last a very long time.

The Hot Wire Cutter is easy to assemble.  Removing it from it's packaging you simply adhere the arm and wire so set up is quick and easy.  It is literally a plug and go tool. 

Foam cuts like butter and you can even cut ribbon so it doesn't fray.

Here are some of the projects which I've created using the Hot Wire Cutter.  Click on the links for the complete project details.


I hope you give the Hot Wire Cutter a try.  I know you will love it!

Thanks for stopping by.


Wednesday, November 21, 2018

Mini Christmas Packages by Steph

Hi everyone, Steph Ackerman here today with a set of mini Christmas packages.  This is a perfect project to create with the kids in mind.


Supplies:
Ribbon

Who doesn't love decorating for Christmas?  Even if you only have a small space to decorate, it's still possible to create a design you will love.

To create my packages, I used the Hot Wire Cutter to cut foam into squares.


Taking only seconds to warm up, you can use the Hot Wire Cutter to cut foam into any size you need.  I cu my foam into several sizes.


Next, I painted the foam blocks with assorted colors of Plaid paint.


Once they dried, I realized I need some smaller blocks so I used the Hot Wire Cutter again to cut the blocks.  Again, the painted foam cut easily; paint was not a hindrance.


Then I simply wrapped ribbons around each block creating a "package".  


How sweet they are!  Whether being used as decorative elements with other decorations or hanging from your tree, these little packages will add a fun element to your Christmas décor.  

Thanks for stopping by.


Wednesday, August 1, 2018

How to create a tombstone with the Hot Wire Cutter

As we head toward the end of summer, it's not too early to think about Halloween.  Steph Ackerman here today to show you how to create a tombstone using the Proxxon Hot Wire Cutter.


I love decorating for Halloween and realized I didn't have a tombstone!!  So I decided to use a sheet of Smoothfoam with my Hot Wire Cutter to create a tombstone.  So quick and easy and so much fun to create.

Supplies:
Proxxon Hot Wire Cutter
Smoothfoam
Plaid Paints - Delta Ceramcoat - Ink Blot, Antique White, Charcoal
Folk Art Coastal Texture Paints - Sand Dollar, Seal Grey


I began by drawing the tombstone on a sheet of Smoothfoam.


Using the Hot Wire Cutter I then cut the pattern.


Next I painted the tombstone with Coastal Texture Paint in Sand Dollar and Seal Gray, mixing the colors together.  Then I put it aside to dry.


Once dry, I used the Hot Wire Cutter again to create the "cracks".  With no specific plan in mind, I created assorted "cracks" around the tombstone.


Check out how defined the cracks are and how small I was able to cut them.


For definition, I paint the cracks with black and white paints.  Using a stencil, I added RIP down the center with blue paint.


To give it a more aged appearance, I added more black paint around the edges and used a baby wipe to blend it in.


Finally, I added some mesh along one side creating a cobweb effect down the side.


What do you think?

I love using the Hot Wire Cutter for projects like this.

Thanks for stopping by.

Steph

Wednesday, March 21, 2018

Happy Easter with Hot Wire Cutter

Hi everyone, Steph Ackerman here today with an Easter Egg.  Easter will be here shortly, but you still have time to create some Easter décor.  If you haven't tried to Hot Wire Cutter, you will love it.


I created a stencil using my Cricut then taped it to a panel of Smoothfoam.  Using the Hot Wire Cutter, I cut around the stencil.  Smoothfoam cuts like butter with the Hot Wire Cutter and I cut this egg in only a few minutes.


After removing the stencil, this is my Easter Egg.


The Easter Egg was painted with Gold Plaid Metallic Paint.


I placed the stencil back on the Easter Egg and added more color with additional Plaid Metallic Paints.


 Finally, I added some dew drops around the Easter Egg.  There are so many different egg possibilities when you create with the Hot Wire Cutter.


Happy Easter.

Thanks for stopping by.


Friday, November 17, 2017

Let It Snow Sign

Hi everyone, Steph Ackerman here today with a fun new winter sign I've created for my house.   It was easily created with the help of some amazing Proxxon Tools.  I picked up this wood and metal sign in the clearance section because I knew it would be fun to alter.


Use a stencil to draw a snowman on a left over piece of a 12" x 12" panel of  Smoothfoam.  Alternatively, you could also freehand the snowman.


Using the Proxxon Hot Wire Cutter, I quickly cut off what I did not need.  If you haven't tried the Hot Wire Cutter yet, I will tell you that it heats up quickly and then cuts through Smoothfoam like it's butter. 


After removing the excess panel, I began cutting around the snowman.  The Hot Wire Cutter cuts so smoothly and easily.  Even the tiniest of areas are no problem to cut!  I always save my scraps because you never know when you'll need them!


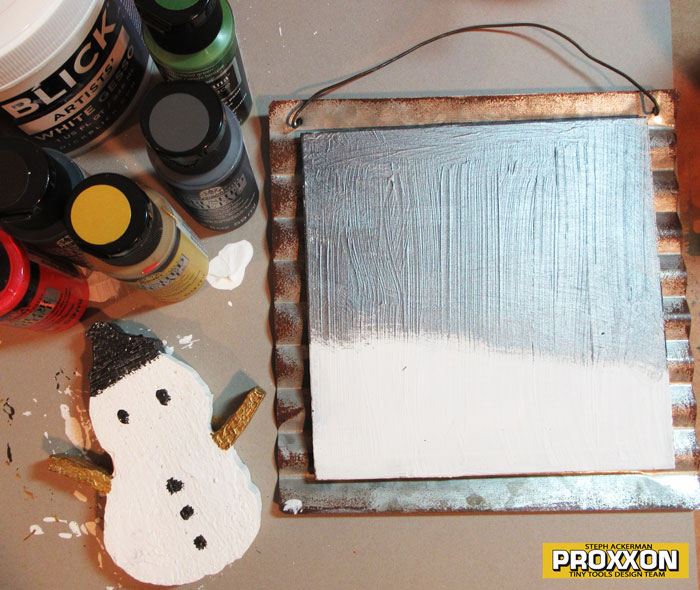
I decided to upcycle the wood and metal sign so I painted it with gesso. I also painted the snowman with gesso. 


Using Plaid Metallic Paints in Antique Gold, Gunmetal Grey and Black, I painted both the snowman and the sign. 


Once the sign was dry, I used a stencil with molding paste to add stars to the background.  Then I added molding paste along the bottom to create the snow effect.


I then finished the snowman, tying a scarf around his neck.  A scrap of ribbon was added to create a nose and wiggly eyes were added.   Holly, ribbon and a pom pom finished him off.  


Let it Snow was die cut from white cardstock.  While still in the die, I painted the words with Antique Gold, the holly with Green Flash and the berries with Red Flash.


I added all elements to the sign with liquid adhesive.


Thanks for stopping by.