Showing posts with label Plaid Paint. Show all posts

Sunday, February 25, 2024

Building Patriotic Buntings For Tiny Houses


Today I will show you how I built tiny patriotic buntings for one of my tiny houses. This simple project adds so much character to my fence. Follow along with me and I'll show you how I made them.


Supplies:
     1/16" Balsa Plywood
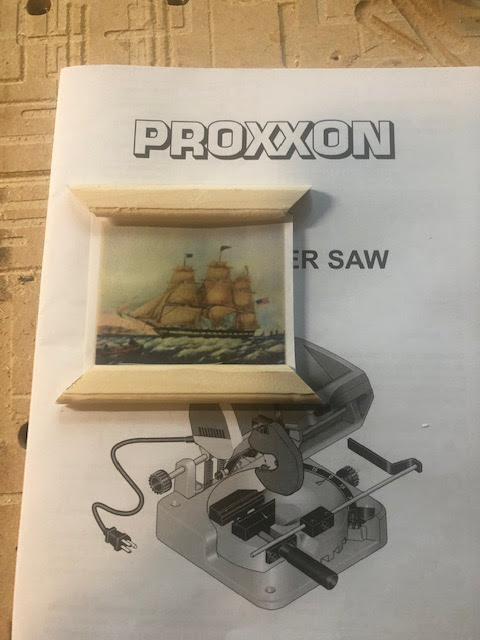
     Proxxon 2 Speed Scroll Saw DS460
     Plaid Paint


First, I determined the size I needed the buntings to be and drew a pattern.


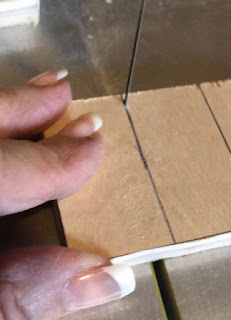
I then drew the pattern on my balsa wood. Using my Proxxon Scroll Saw I began to cut them out. For the fence I needed 6.


The Proxxon Scroll Saw does such an amazing job that I didn't even need to sand the edges. If this were a thicker piece of wood, I'd imagine that to be necessary. As you can see in this picture, I even stacked 2 pieces together and cut.


Now all 6 pieces are cut out and ready to paint with my Plaid paint.


Using various shades of red, white and blue, the buntings are painted. I used a tiny awl to poke a hole in each end and attached them to the fence with sewing thread.


Here is my completed project.  Just wanted to add that every element of this tiny house was created using Proxxon tools.  Hope you enjoyed following along with me.
Colleen :-)


Saturday, February 11, 2023

How To Make Picture Frame Ornaments Using Proxxon Tools


Hi everyone.  Today I'm going to show you how I made these miniature ornaments for a tree I have on display in my spare bedroom.  The room has a nautical theme.  Follow along and I'll show you how I made them using Proxxon tools.


Supplies: 
   Proxxon Micro Band Saw   
   Proxxon Miter Saw
   Proxxon Table Saw
   Plaid Paint
   Scrap pine
   Scrap thin Plywood
   Assorted photos
   Wood Glue
   String


First I ripped some thin strips of wood using the Proxxon Table Saw.


Theen taking those strips I ripped out a notch without cutting all the way through.


Turning the strip again I ripped out a notch going the other direction. This made a rabbit on the edge of the strip that the picture will slip into.


I then took my strips and measured the sides to figure out the size I wanted my frames and cut at right angles on the Proxxon Miter saw.


Next I glued the corners together and let dry.


I had found a few ship pictures online and printed them to fit my tiny frames.  I cut backs for each photo out of thin plywood using the Proxxon Micro band Saw that would fit into the backs of each frame.


I used Mod Podge to secure the photos to the plywood backs.


I then tried them in the frames to make sure they fit.


I removed the pictures then painted each of the frames with black Plaid Paint.  I returned the photos to the frames and painted the backs.


Lastly I applied a string to the backs with glue for hanging.


These are going to look so adorable on my little nautical tree.  Thanks for following along...
Colleen


Monday, March 28, 2022

How To Build A Clock Case


Hi everyone!  Today I'm going to show you how I built a simple clock case for a cross stitch piece I stitched over 30 years ago. The piece has been in my cedar chest, and I've often thought about finishing it. Follow along with me and I'll show you how I did it.


Supplies:

     1" scrap pine boards
     Filigree Trim Molding (pine)
     Wood Glue
     Brad Nailer and Brads
     Plaid Paint  (black)
     Plaid Inspirations Clear Wax
     Small piece of window glass  (cut to fit)


First I measured my original piece of cross stitch soi could determine how large the opening for the face needed to be.  I made a sort of template from posterboard that I could build the frame around. Using the Proxxon Table Saw I cut my pieces accordingly from the template.  I cut two side pieces and a top and bottom face frame pieces. After I dry fit the top and bottom pieces, I removed them and using the table saw cut notches in them for the glass.  I also cut a slot in the two side pieces for the glass to slide in.


I glued and nailed the two side pieces to the bottom. I then slid in the glass and glued and nailed in the top piece.


I had to cut two spacers for the top and bottom to hold the clock hands away from the glass.


Next I cut a thin piece of scrap wood a little smaller than the size of the opening, to accommodate the fabric being folded over and to the back.  I dry fit the stitched piece in the frame.


Next, using the Proxxon table Saw,  I cut a top and bottom for the case. I glued and nailed them together with the sides. I went over some of the edges with the Proxxon belt sander.


Using the Proxxon Table Saw I cut a back for the case.  It was then I realized I had nothing to screw it into so again I cut two spacers and glued them in.


Lastly using the table Saw and the Micro Band Saw I cut some tiny filigree molding to go on the top and bottom of the case, and a rounded piece for the top.  Once each piece was cut, I glued them on.


With a little extra sanding, it's ready to paint and wax,  I used Plaid products.


After everything was dried, I inserted the stitched piece with the clockworks attached.


Here's my finished piece alongside a larger clock I made years ago.  Hope you enjoyed following along with my project!  
Colleen  :-)


Sunday, November 21, 2021

How To Build A 3 Candle Wall Sconce


Hi everyone!  I wanted to share with you a wall sconce I built.  This is based on a tin sconce I've seen in a lot of stores that sell colonial lighting.  I thought using some scrap wood I could come close to making something that looked similar.  Follow along with me and I'll show you how I made it.


Supplies

  Proxxon 2-Speed Scroll Saw

  Proxxon Disc Sander

  Proxxon Power Carver

  Scrap 1/2" birch plywood

  Wood Glue

  Drill and drill bit

  3 Small tin candle holders

  Plaid Paint  Black

  Plaid Inspirations Varnish  Matte 


First I started out by drawing a paper pattern then transferred it to my scrap plywood.


Next using my Proxxon 2-speed scroll saw I cut it out.


I also cut out 3 small rectangles of wood to be glued on the bottom to hold the candle cups.


I sanded all the pieces using the Proxxon Disc Sander.


Next I glues and nailed those 3 pieces onto the notches of the base.


I drew some lines on the base and carved them out using the Proxxon Power Carver.


I lightly sanded everything and painted with Plaid Paint.  I chose black.


Using my drill I drilled a tiny hole at the top for hanging.


I gave it one coat of  Plaid Inspirations Matte Varnish.  Let dry then attached the candle cups with glue.


Here's my finished sconce. It can sit on a table or hang on the wall. I purchased 3 short battery operated candles to complete it.


Thanks for following along with me.  This was a fun and simple project. 
Colleen  :-)