Showing posts with label Proxxon Power Carver. Show all posts

Sunday, August 13, 2023

Making A Nautical Trade Sign Part 1


Hi friends!  Today I'm starting kind of a lengthy project.  I'm designing and building a nautical trade sign to hang on the wall. I'm splitting it in 3 parts because each element is a project in itself.  The first is cutting and carving this whale. The second will be a ship and the third will be a wood sign with carved elements to mount parts one and two on.  Follow along with me.  Lets get started  :-)


Supplies  

   Proxxon  2 speed Scroll Saw DS 460
   Proxxon Cordless Belt Sander  BS/A
   Proxxon Power Carver
   Proxxon Precision Rotary Tool FBS 115/E
   Clear #1 white pine board   1x8x6
   Wood Glue
   Brad Nailer


First, I started by drawing my whale directly on the pine board. This was some pine I had left from another project. 


Using The Proxxon Scroll Saw, I cut out the whale.


Now the fun begins!  Using the Proxxon cordless belt sander, I began to round off the edges. I also used the Proxxon rotary tool and Proxxon power carver for details.


Next using the Proxxon rotary tool, I worked on the eye.


Lastly. I cut and carved the flipper.  I laid a small piece of wood on the whale and drew what I felt would be the appropriate size.  Using the scroll saw, I cut out the flipper.  I used the belt sander to round off the edges, then I attached the flipper to the lower portion of the whale with wood glue and a brad nail.


This part 1 is complete except that it will be painted when the other two elements are finished.  

Thanks for following along with me.  Stay tuned for 2 more segments to this project.
Colleen :-) 


Sunday, November 21, 2021

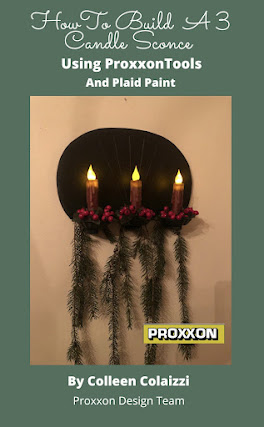
How To Build A 3 Candle Wall Sconce


Hi everyone!  I wanted to share with you a wall sconce I built.  This is based on a tin sconce I've seen in a lot of stores that sell colonial lighting.  I thought using some scrap wood I could come close to making something that looked similar.  Follow along with me and I'll show you how I made it.


Supplies

  Proxxon 2-Speed Scroll Saw

  Proxxon Disc Sander

  Proxxon Power Carver

  Scrap 1/2" birch plywood

  Wood Glue

  Drill and drill bit

  3 Small tin candle holders

  Plaid Paint  Black

  Plaid Inspirations Varnish  Matte 


First I started out by drawing a paper pattern then transferred it to my scrap plywood.


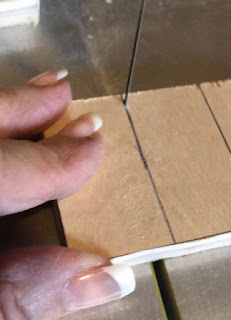
Next using my Proxxon 2-speed scroll saw I cut it out.


I also cut out 3 small rectangles of wood to be glued on the bottom to hold the candle cups.


I sanded all the pieces using the Proxxon Disc Sander.


Next I glues and nailed those 3 pieces onto the notches of the base.


I drew some lines on the base and carved them out using the Proxxon Power Carver.


I lightly sanded everything and painted with Plaid Paint.  I chose black.


Using my drill I drilled a tiny hole at the top for hanging.


I gave it one coat of  Plaid Inspirations Matte Varnish.  Let dry then attached the candle cups with glue.


Here's my finished sconce. It can sit on a table or hang on the wall. I purchased 3 short battery operated candles to complete it.


Thanks for following along with me.  This was a fun and simple project. 
Colleen  :-)


Thursday, August 20, 2020

How To Make A Wood Carving Using Proxxon Tools And Plaid Paint


Hi friends. Today I'm gonna show you how todo some simple woodcarving using Proxxon tools. I made this Moby Dick. This is part one of two blogs I'm doing for this project. You'll see how I made what you see in this picture today and next month you'll see how I added to it. Follow along with me and I'll show you how I did it.

Thursday, May 21, 2020

How To Build A Display Base


Hi everyone!  Today I'd like to share how I made this simple display base for a punch needle eagle I designed. I wanted a base that I could mount 3 flags so this is simply made with 2 pieces of pine to lift the eagle up and adapt to being a flag holder. Follow along with me and ill show you how I  made it using Proxxon tools!


Supplies
  • Proxxon Micro Bandsaw
  • Proxxon Delta Sander
  • Proxxon Power Carver
  • 3/4" scrap pine board
  • Wood glue
  • Plaid Paint black 
  • Mat finish spray polyurathane


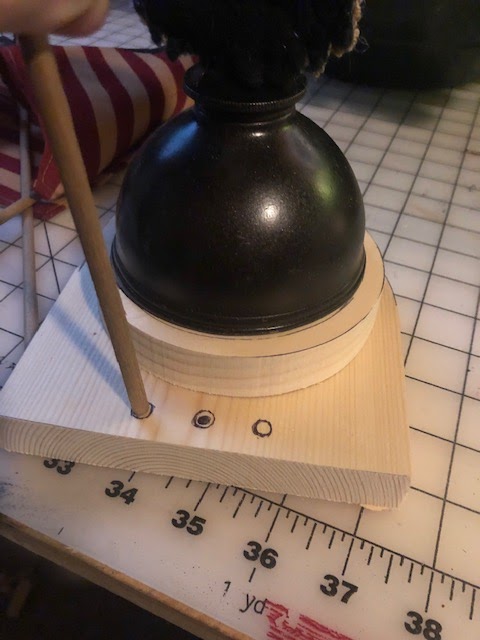
I determined the size I made by the base of the oil can that my punch needle piece is mounted on. I drew a circle about a 1/2" larger and cut out with the Proxxon micro bandsaw. I cut out a second piece a half inch larger and extended it out and squared it off


I then stacked the smaller circle on top of the second piece to check for fit.


Next I decided where I wanted to drill the holes for my flags  I marked them and drilled them.

Next I centered the oil can on the circle and drew a line around it. Using the Proxxon Power Carver I removed some of the wood in the center so my oil can will be a tiny bit recessed.  I sanded everything with the Proxxon Delta Sander, rounding the edges.


Glue the two pieces together.


Lastly paint with Plaid Paint.  I chose black


I then sprayed with a mat finish polyurathane


Thanks for following along with me...Colleen :)


Wednesday, May 16, 2018

Blue Bird of Happiness by Steph

Hi everyone, Steph Ackerman here today using an assortment of Proxxon tools to create my mixed media project.


Supplies:
Imagine Inks
Petaloo, Prima flowers
The Robin's Nest Dew Drops


This bird has been in my stash begging to be altered so I thought it was about time to create my Blue Bird of Happiness.

I began by using the Delta Sander to sand the bird.


Next, I used the Drill Press to drill a hole for his eye and 2 holes for the hanger.


I wanted some decorative details in the wood so I used the Power Carver to carve lines in the body and the tail.


I used Plaid Coastal Texture Paints in High Tide and Largo Blue to paint the bird.  I then painted Seal Grey about the body using a baby wipe to blend the colors.


Next, I added some texture by inking a grid stamp with VersaFine Clair Pinecone Ink and stamped it randomly about the bird.  Then I added a touch of ColorShift orange paint on his beak


Now that the base work was done, it was time to decorate.  I had lots of blue flowers, so I selected some Petaloo and Prima flowers.


To finished, I added The Robin's Nest dew drops as flower centers.


Thanks for stopping by.

Steph