Showing posts with label Proxxon OZI/E delta sander. Show all posts

Thursday, October 20, 2022

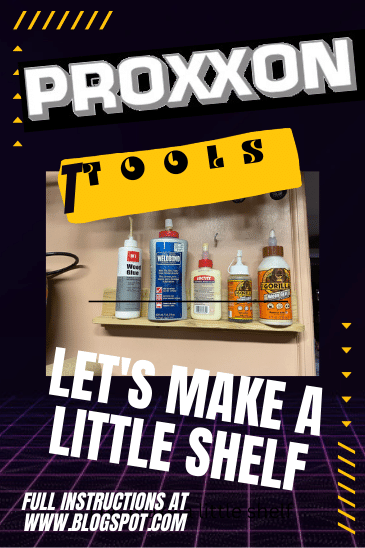
How to make a little shelf

 Hi out there.   Still being practical, I have a easy peasy project today.   Little organization projects can help you keep your wrrkshop neat.   Today let's make a little shelf because I need somewhere to put my glue so I can find it.  I wull be using Proxxon tools.


This can all be made out of one piece of 1 x 6" board.  I mainly am going to use my Proxxon mini table saw and my OZI/E delta sander and new cordless Proxxon mini belt sander.

First i want to cut my (U chose a 16" piece of fence board) on the Proxxon mini table saw.  Using the fence, I measure 4 inches from the fence to the saw blade and lock the fence.


This wood is too thin to simply glue them together, so I am going to make a groove to fit the2 pieces together.   This is easy to do again on the Proxxon mini table saw  I make my first cut 1/2" from the edge of the larger piece.  Remember to set the blade height at 2/3 the height of the board, so in this case at 1/4"


After the first cut I nudge the fence just a tiny bit outward and make another cut.  Look the groove has begun.  I do these 3 or 4 more times until I have the width of the groove the same size as the edge of the other piece of wood.  Now this wood can slip into the groove and this will hold it better than a "butt joint"


Convienetly, the Proxxon cordless mini belt sander is 1/2" and I can use it to smooth and sand my new groove.


next add glue to the groove and place the other piece of wood into the groove.  Make sure it sits at 90 degrees while the glue sets.

I used the Proxxon cordless rotary tool to make pilot holed from the back into the wood after the glue dried to reinforce the bond.  

A couple more pilot holes where i will screw it into the wall.    Now to find a place.


Here is a good place, on the back of the door.   Now I will always find my glue.  

Thanks Proxxon tool company.   and thank you all for visiting.        Carol

Thursday, August 4, 2022

How to make a simple piggy bank

 Hi gang.  Hope all is going well for you.  Today I have a simple project that you can help your child make, under strict supervision of course due to the nature of saws living to cut, wood and or fingers.)  In other words, just be careful with cutting tools.  Enough said, let's get busy with this easy project.


I'm not sure if you can tell from the picture but my inspiration was an empty Gatorade bottle.  It had a couple of things going for it.   It was a nice sturdy plastic bottle, (so it could be cut) and... the orange bottle top which was bigger than a quarter sold me.


Firstt,I designed a pattern that I was going to use.  Everyone should do their own but basically see the cutting pattern below.  These are the 3 pieces you will need.


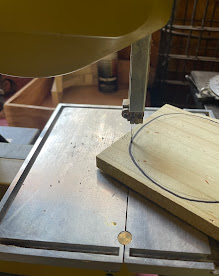
I drew my patterns onto my pieces of scrap wood then took it over to my Proxxon mini bandsaw and cut out the perimeter of all 3 pieces.


Now, for the inside cuts I used my Proxxon professional rotary tool with a small drill bit to make a hole inside the circle I wish to cut out.  Then I passed the scroll saw blade through that hole and reattached it so I could make my inside cut.

Then I used my Proxxon cordless mini belt sander to bevel the edges slightly outward on my inside pieces, so they fit the bottle pretty tight.   I used the Proxxon OZI/E delta sander to smooth all the edges of the wood, (no splinters allowed!)


Its a good time to paint the pig parts.  🐷🐖  I used Plaid paints because they have the best colors.


I used my Proxxon professional rotary tool with a cutting wheel to cut a slit in the top of my bottle.  This is where everyone is invited to stuff coins, and or paper cash.!


Next Glue the cap of the bottle the front part to the pig.  Be careful not to glue the piggy parts to the body of the bottle.   (To get our money out we are going to untwist the nose).


I'ts done, if you want, put a squiggly tail on him--or not

I painted him at this point, but hopefully you painted him earlier.  It's a lot easier before it is together. 


It[s been a lot of fun,  Thank's Proxxon, and Thank you for visiting!

Catch ya next time..   Carol

Thursday, June 2, 2022

How to Make a 3-D lion puzzle

 Hi out there, hope you are feeling well and ready to begin a new project. Today we are going to make a beautiful puzzle that is also decor for around the house.


Equipment and supplies
Nice piece of wood approx 1/2" thick
carbon paper, pencil 
sealer of your choice
wood glue

   Got my inspiration from someone who had done a horse.  Not wanting to copy exactly, I made a lion.   I drew out my own design.  This was my first drawing but I did not take into account that the pieces are up in the air and so they better lock well with each other.  I did sneak in a rock to help support him also.


Using carbon paper, I transferred my design onto my wood piece. I had a nice piece of black walnut to work with.


The next step is to cut out the design.  Proxxon mini scroll saw does the work easily.  First cut out the design outline as one piece.


Next, carefully go in and cut apart the puzzle pieces.   This is delicate so I used the slow speed on my Proxxon mini scroll saw.  This helps me make the delicate cuts.  Keep in mind they need to interlock well.

Now, we sand, sand, sand.  I want to take off the edges, so they are rounded and smooth.  This will show off the puzzle effect I am going for.   I used the Proxxon OZI/E delta sander and the Proxxon cordless mini belt sander to do the job.  


To make a base to stabilize the lion, I cut a piece of wood approx 2" x 5" and I made a slot for the lion's back foot and rock piece to fit in.  This just adds stability.  I am going to use the Proxxon mini table saw for this.


I set the saw blade at about 1/4" height and I set the fence about 1" from the saw blade and run the base piece over the blade.  It is not wide enough to insert the lion piece yet so I move it just the tiniest bit either way and run those boards through it again. I do this several times until my piece will fit snuggly into the slot  Then I glued the bottom piece in


I used some polycrylic to seal the wood which also gave it a slightly darker tone that I really liked.

Uh oh.... then I ran into some trouble.  My puzzle would not stand.  The small little forefoot of the lion kept slipping so....Using the Proxxon professional rotary tool. I drilled a hole right through his foot and into the stand and inserted a small skewer stick.  That held it.  Yay.   

Then the rest of the lion could be assembled and if left unbumped would stay together.    psssst.... the polycrylic also helped by filling in the kerf lines for a snugger fit.  


All done.   See how I changed the skewer stick into a magic wand with a little paint and a sparkly bead on the end.  He is a magic lion.  He stands 8" tall.   He has a nice shine and he is sooo smooth to touch.  It's a tactile thing.  And, the more he is played with the smoother he will become.  

Thanks for visiting.   And thank you  Proxxon.  Your tools are awesome and make making things a joy.
Till next time, play safe,
Carol


Tuesday, December 1, 2020

How to make a decorative box for your domino game pieces

 Hi again.    Carol W. here and as promised today we are going to make a decorative box for the dominos we made 2 weeks ago.  This is going to transform our little game into something that can be given as a gift.   I think it turned out well and I enjoyed making it.   Proxxon makes quality smaller tools that are perfect for this sort of project.

Where we left off last time


Let's get our stuff together

Proxxon rotary tool with small drill bit
1/4" wood stock
stain or sealer of your choice
Hardware-2 small hinges, 1 latch set
phillips screwdriver
masking tape
wood glue
small wood clamps, (optional)


Looking back to last time.  We made 28 domino tiles each measuring 1/4" x 2" x 1".
I want to make a box that will hold 4 stacks 7 tiles high.  


 I figure the inside of the box needs to be about 2" high;  width  2- 1/4" and length  about 4- 3/4 "

So we need 2 long sides measuring 4- 3/4 x 2- 1/2"
2 short sides measuring 2-1/2 x 2-1/2"
2 (top and bottom pieces) 4-3/4 x 2-1/2"'


I setup the Proxxon mini table saw with the fence to rip my wood pieces to the proper width then used the miter guide to cut them all to length.      Now I have 6 pieces cut according to the above measurements.

We are going to continue with the Proxxon mini table saw to make some half-lap joints that will help hold our "box" together 

First we must remove the blade guard/splitter.  This is easy and facilitated by a hinged table top.  
Step 1  Remove the small screw from the front of the saw.  It is yellow in color and easily located.  (figure 1),   
Step 2   Lift up the top, there is a locking device that will keep it there. (figure 2) , 
Step 3  Using a short Philips screw driver on the underside, remove the top screw (see figure 3) .   This will release the blade guard // splitter that you can pull off from the top.  Return the table top to it's original position and replace the locking (yellow screw)   You don't want to lose pieces.


Now we are going to work from the top (of the saw) 😀

Lower the saw blade to 1/8" in height  (1/2 the thickness of your wood)

Place the fence 1/4" from the saw blade.   
Run all 4 sides of both long sides and top and bottom  (flat sides down) across the saw blade.  Do Not do the short sides  This will leave a kerf cut 1/4" from the sides.   Now, move the fence just a smidge closer to the blade and run them all through again.   Move it just a little again .... Keep doing that until you have a half lap.   see below


Now we can put it together. I use masking tape to help hold it while I get all the pieces set. Put glue into the half laps. Then it sort of rolls together.    Then I add some clamps.   Check and make sure it is squarish.   when we add the short end pieces that will square it up even more.  I added some clamps to keep it until it dries.  

e


Now we have a closed box.   Let us sand it really smooth using the Proxxon O/ZIE delta sander.   I ended with 240grit.  Note, I used cedar which really lights up when it is sanded well.  


Time to open her up.

I set the fence about 1 " high and 3/4" from the saw blade then simply ran all 4 sides through it to cut the top off. 


Next I used the Proxxon rotary tool to predrill my hardware and added  2 hinges on the back and a latch for the front.


A little stain and we are done.😄

Looks like they fit!


Trust me this is an easy project.   Hard to explain but easy to do.   You can customize any box!!   You ought to give it a try.   AND  don't forget to check out Proxxon tools.  Easy to use, Great for crafts, Not scary.
That's it for today.  I had fun, but I always do!   Thank you Proxxon.   and Thank You for visiting!!!  Leave me a comment.  Let me know you visited!    Please be safe and stay well.   Carol

Thursday, August 20, 2020

How To Make A Wood Carving Using Proxxon Tools And Plaid Paint


Hi friends. Today I'm gonna show you how todo some simple woodcarving using Proxxon tools. I made this Moby Dick. This is part one of two blogs I'm doing for this project. You'll see how I made what you see in this picture today and next month you'll see how I added to it. Follow along with me and I'll show you how I did it.

Thursday, August 13, 2020

How to make a Halloween Pumpkin


 Oh it is hot!   Dog days of summer are upon us.  You know what that means...fall is coming and so is Halloween!!!     I know it's a bit early but with crafting we have to start early.  Today we are going to make a pumpkin.   I was going to say "little pumpkin", but you can make it as big or as little as you want.


Supplies and Equipment/

Wood of your choosing (enough to cut out 8-12  pumpkin ribs) plus 2 circles.   (I used 1/4" birch plywood because mine was going to be a small centerpiece)

Yard scrap (for pumpkin stem)

Wood glue

wood clamps or clothespins if small.

Proxxon mini bandsaw with scroll saw blade or Proxxon mini scroll saw.

Proxxon OZI/E delta sander

Plaid paints and or other embellishments

pencil and tracing paper.


Here is the pattern I started with.  I fit 2 ribs in a small square.   I will need to repeat this pattern 4 or more times to make 8 - 12 ribs.   cut 2 circles in proportion to your rib pieces.


I traced my pattern onto my wood piece then proceeded to cut them out.   I am using the Proxxon mini band saw in the picture below.   It cuts the tightest curves.  I am impressed.  This is the first time I have used this saw blade.   WOW!


I got all my pieces cut, and then I sand them using the Proxxon OZIE delta sander.  I love how it gets into all the curves.  It has adjustable speeds too.   If your cutting is not perfect don't worry.  Pumpkins are very forgiving.


Next comes the part that is a little bit tricky.  If I can do it, you can, it takes just a little bit of patience.   We are going to glue it all together.   Use enough glue.   Let it get just a little bit sticky before you position your piece so it will stick some.    I used clothes pins to hold mine.  

Glue the bottom of the "ribs" to underneath the circle piece  as in the picture below.   Let this dry.   (Note- the tops of the "ribs" are lining up)    I did this 2 at a time and let dry in between.  (takes some finger dexterity)


I glued the second circle to the underside of  the top of the pumpkin.
Then I painted the pumpkin using Plaid paints.  I got my stem ready to go when the paint dries.


All done.   I painted a little egg to sit on the circle.   If I had made my pumpkin a little bigger I would place a candle on the stand.   I plan to make one about 12"-14" tall to sit on the porch this year.

Thanks for visiting.   Thank you Proxxon tools and Plaid paints.   I work with the best!

Catch ya next time.   Take care, and please be safe!!!   Carol