Showing posts with label kid friendly. Show all posts

Sunday, March 3, 2024

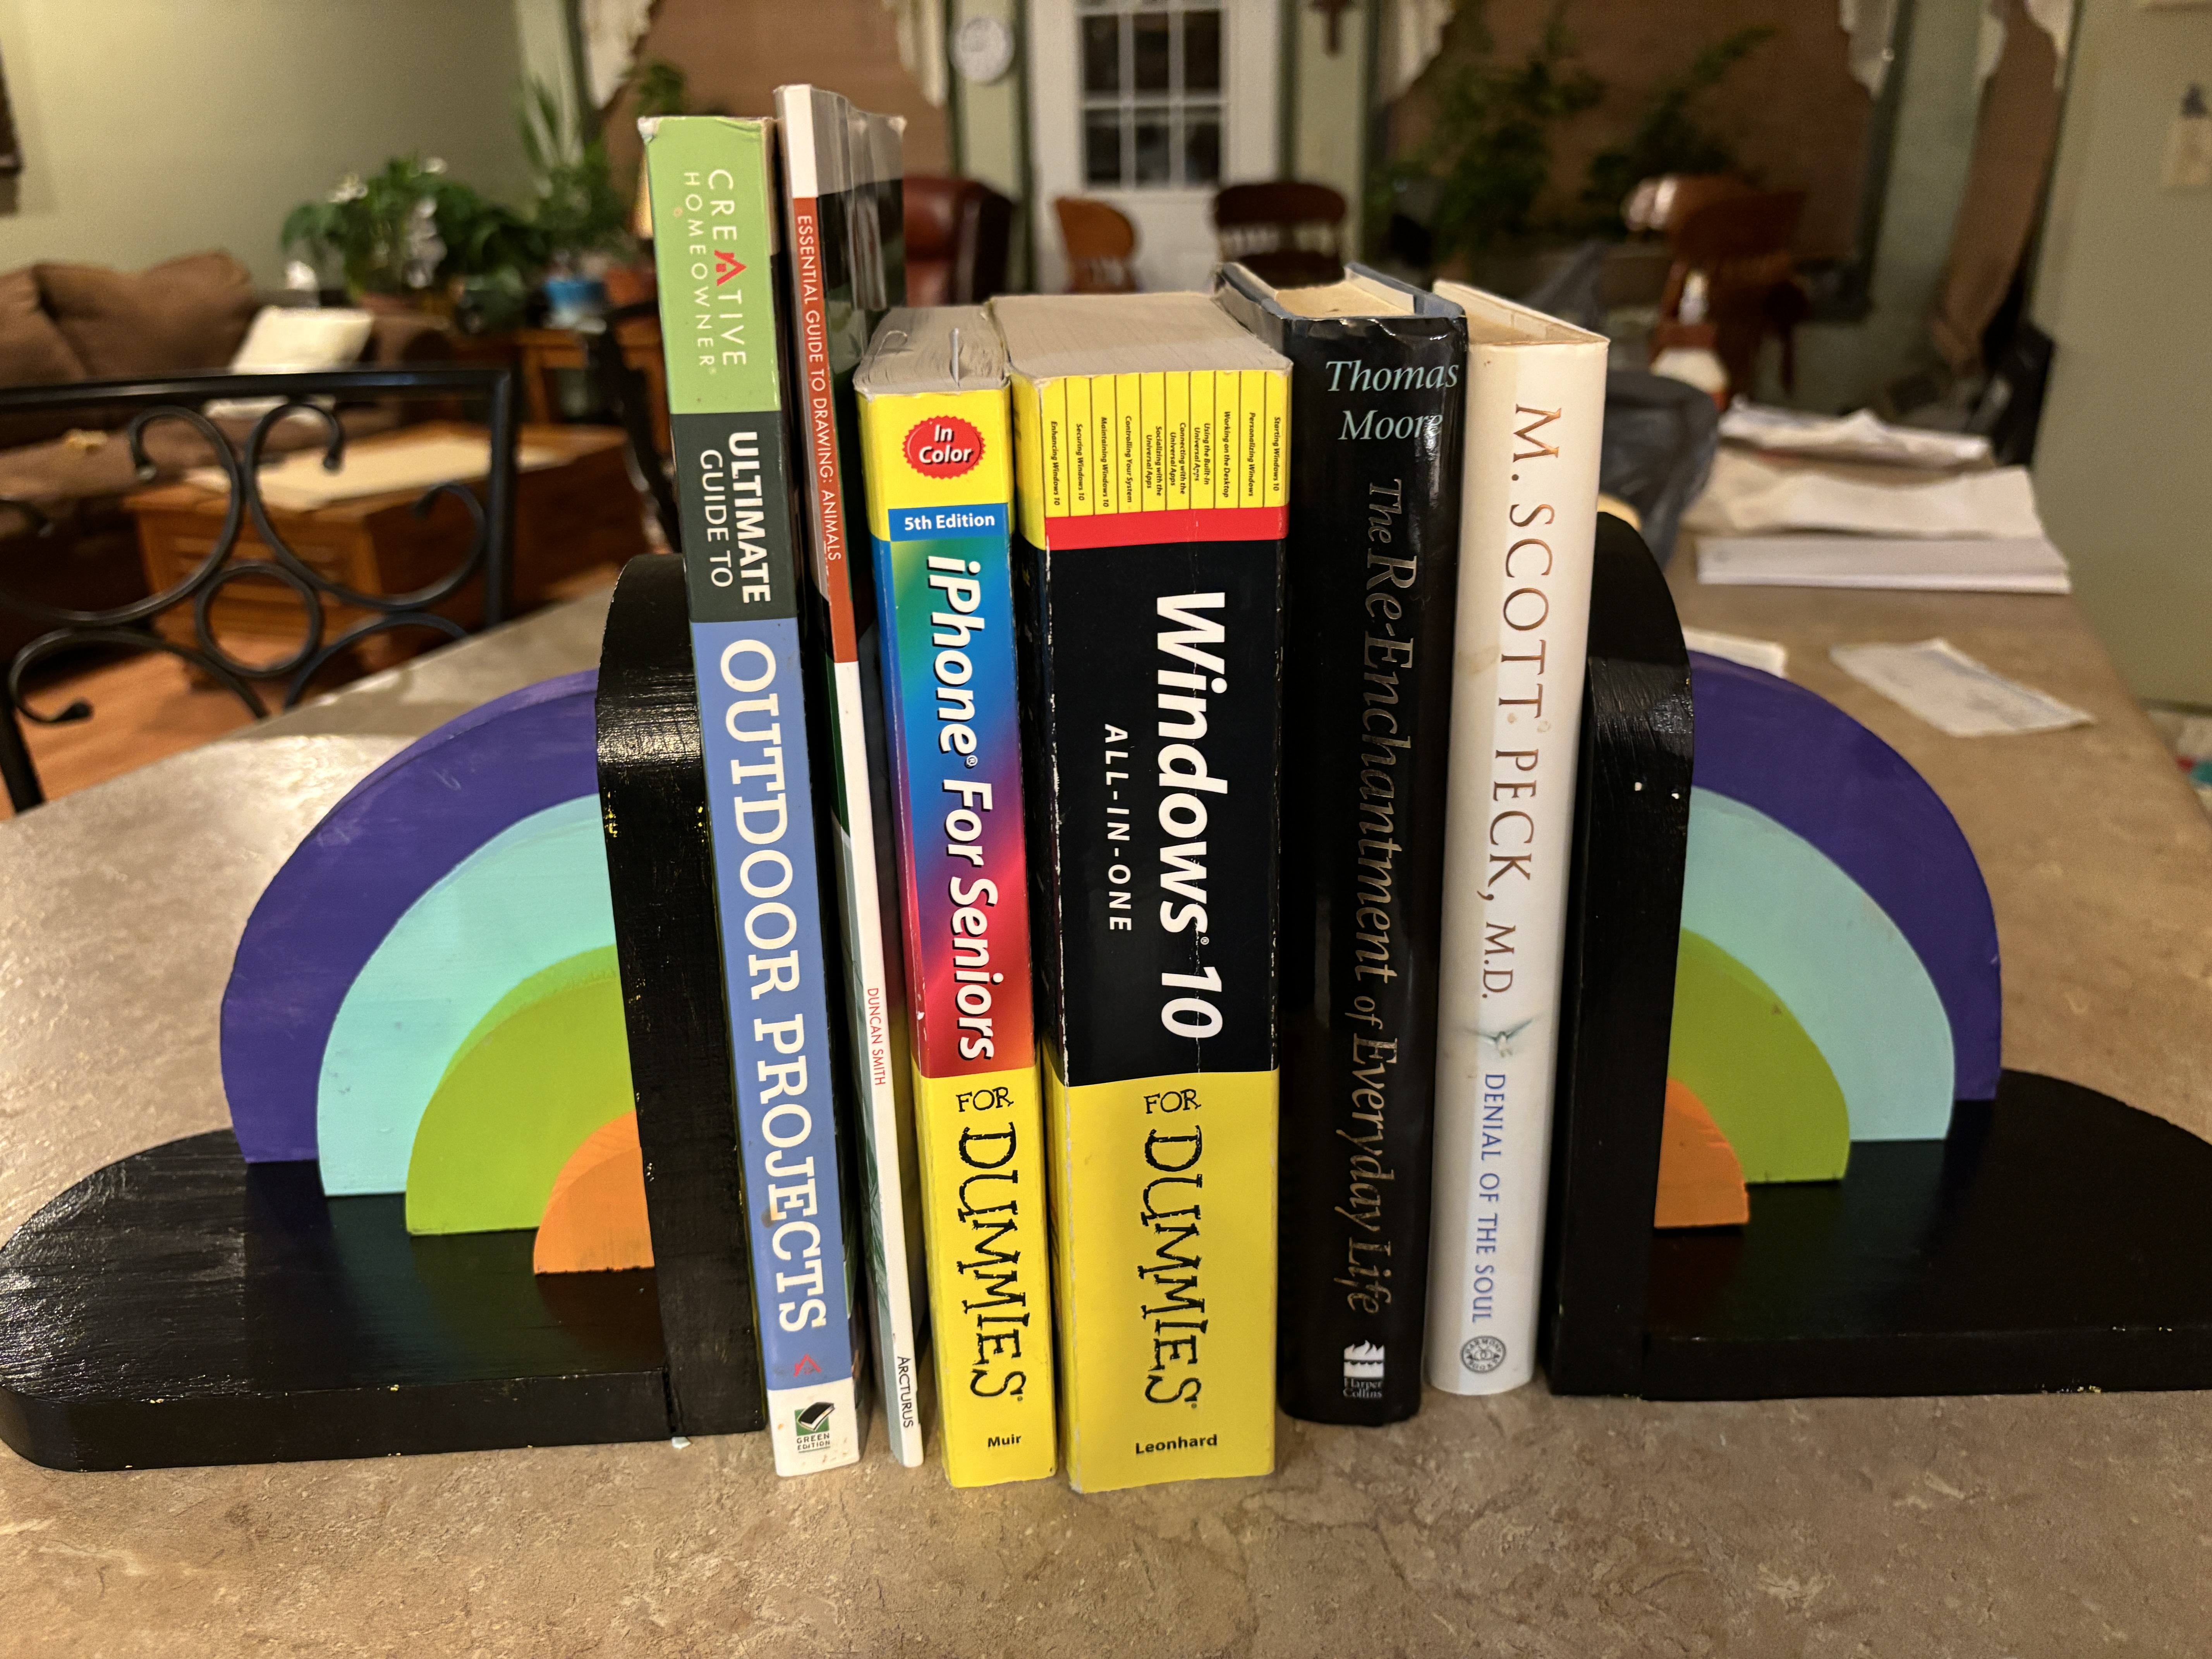
Easy to make bookends

 Hi everyone.  Hope this finds everyone well, and anxious and motivated for a new project. 

I just want to tell you that since it warmed up a little, I have been enjoying my workshop.  But, I didn't know what to make, I had dug out an old board that I knew would work for whatever project I decided on.  Flipping through an artists' journal gave me an idea, so now I will get busy and show you what I made so you can go out and make yourself 1 or 2. This would be great in a toddler's room to hold his colorful books.


I used just one board.  1 x 7 x 48  


First, I transferred my pattern onto my board Then, using my Proxxon mini bandsaw I cut  out all the pieces.  Note if you use the extra narrow band saw blade you can cut out these pieces very easily as it will take tight curves with ease.

After sanding real well, I used some carpenter's glue to glue the basic braces together.  Note:  The longer one is glued to the shorter one so that the sides and the base are of equal length.   When the glue dries I add some nails for added support.  I used the Proxxon cordless rotary tool to pre-drill my holes to avoid cracking the wood.  


Then I sand all the pieces well and proceed to painting. 


]\

Let that get good and dry then glue it up like a rainbow to the base and side pieces.  Drill and add the nails or screws for added support and you're done.  The bookends are heavy enough, so they don't slide.  

It was easy, wasn't it.  Put it anywhere you need a splash of color or to hold those oversized books neatly.

Thanks for visiting!  Check out Proxxon tools next time you get a chance.  Small precision tools are so easy to use.

Saturday, February 3, 2024

How to make a fishing pole rack

       Hi everyone.  Hope your winter is going well.  Groundhog says an early spring and I'm all for it!  I'm ready.  Speaking of spring.  I like to go fishing when the weather is nice, but I hate storing the fishing poles.  Seems they are always getting tangled or falling over or just generally getting in my way in the workshop.  So today when I got them down out of the rafters, I made a little fishing rack with the intentions of keeping them tangle free and ready to go at a moment's notice.  I of course used my Proxxon tools, I find the smaller tools are so convenient to use for these quick projects.


 I used some wood pieces I found in my shop so my measurements might seem arbitrary, probably because they are. 😁 Feel free to shrink or enlarge your project according to your needs. 

Here are the measurements I used.  Enlarge the picture above to read it.

 I used the Proxxon mini table saw to cut all my pieces,  


Then, I used my Proxxon mini scroll saw to cut out the keyholes in the top piece.  My rack will hold 6 poles so I cut 6 keyholes.


I spaced the center of the keyholes 2 1/2 inches apart.


I always use my Proxxon O/ZIE delta sander to smooth all the edges after each cut. Splinters are never wanted.


To prepare the bottom to hold the butt of the fishing rod, I used a drill with a Forstner 1- 1/4 bit to make 1/4" deep holes spaced at center 2-1/4 inches apart.  This just keeps the poles from sliding around on the rack.


Next, I fastened the 3 supports to the side pieces, One at the top, one at the bottom/ and the third in the middle.  I glued and clamped them in place then added screws to strengthen it.  I used the Proxxon rotary tool with a small drill bit to predrill all my holes prior to adding the screws to avoid splitting the wood.


When the glue was dry, I added the top and bottom pieces aligning them perpendicular to the brace pieces; Again, I glued, clamped, and then when it was good and dry I predrilled mu screw holes prior to adding strengthening screws.  


                                                                                                                                                                                                                                                                                                                                                                                                                                                                                                                                                                                                                                                                                               I added the 2 small pieces to the top piece and fastened them down with wing nuts.  They can be loosened to release the poles.                                                                                                                                                       
 I put it all together and hung it temporarily on the wall.  It works great.  I'm going to take it down and paint it, then it will be finished, and I can add my other poles to this collection. 

]\

Proxxon tools made this project super easy.

Now I'm ready for fishing season and won't have to untangle everything first.
I enjoyed this project.  Hope you give it a try too.
Catch you next time   Carol W


00

Saturday, November 4, 2023

How to make a patriotic frame for Veteran's day


Hi folks, Carol here to show you how to make a simple but fun picture frame to celebrate Veterans' Day

Does anybody out there have scraps of wood laying around?   
Who doesn't,  right? 
Ok, we are going to take those little scraps of wood to make our Veteran a special picture frame.  


I started with a long piece of simple pine.  It measured 1 1/2 inches wide by 3/8 inches thick and about 3 feet long.   I'm going to rip it down to 3/8 inches wide so that I can have a perfect square strip.


I use the Proxxon mini table saw to cut my strips of wood.
\

Now I have a long square strip of wood, I need some angles for what I'm doing.  I chose and 8-pointed star so that I could make 45-degree angled cuts that will fit together nicely.   This is so easy using the Proxxon mini chop saw.  I just set the angle to 45 and make my cuts.  I want the lengths to be even, so I use a guide mark where to put the wood for cutting.  I am going to use the edge of the circle to line up my cuts.  If I want a different spot, I might place a piece of tape to guide me.


So, I need 16 identical pieces to form my eight-pointed star.  So easy with the Proxxon mini chop saw.  I love it!


I use the Proxxon disc sander to just smooth the edges.  Use a gentle touch here.  
\
Ok, now glue 2 pieces together to form a >   8 times.  Let it dry good.

I use Titebond glue.  I use the premium for quick setting and ultimate for stronger set.  For this project I used the Premium because I'm a little impatient. 😁  

To hold things really well I added toothpicks.

\Using the Proxxon cordless mini rotary tool I drilled a hole through both pieces and stuck a toothpick in it.  When it dries, I will break off the toothpicks and sand it smooth. before I paint it. 

Put them all together in a similar manner and you have made a 8-pointed star.  


Ok, I wanted to take it a little further, so I did exactly the same thing only cutting my pieces slightly shorter on the Proxxon mini chop saw.
And then I did it again.    Hmmm 3 starts just beckoned to be red, white, and blue, the colors of our glorious flag.  
I glued it all together and temporarily placed a flag picture in it for Veteran's Day.   I like it, and am going to place it on our door.  


Hope you had some fun, I wanted to show you that no scrap is too small, that you can't make something out of it, using Proxxon tools.  They are the best tools for little projects.  

Thanks for visiting today.  Hope you all have a wonderful Veteran's Day.  Well everyday can be wonderful,,, ENJOY !!    Carol

Thursday, December 15, 2022

How to make a continuous calander

Merry Christmas to all of you.   Hope your all warm safe and with family and friends.

 The days have flown by, and it is soon to be another new year.  What do we need to do?   Oh yeah, we do need a new Calander, don't we?   Every year.   I have a solution, we can make a Calander to last forever and it's easy, and kind of cute.   Best of all, everyone has little piece of wood to make it with.  

Not sure if you can see the tiny little Calander in front of the books there, I should have made it bigger.  But it is a little whale.  I made it for a kid's room.   The concept of blocks for days and months can be used to make it into almost anything or any size.  Maybe even an adult something.  

Let's see how easy this is.    I used the following:   A piece of 1" thick cedar that was cut off of a fence rail in the making.  It is about 7" long and maybe 2 1/2"wide.  If your wood is a different thickness you need to multiply your measurements by that number.  (for instance, If your wood is 2" thick make the whale twice as big and the blocks cut out will be 2 x 2 instead of 1x1   The  cut out of his back would be 2 2/3 x 4. etc)  I used 1" wood because 1st of all it was there, secondly it makes the calculations easy.   Here is the pattern below that works for 1" wood.     

The whale is cut out as a whole from the 1" cedar.  I used the Proxxon mini bandsaw to do this. And to cut the 2 vertical parallel cuts (Those should be 1 1/3" deep)


Then I switched to the Proxxon mini scroll saw to make the corners on the squares as it was a little too tight for the bandsaw.   

 The top 1/3" is cut from this piece we just cut out.  This will be the pieces used for the months.   Now after you get that piece it needs to be cut into thirds so there are 3 pieces which are 1/3"  x 1/3" and 2" long. 

 I used the Proxxon mini bandsw,  BUT, that is a little close for the fingers.  I recommend using the Proxxon mini scroll saw.    Now cut the remaining rectangle in half.  This gives you (2)  1" x 1" pieces.  These will be the days.

Now it is time to sand this pretty cedar wood.  

I used the Proxxon OZI/E delta sander for most of it.  


And the Proxxon cordless rotary tool to drill some eyes

I sanded the parts really well and then I wrote the numbers on them.    You need to know which numbers to put on the cubes.   On the first cube put the numbers 0-5.  On the second cube put the numbers 0,1,2,6,7,8,9.  Now you can make any number from 01-31
On the long skinny pieces write you months.

If I did it again, I would glue (2) 1" thick whales together and make it twice as big.  Also make sure you get a pen that won't run when you apply finish.  Or better yet wood burn those numbers and months in.  Then stain it or paint it.  
This thing is All done.   


I picked a warm day on purpose! 

It's been fun, sure glad you visited, and give this one a try.  It's a super easy one and let the kids help with the math. 

 
Take care everyone and have an awesome New Year!
See ya all next year...........Carol


Thursday, December 1, 2022

How to make a little wooden Christmas deer

 Hi folks,  I know you have all seen them, and they come in multiple shapes and sizes, but I am going to give you step by step instructions on how to easily make them.  Make one,or make a dozen.   You guessed it we are going to make that cute little stand-up deer.


Equipment and Supplies
Piece of thin wood large enough to cut all your pattern pieces.  1/8" to 1/2" thick
tape, pencil, carbon paper
wood sealer lacquer, varnish or paint.

Ok, let's get started on this quick, easy, kid friendly, project.

I will tell you how I did it.

1.  First thing I did was to make myself a pattern.  Simply draw a deer the size you want on paper.
The legs and antlers will go on east to west and the body will be north to south.   In other words look how it is put together.  You need little slits to slide the legs into and the antlers on.   See my drawing and you will get the picture.
  

2.  Next I transferred my pattern onto the wood I chose.  **just a note watch which way the wood grain runs and try to have the skinny legs run with the grain.   Some woods\, especially cedar will come apart at the wood grain when you cut across them on small pieces**

I used carbon paper to transfer my pattern.


3.  I used the Proxxon mini scroll saw to cut out my patterns.


4.  I sanded everything using the Proxxon OZI/E delta sander.   Love that tool.  It gets into places other sanders couldn't.


5.  Finish them off with sealer, paint, or varnish 
and they are almost done.

6.  Slip the legs into the slots.   Slip the antlers on, and they are done.  So easy you can make a dozen.  And....you can make them any size, simply draw the pattern bigger or smaller.

Here is one in cedarandaand this one is an oak veneer.  

Well, that is it.   It was fun and very quick.  I hope you enjoyed it.  It's not original but it was my drawing.    Be safe and come back.  Thanks for visiting.   Thanks, Proxxon, great company!  

till next time.......Carol