Showing posts with label easy wood patterns. Show all posts

Thursday, May 6, 2021

How to make a sliding chicken toy

 Hi everyone.   I was recently looking at an old magazine and got inspired by some vintage paper projects they were showcasing.  The patterns were made to be cut out of some sturdy paper, and kids could color them with crayons or paint and then play with them.   Thinking to myself,  I could make some of these using Proxxon tools and thin wood.  Not sure if kids would play with them as they are not very modern or techie, but I know for sure, that I would have fun making them.  

Equipment and supplies

Proxxon mini scroll saw, or Proxxon mini bandsaw, or both if you are really blessed.  😀

Proxxon OZI/E delta sander plus plunge saw blade     

Proxxon mini drill press

1/4 inch plywood scraps

short length of 1/8" dowel       

Plaid paints             


To get started make a copy of this picture, enlarge or reduce it to the size you want.  The second picture is another pattern of a mama bird feeding her babies.


Transfer the design pieces onto the plywood scraps
Before cutting out the pieces use you Proxxon mini drill press to drill 1/8"  holes into the  designated areas  (A,B,C.D)  Doing this first will hopefully keep the thin wood from cracking near the edges.

OOPs, I took a picture of the mama bird from the other pattern.  (Pretend it is a baby chick)😏


 then cut them out using either the Proxxon mini bandsaw or the Proxxon mini scroll saw.   I love my Proxxon bandsaw but I believe this is better done on the Proxxon mini scroll saw.


Sand them all good with the Proxxon OZI/E delta sander  


We  need to make a little slot in the chick where we will place his wings.  

I used the cutting blade on the Proxxon OZI/E delta sander to make my slot and it worked really well.  When the slot was finished I inserted the wings.


Grab the kids and let's paint.  Use plaid paints and you will not be disappointed!
While the paint dries....
Cut 4 dowel pieces approx 1" long. 

Next we just put it all together

Insert the first dowel into the  hole marked A in the bird and the A- hole of the slider.
Do the same with B, C , and D.
Gently pull the slider back and forth to see the birds dip their beaks into the water trough.  

Wasn't that fun?   I hope you enjoyed it, I did.

Thanks you for visiting!!

Thank you Proxxon tools!  Smaller precision tools make crafting so easy and relaxing.

Carol


.  


Tuesday, December 1, 2020

How to make a decorative box for your domino game pieces

 Hi again.    Carol W. here and as promised today we are going to make a decorative box for the dominos we made 2 weeks ago.  This is going to transform our little game into something that can be given as a gift.   I think it turned out well and I enjoyed making it.   Proxxon makes quality smaller tools that are perfect for this sort of project.

Where we left off last time


Let's get our stuff together

Proxxon rotary tool with small drill bit
1/4" wood stock
stain or sealer of your choice
Hardware-2 small hinges, 1 latch set
phillips screwdriver
masking tape
wood glue
small wood clamps, (optional)


Looking back to last time.  We made 28 domino tiles each measuring 1/4" x 2" x 1".
I want to make a box that will hold 4 stacks 7 tiles high.  


 I figure the inside of the box needs to be about 2" high;  width  2- 1/4" and length  about 4- 3/4 "

So we need 2 long sides measuring 4- 3/4 x 2- 1/2"
2 short sides measuring 2-1/2 x 2-1/2"
2 (top and bottom pieces) 4-3/4 x 2-1/2"'


I setup the Proxxon mini table saw with the fence to rip my wood pieces to the proper width then used the miter guide to cut them all to length.      Now I have 6 pieces cut according to the above measurements.

We are going to continue with the Proxxon mini table saw to make some half-lap joints that will help hold our "box" together 

First we must remove the blade guard/splitter.  This is easy and facilitated by a hinged table top.  
Step 1  Remove the small screw from the front of the saw.  It is yellow in color and easily located.  (figure 1),   
Step 2   Lift up the top, there is a locking device that will keep it there. (figure 2) , 
Step 3  Using a short Philips screw driver on the underside, remove the top screw (see figure 3) .   This will release the blade guard // splitter that you can pull off from the top.  Return the table top to it's original position and replace the locking (yellow screw)   You don't want to lose pieces.


Now we are going to work from the top (of the saw) 😀

Lower the saw blade to 1/8" in height  (1/2 the thickness of your wood)

Place the fence 1/4" from the saw blade.   
Run all 4 sides of both long sides and top and bottom  (flat sides down) across the saw blade.  Do Not do the short sides  This will leave a kerf cut 1/4" from the sides.   Now, move the fence just a smidge closer to the blade and run them all through again.   Move it just a little again .... Keep doing that until you have a half lap.   see below


Now we can put it together. I use masking tape to help hold it while I get all the pieces set. Put glue into the half laps. Then it sort of rolls together.    Then I add some clamps.   Check and make sure it is squarish.   when we add the short end pieces that will square it up even more.  I added some clamps to keep it until it dries.  

e


Now we have a closed box.   Let us sand it really smooth using the Proxxon O/ZIE delta sander.   I ended with 240grit.  Note, I used cedar which really lights up when it is sanded well.  


Time to open her up.

I set the fence about 1 " high and 3/4" from the saw blade then simply ran all 4 sides through it to cut the top off. 


Next I used the Proxxon rotary tool to predrill my hardware and added  2 hinges on the back and a latch for the front.


A little stain and we are done.😄

Looks like they fit!


Trust me this is an easy project.   Hard to explain but easy to do.   You can customize any box!!   You ought to give it a try.   AND  don't forget to check out Proxxon tools.  Easy to use, Great for crafts, Not scary.
That's it for today.  I had fun, but I always do!   Thank you Proxxon.   and Thank You for visiting!!!  Leave me a comment.  Let me know you visited!    Please be safe and stay well.   Carol

Friday, January 24, 2020

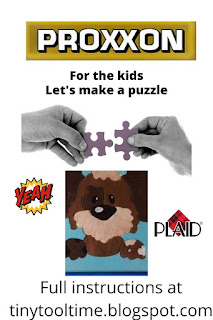
How to make a puzzle from any design

Hi folks!!!   Glad you stopped by.   Today I have a treat for the kids, but it is also a treat for the "maker" in the family.  This is a super easy and creatively fun project, that you can customize to any age group and/or any special interest.
Proxxon

                                                   Here is what we are going to make today.  I chose a simple pattern for a young child.

Materials needed

2 pieces of 1/4"  to 3/8"  thick wood  The backing piece of the puzzle should be slightly larger than the front piece which will create a border (if you desire)

My back sheet measured 12 1/4 x 11 1/2"    My front measured 11 1/4 x 10 1/4"

You can make your puzzle larger or smaller!  😁

Wood glue.

Plaid paints of your choosing.


I used burnt umber, nutmeg brown, golden brown, 
black, spring white, bright blue and cloudless

Krylon Crystal clear sealer.

Proxxon mini scroll saw.


Proxxon mini table saw.


Proxxon OZI/E delta sander.


Proxxon scroll saw           Proxxon OZI/E delta sander.


  Let's get started.  


The first thing I did was to choose my pattern, then I cut my wood to size using the Proxxon mini table saw.  


Next, I painted my back board with Plaid paints "bright blue" color.  Wow this is a really bright blue and I am sure it will please the kids.  


While that dries I use some carbon paper and get my pattern transferred onto my other, smaller board.


After I cut out my puzzle pieces I will still need the outer piece of this front piece so I must make an "inside cut" using the proxxon mini scroll saw so that my border remains in one piece.  I do this by drilling a small hole in an inconspicuous place and thread my scroll saw blade through the hole and then reconnect it to the saw.    I am now ready to cut out my pattern.  This is so easy with Proxxon's mini scroll saw.  I just followed the lines I drew and cut out all the pieces.  To get my remaining piece out, (the border), I release the scroll saw blade and slide my piece out.    Now I have the puzzle pieces for the dog and an outer border piece.


I want my border piece to be a different shade of blue that will go with the bottom piece.  I chose cloudless by Plaid paints and paint the entire border this color. (not shown).  When it is dry I glue it to the bottom piece with wood glue and clamp it until it is good and dry.  I used a scrap piece of wood on top to provide even pressure.  


, Next, it is on to the pieces.   Each one needs a thorough sanding using the Proxxon OZI/E delta sander.   No one likes splinters.   This tool makes it so easy to get into the curves.  It has multiple speeds you can adjust with a dial.  Also it is so easy to change the sandpaper because it has hook and loop fastner, (velcro), so even after removing a piece it can be put back on later!.   I started with 80 grit paper because I wanted to round over the bottom edge of the pieces.  This just makes it easier for the child to slip the pieces together.   I then switched to 150 grit for the final sanding.


I painted all the pieces using Plaid paints.   I finished them off with a coating of Krylon crystal clear sealer.


Looking at my pieces I noticed a piece that had some skinny sides and was somewhat sharp.  A brilliant idea 💡 hit me that I should glue that to the back of the puzzle so that would give the kids a starting point AND it would keep that piece from being broken or hurting anyone.  💡.   So I glued it in place.  


Puzzle is done!!  Wasn't that fun and so easy.


 Hope you had fun and are gonna give it a try.   I thank you sooooo much for visiting.   Hope to see you back next time.  Carol


Thanks to Proxxon tools and Plaid paints............so much fun to play with!!!