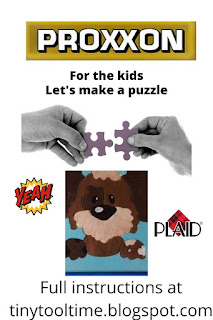

Here is what we are going to make today. I chose a simple pattern for a young child.
Materials needed
2 pieces of 1/4" to 3/8" thick wood The backing piece of the puzzle should be slightly larger than the front piece which will create a border (if you desire)
My back sheet measured 12 1/4 x 11 1/2" My front measured 11 1/4 x 10 1/4"
You can make your puzzle larger or smaller! 😁
Wood glue.
Plaid paints of your choosing.
black, spring white, bright blue and cloudless
Krylon Crystal clear sealer.
Proxxon mini scroll saw.

Proxxon mini table saw.
Proxxon OZI/E delta sander.
  |
Proxxon scroll saw Proxxon OZI/E delta sander. |
Let's get started.
The first thing I did was to choose my pattern, then I cut my wood to size using the Proxxon mini table saw.

Next, I painted my back board with Plaid paints "bright blue" color. Wow this is a really bright blue and I am sure it will please the kids.

While that dries I use some carbon paper and get my pattern transferred onto my other, smaller board.

After I cut out my puzzle pieces I will still need the outer piece of this front piece so I must make an "inside cut" using the proxxon mini scroll saw so that my border remains in one piece. I do this by drilling a small hole in an inconspicuous place and thread my scroll saw blade through the hole and then reconnect it to the saw. I am now ready to cut out my pattern. This is so easy with Proxxon's mini scroll saw. I just followed the lines I drew and cut out all the pieces. To get my remaining piece out, (the border), I release the scroll saw blade and slide my piece out. Now I have the puzzle pieces for the dog and an outer border piece.


 I want my border piece to be a different shade of blue that will go with the bottom piece. I chose cloudless by Plaid paints and paint the entire border this color. (not shown). When it is dry I glue it to the bottom piece with wood glue and clamp it until it is good and dry. I used a scrap piece of wood on top to provide even pressure.
,  Next, it is on to the pieces. Each one needs a thorough sanding using the Proxxon OZI/E delta sander. No one likes splinters. This tool makes it so easy to get into the curves. It has multiple speeds you can adjust with a dial. Also it is so easy to change the sandpaper because it has hook and loop fastner, (velcro), so even after removing a piece it can be put back on later!. I started with 80 grit paper because I wanted to round over the bottom edge of the pieces. This just makes it easier for the child to slip the pieces together. I then switched to 150 grit for the final sanding.
 Next, it is on to the pieces. Each one needs a thorough sanding using the Proxxon OZI/E delta sander. No one likes splinters. This tool makes it so easy to get into the curves. It has multiple speeds you can adjust with a dial. Also it is so easy to change the sandpaper because it has hook and loop fastner, (velcro), so even after removing a piece it can be put back on later!. I started with 80 grit paper because I wanted to round over the bottom edge of the pieces. This just makes it easier for the child to slip the pieces together. I then switched to 150 grit for the final sanding.

I painted all the pieces using Plaid paints. I finished them off with a coating of Krylon crystal clear sealer.
Looking at my pieces I noticed a piece that had some skinny sides and was somewhat sharp. A brilliant idea 💡 hit me that I should glue that to the back of the puzzle so that would give the kids a starting point AND it would keep that piece from being broken or hurting anyone. 💡. So I glued it in place.

Puzzle is done!! Wasn't that fun and so easy.

Hope you had fun and are gonna give it a try. I thank you sooooo much for visiting. Hope to see you back next time. Carol
Thanks to Proxxon tools and Plaid paints............so much fun to play with!!!
4 comments:
This is a great idea. Any child would love one of these.
Carol I think this is adorable and a perfect
first puzzle for a toddler. Was smart gluing in the
started piece. Any toddler would love it I Am sure,
Babies love animals.
Keep up the functional blogs. Good Work.
Misty
What an adorable project. it's perfect for kids.
great job I know some kids that would real enjoy playing with this bj
Post a Comment