Showing posts with label decoration. Show all posts

Saturday, March 15, 2025

Make the Perfect Rabbits and Flowers Spring Decoration Using a Proxxon Scroll Saw

Spring is in the air, and what better way to usher it in than with this rabbits and flowers decoration. This is a great scroll saw project to get comfortable with interior cuts.


Here are the supplies and equipment that you'll need: 

Instructions:

  1. Download and print the Rabbits and Flowers Template. Mount the pattern on the wood blank. Cover one side of the blank with painter's tape. Mist the back side of the pattern with spray adhesive, and mount on the taped blank. The painter's tape made removal of the pattern easy without leaving any sticky residue.

  2. Cut the exterior lines of the pattern using the bandsaw mounted with the scroll saw band. This band is very narrow and capable of extremely tight cuts. Alternatively, these lines can also be cut using the scroll saw.

  3. Drill pilot holes for the interior cuts using the bench drill press.

  4. Thread the scroll saw blade through the pilot holes and cut the interior shapes using the scroll saw.

  5. Sand any rough edges. The flexishaft mounted with a sanding drum and the pen sander are perfect for sanding the inner edges and tight spots.

  6. Coat the decoration with your choice of finishes. I used two coats of white gesso, then stippled a coat of sage green acrylic paint.

Carole

Sunday, January 21, 2024

How to Make the Perfect Valentine's Day Country Chic Peg People Decoration

I'm never without holiday decoration since they are so easy and fun to make with Proxxon MICROMOT tools. With Valentine's Day right around the corner, these Country Chic Valentine Peg People are just right for the day.


Here are the supplies and equipment I used:

Let's make the Valentine Peg People:

  1. Cut the body blanks to length using the bandsaw or table saw. Mine are 6" and 5¼" long.

  2. Cut two ¾" lengths of 1" dowel for heads. These need to be as long as the body blank is thick.
  3. Mark the center of the end of the body blanks.

  4. Mark the center of the height of the dowel heads. Use the rotary tool with the flexishaft to drill ~½" hole in the bodies and heads.

  5. Cut the heart from the 2" x 2" x 1/8" blank using the scroll saw. Cover one side of the blank with painter's tape. Mist the back side of the pattern with spray adhesive, and mount on the taped blank. The painter's tape makes removal of the pattern easy without leaving any sticky residue. 

  6. Sand the edges of all pieces using the Delta sander. I use the Delta sander mounted in the Precision Vice FMZ so both hands are free to manipulate the piece I'm sanding.

  7. Apply the finish of your choice and let dry thoroughly. I painted mine with acrylic paints.

  8. Cut 1" pegs from the 1/8" dowel for attaching the heads to the bodies with liquid wood glue.

  9. Tie the peg couple together with twine and glue the heart on top of the twine.
  10. Enjoy your Country Chic Valentine Peg People!!

Carole

Sunday, January 20, 2019

How to Make a Rustic Snowman Decoration

The holidays may be over, but for us, it's still winter. And for me that means winter-themed decorations. Here's a sweet rustic snowman decoration that is sure to melt your heart. This is the perfect beginner project for getting to know to know your Proxxon tools.

Supplies and Equipment for Making the Rustic Snowman

Instructions for Making the Rustic Snowman

  1. Dimensions for this snowman can vary, depending on what scraps you have available. You're only limited by the working tolerances of your machines. My snowman's overall measurements are 4¼" tall x 1" wide x ¾" deep, made with three smaller blocks.
  2. Begin by marking your cutting lines on the scrap lumber.
     
  3. Cut pieces for head, middle body, and bottom body on the bandsaw. Don't be worried about exactness; a few wonky cuts adds character to the finished piece. In fact, you can plan wonky cuts :) The goal is to get comfortable using your tools.
  4. Sand the pieces on the disc sander.
  5. Drill holes on the bottom of the head piece, top and bottom of the middle body piece, and top of the bottom body pieces to accommodate the dowels. These holes don't need to be exactly positioned, but should come close to the center of the piece.
  6. Paint the pieces with a coat of gray acrylic paints, and let dry thoroughly. Next, paint one of two coats of white acrylic, depending on the coverage you get and the look you want. Some of the grey paint shadowing through the white give an even more rustic look. Let paint dry.
  7. Option: Coat the pieces with artists' cement to create texture. Let the cement cry thoroughly.
  8. Sand each piece using the Delta sander. How much you sand and expose the grey paint and the base substrate will determine how rustic your snowman will be. Remember: you can also sand more.
  9. Use a strong liquid adhesive to secure the dowels in place. The dowels give added support to keep the pieces together.
  10. Decorate your snowman with a ribbon scarf and buttons. If desired, add facial features with a Sharpie or paint.

Sunday, October 14, 2018

How to Create a Rustic Angel Using Scrap Wood

This rustic angel decoration not only uses scraps of wood, but is a great beginner project. It's great for learning to use the band saw, scroll saw, and disc sander.

Supplies and Equipment for Making the Rustic Angel

Instructions for Making the Rustic Angel

  1. Cut MDF or wood pieces to size using the band saw.
  2. Print the angel body and wing patterns and adhere to wood pieces. 
  3. Cover the substrate with painter's tape; spray the reverse side of the pattern with spray adhesive; mount the pattern onto the covered substrate. The adhesive holds the pattern in place, and the painter's tape makes removal easy.
  4. Cut the straight sides of the angel body on the band saw—up to where the shoulders begin to curve.
  5. Complete the curved parts of the angel body on the scroll saw. Cut out the angel wing using the scroll saw.
  6. Sand any rough edges using the disc sander or the Delta sander.
  7. Paint both the body and wing pieces with FolkArt Painted Finishes Barnwood.
  8. When the paint is thoroughly dry, glue the wing to the body using Rapid Fuse Wood Adhesive.
Carole

Sunday, September 16, 2018

How to Make a Santa and Stars Christmas Decoration

It's never too early to start making Christmas decorations, and this rustic Santa and Stars in a great beginner project.

Supplies and Equipment for Santa and Stars Decoration

Instructions for Santa and Stars Decoration

  1. Using the pattern as a guide, measure and mark the cutting lines for the Santa.
  2. On the ¾" side of the lumber, mark the hole for the wire on the top of the Santa and the smaller star. Mark the hole for the wire on the top of the larger star.
  3. Using the professional rotary tool, drill these holes for the wire before cutting the top angles.
  4. Using the band saw, cut out the Santa.
  5. Cover the lumber with painter's tape. Spray the reverse side of the patterns with spray adhesive. Mount the star patterns on the lumber. Alternatively, trace the star patterns in pencil. Cut the stars either on the band saw or the Proxxon Scroll Saw DS 460.
  6. Drill he remaining hole for the wire on the bottom of the Santa and the bottom of the larger star.
  7. Sand any rough edges using the disc sander.
  8. Cover all the pieces with a coat of gesso.
  9. Use air dry clay to make a small ball for the nose, or use a small bead. 
  10. When clay nose and the gesso are thoroughly dry, paint the stars with Glitterific paints, and paint the Santa and his nose with acrylic paints. Use artist's cement for the beard and hat trim to add dimension. Alternatively, paint these areas with acrylic paints. 
  11. When the paints are dry, glue the nose in place with liquid adhesive.
  12. Use the Coiling Gizmo to make a coil of wire.
  13. Gently pull on each end of the wire coil to open the coils. Cut into three sections, and glue each section into the pre-drilled holes using DAP Rapid Fuse.

Carole

Sunday, August 6, 2017

How to Make Five Pointed Patchwork Star

This five pointed patchwork star is such a versatile pattern. It can be used as a decorative piece, a coaster, or a trivet depending on the size you make it. There are also many decorating options depending on how you paint it. How about red, white and blue for a patriotic theme? Or, each point a different color to resemble a quilted star? Silver and white tones would be perfect for wedding decorations. Of course, gold metallics are ideal for Christmas ornaments and display pieces.
Finished Five Pointed Patchwork Star

Supplies and Equipment for Making the Five Pointed Patchwork Star

Instructions for Making the Five Pointed Patchwork Star

  1. Cut out star point pattern. You can vary the size of the star by reducing or increasing the size. I recommend cutting the template out of substantial cardstock or acetate so it maintains its shape through multiple tracings.
  2. Trace the template onto your wood. I traced a column of star points the entire length of my piece of MDF.
    Template and Pattern on MDF
  3. I used the table saw to cut the column of star point patterns. Here you can see that I'm adjusting the blade height to be just above the thickness of the MDF.
    Setting Saw Blade Height
  4. I moved to the band saw to cut out the star points. Note: This could also be done on the scroll saw.
    Cutting Shapes on Band Saw
  5. Drill the holes for attaching the star points to one another using the Professional Rotary Tool and Drill Stand. I used a 1/8" HSS twist drill bit with brad point.
    Drilling Holes
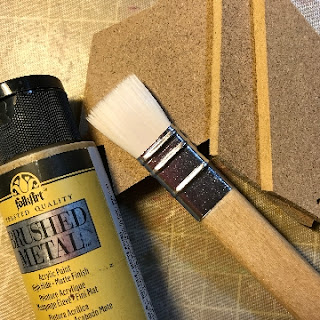
  6. Paint each star point. I used FolkArt Brushed Gold Brushed Metal Acrylic Paint.
    Painting Star Points with FolkArt Brushed Metal Acrylic Paint
  7. When the paint is dry, glue the star points together with wood glue. This step is not absolutely necessary, but it does give the finished patchwork star extra strength.
    Gluing Star Points Together
  8. With wire cutters, cut the brass wire into 1½" lengths. Note: If you increase or decrease the size of the star point template or the thickness of the wood, you will need to adjust the length of the brass wires. Bend the brass wires to form a U-shaped staple.
    U-shaped staple formed from brass wire
  9. When the glue is dry, working from the front of the star insert a staple into holes on adjacent star points. 
    Inserting staple in adjacent star points
  10. Holding the staple in place, turn the star over and flatten the ends.
    Flatten staple on reverse side of star
Your five pointed patchwork star is complete—ready to be a used as a decoration, an ornament, or a trivet.
Five Pointed Patchwork Star Trivet