Showing posts with label Plaid Ultra Dye. Show all posts

Wednesday, December 19, 2018

Oh Christmas Tree

Hi everyone, Steph Ackerman here with a Christmas Tree to share.    Who doesn't love decorating for Christmas?  Using assorted tools, you can create an amazing decorative element that is perfect for smaller spaces. 


Supplies:
Proxxon Scroll Saw
Proxxon Bench Drill Press
Plaid Ultra Dye

 I began by drawing the pattern on plywood, then used the Scroll Saw to cut the pattern.


I painted the tree with white paint then used the Bench Drill Press to drill holes around the tree for Christmas lights.


To create texture, I adhered gauze to the tree, then painted with Plaid Ultra Dye.


 I had to redrill some of the holes that I covered with the dyed gauze.


 Then I inserted lights from behind.


Thanks for stopping by.


Wednesday, June 20, 2018

4th of July SIgn by Steph

Hi everyone, Steph here to share a new 4th of July sign created with my Proxxon Tools.


Supplies:

I drew the design I wanted to cut on a piece of wood, then used the Scroll Saw to cut the design.  Next I used the Bench Drill Press to drill a hole in the top.


Once cut, I used the Delta Sander to smooth out the panel.  With it's angled head, it was easy to get into the little crevises.


Then I had fun decorating it.  I painted it with Plaid Ultra Dye in Infra Red, a beautiful color.  With it's rich color, I only needed one coat of dye.  Next, I cut Canvas Corp. 4th of July paper to fit the center panel. I matted it with cardstock, then adhered it to the panel.


Next, I die cut fireworks and sparklers and added them in place.


Then I die cut USA to fit across the panel.


Finally I added some jute and the sign was ready to hang.

What do you think?

Thanks for stopping by.

Steph


Wednesday, December 6, 2017

Christmas Joy

Hi everyone, Steph Ackerman here today with a fun new Christmas sign I've created for my home this season.   It was easily created with the help of some amazing Proxxon Tools.  And with Christmas just a few weeks away, it's a great addition to my home's seasonal décor.


Using a plate as a template, I drew an ornament shape on plywood and just free handed the top of the ornament.


I used the Proxxon Jigsaw to cut out the ornament.


Once theornament was cut, I used the Delta Sander to sand down the rough edges.


Using Plaid Ultra Dye in Infra Red, I painted the ornament using a brush from the Plaid Ultra Dye Brush Pack.  Then I used a stencil with molding paste to create a 3 dimensional design.


Once the molding paste was dry, I replaced the stencil and sprayed on some glimmer mist.


Using the Precision Rotary Tool with a small bit, I drilled several holes in the panel.  I wanted to add some foliage and needed a way of anchoring the foliage in place.


I created a bow using the Bowdabra then tied the bow to the foliage. 


I wrapped thin wire around the foliage and then threaded it through the holes in the ornament.  Although it looks lovely, I felt my ornament needed a little "something".


So I decided to paint the edges of the ornament with Folk Art Brushed Metal Acrylic Paint in Silver.  Then, Joy was die cut from cardstock and Rinea Foiled Paper and added.  Finally, foil was added to the top to finish the ornament look.  


Thanks for stopping by.


Friday, March 17, 2017

Butterflies and Flowers Wall Hanging

Hi everyone Steph Ackerman here and I'm hoping and wishing for Sping.  With the new snowfall we recently got and with more on the way, I wanted to create a wall hanging that would have me thinking of Spring all the time.


I used the Delta Sander to sand a wood plaque I had in my stash.


Next, I added color to the plaque using Plaid Folk Art Ultra Dyes in Emerald City and Turquoise, blending the colors with a baby wipe.  I love how the dyes allowed the wood grain to remain visible after painting with Plaid Folk Art Ultra Dyes.  Originally I placed painters tape around the edges so the colors didn't run over the edges, but I decided to add the same colors around the edges after all.


Using Joy Clair stamps, I stamped a flock of butterflies on the left side of the plaque in black ink.  Then I used molding paste through several different stencils about the plaque.


Once the molding paste dried, I added some large flowers to the corner.  Then I added some butterflies created with Makin's Clay.


Finally I spritzed some Tattered Angels Glimmer Mist for some splotches of color.


The words are also stenciled on the plaque with molding paste.


Have I gotten you in the Spring mood yet? 

Thanks for stopping by.


Friday, February 24, 2017

How to make a cute St Patrick's Day Wooded Wreath

Hello friends. I am here today to show you how I created this cute little wooden St Patrick's Day wreath. This is a some what easy project if you have the right tools.

I started off cutting the wreath out of a thin piece of wood. I used the amazing Proxxon Scroll Saw DSH/E for this. I used a a green marker to draw the outline of the wreath on the wood first and then followed the outline to cut it out. Ok I will admit as I did not take pictures of this but this was my 2nd try. The first one was a little jagged and not what I wanted. That is the beauty of doing this kind of projects you can always do it over. :)
For the middle circle you can use a router to cut it out.  I didn't need to do this because the wood was smooth but if there are any rough edges make sure to sand them.


I grabbed a few different paints for this project. I didn't want a deep green so after digging through my stash I came up with a Milk Paint and Dye. I also used a Gel Medium to add a little more to the paint.  
Because this was a light colored paint I gave this little wreath three coats to cover it completely. 


After it was completely dry I added a few embellishments. These Shamrocks and Letters can be picked up and your local craft store. 
I placed the letters and shamrocks around the wreath. 


I am loving the way this little thing came out. It is perfect to use inside or out from year to year. 
What do you think?


Supplies Used:
Proxxon Scroll Saw DSH/E
Thin piece of ply wood
Embellishments (Letters and Shamrocks) 


Friday, February 17, 2017

Keep Calm and Garden Wood Sign

Hi everyone Steph Ackerman here with a sign that screams of spring.  We have had our fill of snow so it's time to think spring with sunshine and flowers.

I began by sanding a wood sign with the Delta Sander.

 
Next I painted the sign with Plaid Folk Art Ultra Dye in Infra Red.  This dye brushes on so smoothly and easily.


Once dry, I sanded it again to get a more rustic look.
 
 
Next, I created a vase from a paper towel tube using Transparent Paverpol.  Once dry, I painted it with Plaid Folk Art Milk Paint in Jamestown Blue.
 
 
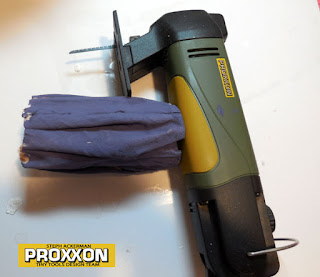
Next, I used the Delta Jigsaw to cut and clean up the edges of the "vase".
 
 
Finally, I added some May Arts ribbon to the top and bottom of the "vase" and adhered it to the sign.
 
 
I created words from left over chipboard letters then randomly stamped flowers from the Joy Clair Stamp set, Paisley Bouquet,  around the sign. 
 
 
A butterfly, created from Rinea Foils, was added atop the vase.  Tattered Angels Glimmer Mists were sprayed over the sign to add a little shimmer as the finishing touch.

 
There is nothing better than seeing the flowers bloom after a long, cold winter.  And this sign is sure to remind me that spring is not far away.
 
Thanks for stopping by.


Monday, February 6, 2017

Happy Valentine's Day Wreath

Hi everyone Steph Ackerman here today with a wreath just in time for Valentine's Day.


I found this wood wreath just sitting on a shelf and knew it would make a great Valentine's Day project.  I began by sanding the wreath and hearts with the Delta Sander.  I love the shape of the sander and the fact that I can get into the tiniest of areas.  I easily sanded the edges around the heart.


Once the wreath was sanded, I used Plaid Folk Art Ultra Dye in Infra Red to paint the hearts.  Once dry, I used the Delta Sander again to distress the hearts a bit.


I marked off the hearts then painted the wreath with Plaid Folk Art Milk Paint in Jamestown Blue.  I love the contrast of colors.


Using the Professional Rotary Tool, I sanded a metal embellishment to distress it.


Next, I used the Cotton Polishing Disc to buff up the metal embellishment before continuing.

 
Then I used Plaid Folk Art Milk Paint in Winter Harbor to paint the metal embellishment.  Distressing the embellishment with the Professional Rotary Tool allowed the paint to easily adhere to the embellishment. 


Next, I spritzed Tattered Angels Glimmer Mist on the embellishment before adding it to the wreath.
 
 
I embellished each wood heart with assorted rub-ons, then used the Cotton Polishing Disc to help burnish the rub-ons in place.


Happy Valentine's Day.


Thanks for stopping by today.