Showing posts with label beginner project. Show all posts

Saturday, February 4, 2023

How to make a little bee house

Well Hi everybody.   Boy has it been cold.  Nothing like a good blast of winter to make me start dreaming of spring.  I'm anxious to plant my garden but I guess since the ground is all white it might be a little early.  But I was reading about bees and how the more the merrier when it comes to the garden.  So, to encourage the little buggers, (I say that fondly), I want to make a bee house.  I read about that too.  Amazing how much reading you can do when the ice outside prevents you from leaving home.  Anyway., bee houses encourage bachelor bees to come to your garden.  These are bees that don't belong to a hive.   I never knew there was such a thing. Live and learn.  So, let's make them a home where they will be happy, and they will pollinate your garden in exchange. 


Equipment and Supplies


First, we are going to make the house.   It's a simple pattern. Use the pattern below to cut your pieces.  I used the Proxxon mini table saw to do most of the cutting for the structure. The table saw always cuts straight and true.


  I assembled the carcass using wood glue and clamps, then I let it dry really good and then added screws for strength.


Note- the back and bottom are inside the sides.

Next, we will dd the roof and secure it well.  By making one roof side shorter by 1/2" there is no need to miter the roof angle.  It is called a butt joint.

Then we want to fill up the front with anything bees will be able to lodge in.  I used bamboo, because I had some.  Anything that will leave spaces a bee can get in should work.   I used the proxxon mini chop saw to cut my little tubes to length which was 3"   I needed a whole bunch of them (30-40) to fill up the house, so I made a little "stop" so I didn't have to measure each one. (see below), I used hot glue to secure them to the frame,

I couldn't resist decorating the top a little bit.

To mount the bee house, I added a thin wooden slat to the back which is long enough to nail to a fence post or tree.    

All done!   Come on spring and come on bees!


Thanks for visiting, come back soon for more!

Thanks Proxxon, I am loving your tools!  Carol W.

Thursday, July 14, 2022

How to make a simple puzzle for a young child


 Hi everybody.  
👨👨👧👧👦👧👦

Today let's make a simple wooden puzzle for the young child.  It is easy and can be customized for that child.  I am going to use simple shapes, but you might want to cut out their name as puzzle pieces or something unique for them I will be using Proxxon tools because they are awesome.


I recently obtained a big piece of plywood that they call "blond wood"   I had never seen it before, but it is a nice 1/2" plywood that comes sanded and primed, so it is smooth on both sides and basically ready for whatever you want to make.  The employee at the hardware store told me it was often used for cabinet making so it is top of the line.  Anyhow it was perfect for this project.   I had them cut my 4' x 8' piece in half at the store simply so I could fit it in the car.  I used a circular saw to cut a strip 6" wide that I can use for this and other projects. 


At the Proxxon mini bandsaw I cut a piece 12" long to be the base of my puzzle.


 Next, I drew some simple shapes.  This is for a very young child.


I need to cut these shapes out, but first I want to drill some holes where I can insert dowels as handles for the puzzle pieces.  So, I did that with a regular drill with a bit that was the same diameter as my dowels.


Now I want to cut out the pieces, but I don't want to cut inside the pieces, so I used the Proxxon cordless rotary tool with a very small bit and made a tiny opening in the line I am about to cut.   


I will thread the scroll saw blade through that hole and cut out my pieces one by one.  Check out the Proxxon mini scroll saw,  It is a really nice machine with so many practical uses.  

\
I use the Proxxon min band saw next to cut my dowels approx 1" long.  Watch your fingers!   Alternately you could use the scroll saw for this.  I glued my dowels in place and let dry well


Everything gets a good sanding using both my OZI/E dlelta sander and my cordless mini belt sander.  These are both great little tools from Proxxon.  I hate sanding but these make it painless.


Meanwhile, I use the proxxon mini table saw to cut a piece of scrap board to 5 x 11" and glue it to the bottom of the base of the puzzle.  This is to keep the pieces from falling through. 


I used Plaid paints to paint my pieces.  I am giving this child extra clues with color as to how to solve this puzzle.  I painted the holes for the pieces the same color as the pieces.  


I didn't like how the dowel pieces looked like they could be a little dangerous so I placed and glued wood beads over them.  This puzzle is done.

Thanks for visiting.  Till next time.....Carol

Thursday, August 19, 2021

Weiner dog bobbin holder

 All right, I think I have said this before, but I have recently taken up a new hobby...Sewing... but just like every other hobby it comes with so much equipment and supplies, I wish I had a dedicated room for it, but I don't so I am enjoying making what I can to try and keep it a little organized.   Today we are going to make a simple, no, super simple, bobbin holder, but not for me.  This is for a young lady just learning to sew like me, and she is going to help me make it.  


We are going to start out with some pieces of scrap wood and a small wooden ball that I had on hand.


We used the Proxxon professional rotary tool to make a hole in one side of the wood piece where we will put a small dowel to mount the head.   We also put the same size hole in the round piece of wood. and glued it in place.  Now we will stick the remaining dowel part into the body of the "dog to be" to see if it works.  It' ok, but  we won't glue it yet.


Using the Proxxon mini band saw, I rounded off the corners a little bit on all 4 sides


We am going to use the Proxxon mini drill press to make lots of holes all over the "doggy's" back   Then I am going to use the Proxxon mini bandsaw to cut lengths of dowels that will fit into these holes.   This is where she will stack her bobbins.  Looks more like a porcupine.  


You can see we have added a small nose.  Wewill also cut out some simple ears.  This is best done on the Proxxon mini scroll saw.  We can attach these with small nails so they can be positioned in different ways.


Got the kid to paint it.  Look, she has added some pony beads as well as the bobbins.   Good for her.   You go girl, make it your own.  

She says she has a space for this on a shelf next to her sewing machine.   I am glad she likes it.  We had fun making it.
  
Important note.  Never leave youngsters alone with woodworking tools.  Close supervision is absolutely mandatory, and some tools, like the bandsaw should not be operated at all by children.  But do get them involved in safe ways.   They love it.

Well, thanks for visiting.  Hope you enjoyed the project.   Looking forward to seeing you next time.
Thank you Proxxon, love love love your tools.

Take care and play safe!   Carol


Thursday, July 1, 2021

How to make a box kite

 OK, I want to bring out the kid in you this week.  We are going to make a box kite using our Proxxon tools and hopefully it will fly and so will your spirits.  Trust me!


Supplies and equipment:

6    1/4" x 36" dowel rods

4   Walmart bags

2-3 drinking straws

kite string or suitable substitute

scissors

gorilla glue

contact cement 

plastic tape

measuring tool  yardstick or tape measure

speed square if you got one. 

Proxxon scroll saw

Proxxon profession rotary tool

Patience  ha ha

Here's our plan


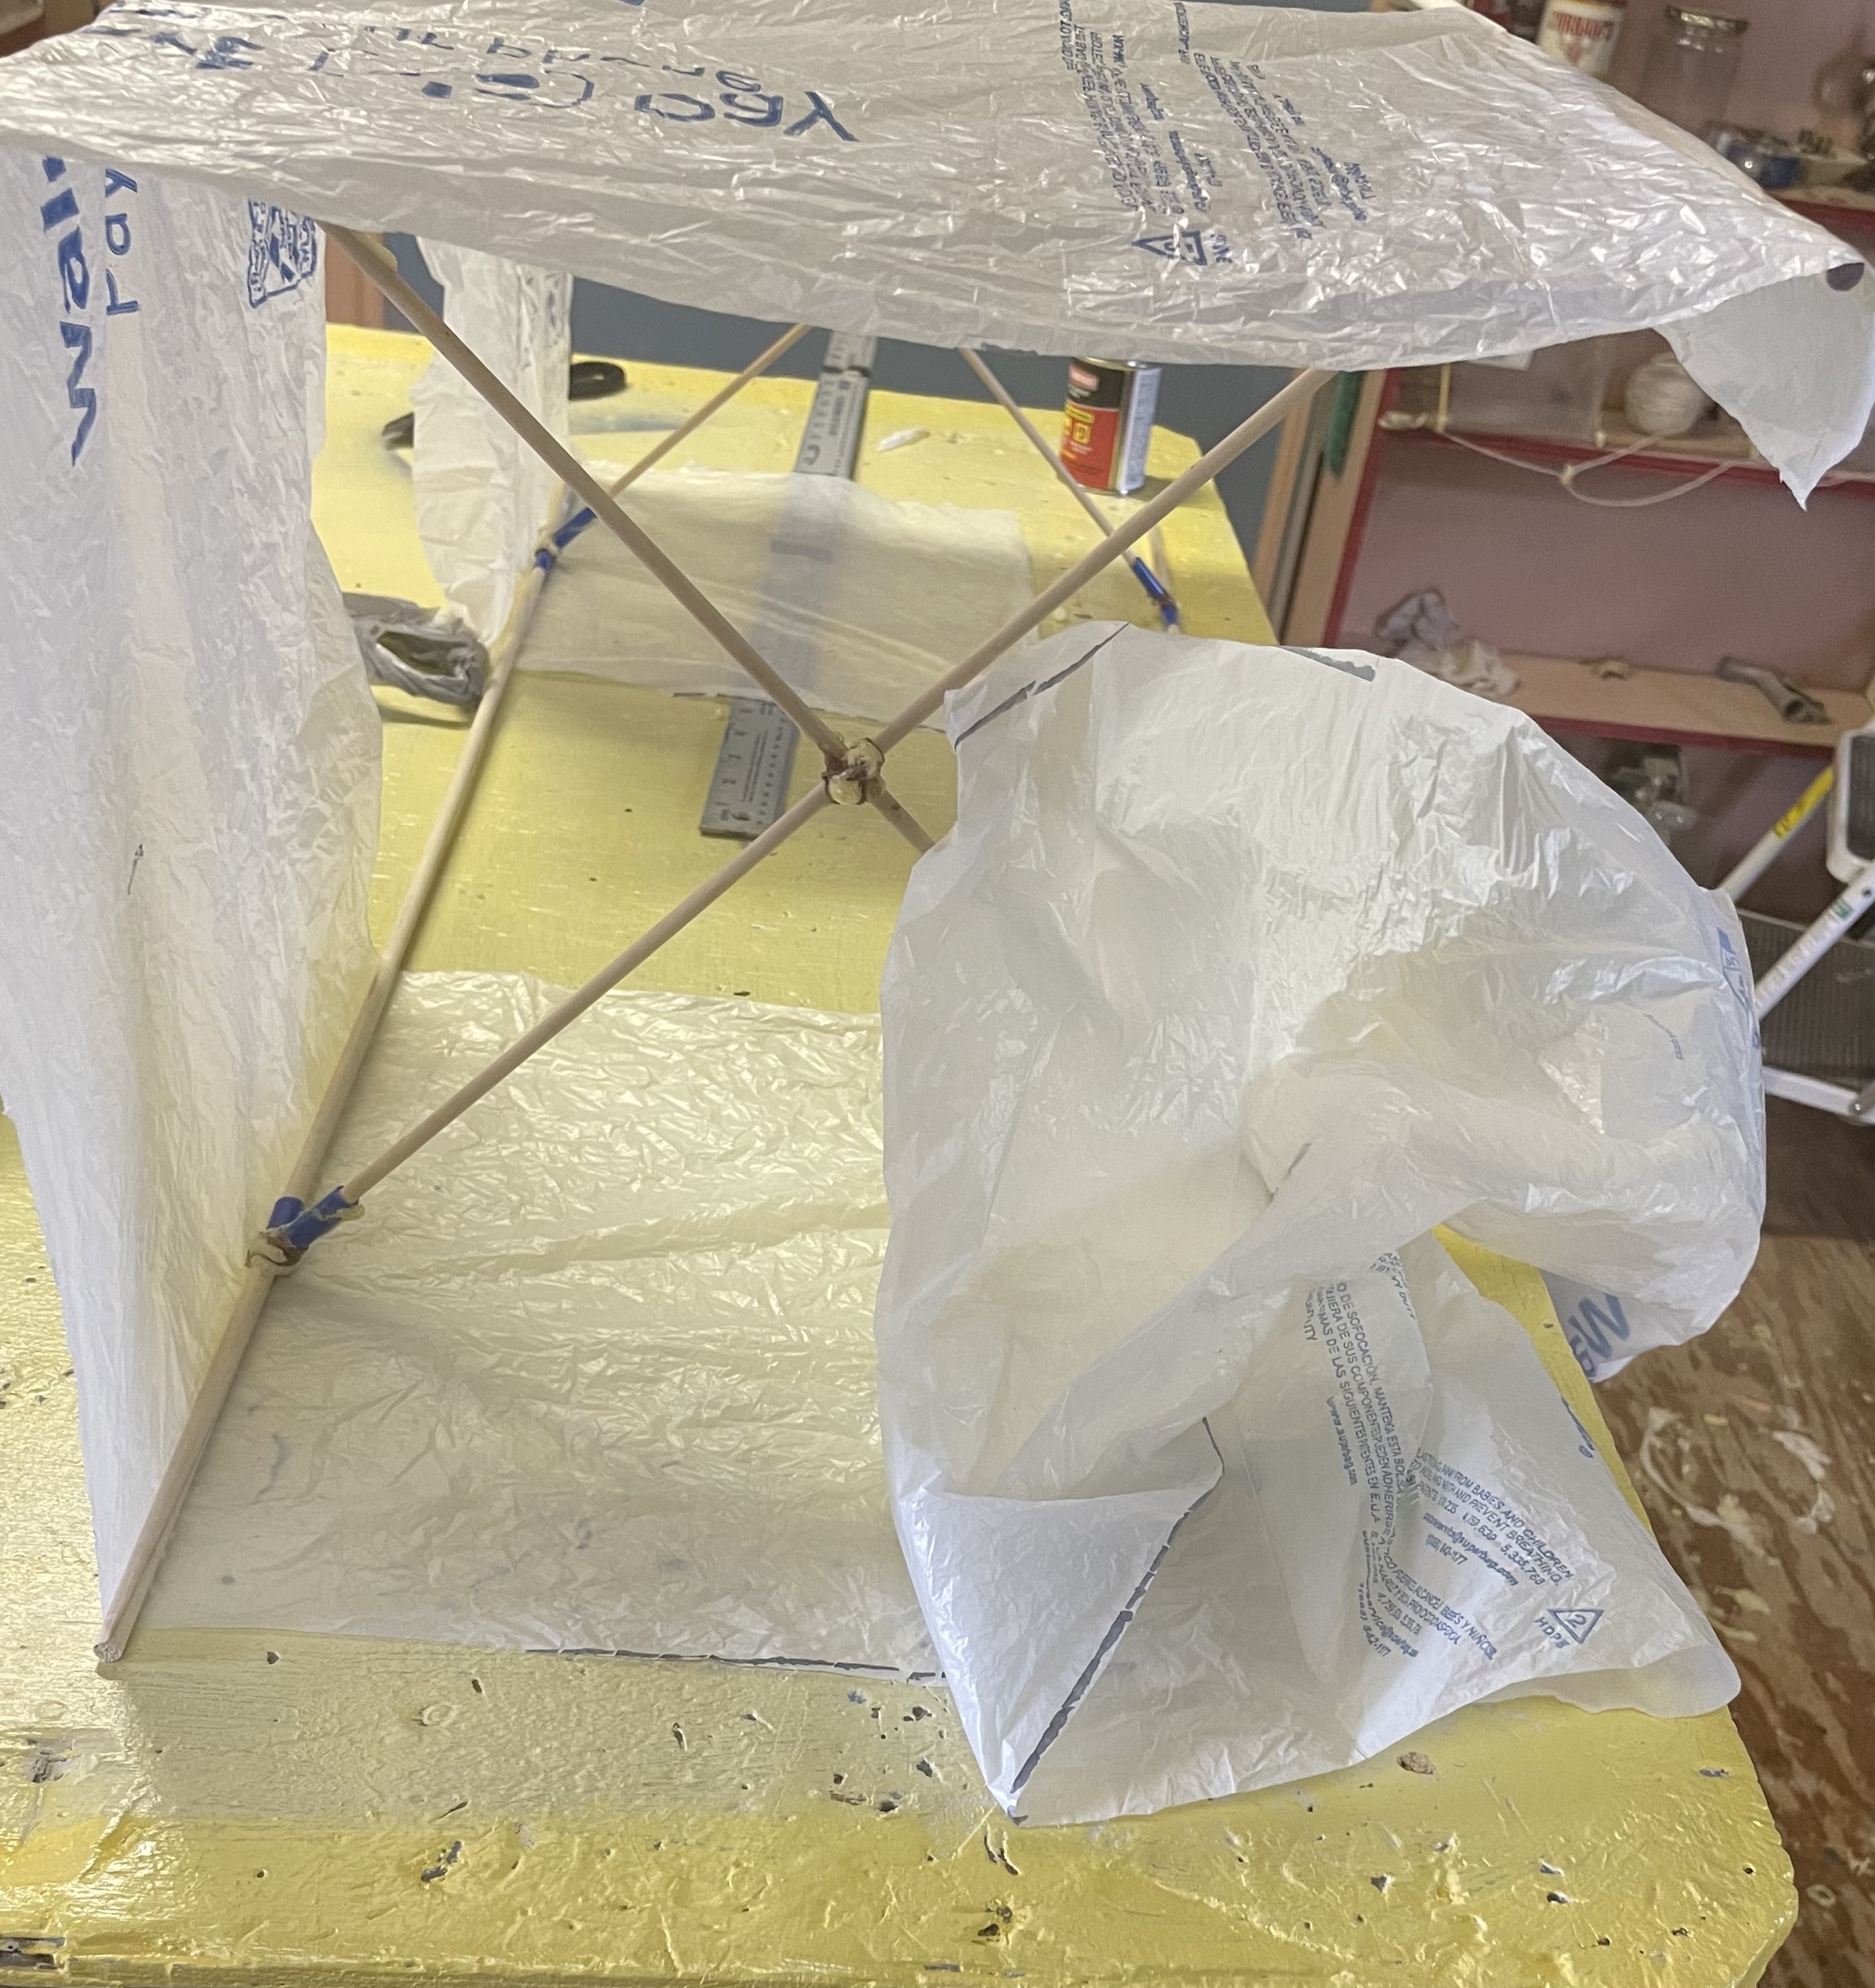
Let's get started.   The first thing to do is to  cut (4) 14" pieces of dowel   These will be our cross pieces.  I used the Proxxon Scroll saw to do my cutting.  But I could have used my Proxxon mini bandsaw just as well.  You choose,


I made some indents using the Proxxon professional rotary tool.  This will help keep the parts from slipping while I lash them together.  


I lash them together in the middle with string, wrapping it around every which way until it kind of holds it together as an X.  Then I applied a drop or 2 of gorilla glue to strengthen it.   Gorilla glue is very strong but also very light.


Meanwhile I cut my straws into 2-3" lengths.  I need 8 of these.  I cut them about half way through at their halfway point.   These are really going to help keep things together.  I don't know if you noticed how hard it is to stabilize two round things together...😆
I slipped those over the 4 outside 36" dowels at the 6 " mark.  Note the picture below as how to use the straws.  


I put a drop of glue into 2 adjacent dowel sticks straw holes in each of the 4 36" dowels  then put two pieces of each cross members into the straws then propped them up to dry.  Try to keep them at pretty much 90 degrees to each other.


When it is good and dry turn it over and do the other sides just the same.   Now we have a skeleton.

Part 2, making the skin.

  Take 3 Walmart or similar bags and lay then out straight as you can.  Measure 12 inches out of the middle so that when cut it turns into a big loop.  Cut it down the side so you now have a sheet of plastic 12" wide.  Starting at one corner secure the plastic to the side using contact cement.  Then wrap the plastic around the frame as far as you can get.  I got around 3/4 of the way so I needed to add another length of plastic bag.  I attached the second plastic  to the first with a line of contact cement and finished the journey around the frame.  I cut off the excess and secured the end to the first piece at the first corner.  To add strength and durability to the wispy plastic I took clear packing tape around all the edges of the plastic.    

Part 3  Kite string

First let me say.  "goooood luck"   I went to Walmart, dollar tree, dollar general, etc etc.  I believe they have done away with it.  I did find a kite at dollar tree with a miniscule amount of string.  So use what you can.  Light but strong.  I finally chose yarn.  
Cut a piece 36 inches long and secure it to the top of the kite and the top of the bottom section of the kite.  (12" up from the bottom).  About 12- 14" down from the top, tie a small loop.  Attach your "string to' this loop.

Hey,,, guess what.  If there is some wind outside we are ready to fly.    I had to wait 3 days to get enough wind for take off.   But it was worth it.!  You are never too old to fly a kite!  Try it.  

                                                                                                                                                                                                   ↖Me, having a great day.    
Thank you all for visiting.  I do hope you give it a try.  Invite the kids or grands so you have an excuse.to play.    I had soooo much fun.

Thank you Proxxon for your fine tools that make making stuff so easy.  
Till next time.   Carol


Sunday, October 6, 2019

How to Make a Sliding Book End

This sliding book end project to as easy as it is useful. It's a great beginner project for learning more about Proxxon tools.


Supplies and Equipment for the Sliding Book End

  1. Determine the size of your finished book end. Mine measures 6" x 6". Cut your board to size on the table saw.
  2. Transfer measurement from the schematic to the board.
  3. Cut the slot using either the bandsaw or scroll saw.
  4. Use a quarter to make the rounded corners.

  5. Use the disc sander to round the corners.
  6. Sand all surfaces with the Delta sander.
  7. Paint and finish the book end with your choice of finishes. I used FolkArt Ultra Dye.
  8. You can decorate and embellish the book end, or leave as is. I added a book band book mark.

Carole