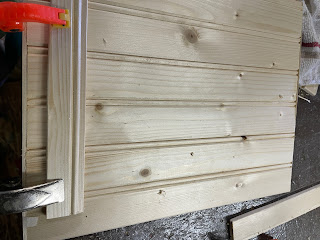
Hi there! I am glad you came to see what we are doing today. Well I thought we might do an easy project. I had some leftover pieces of wood from when we did some wainscotting in the kitchen., so we are going to use these.
Supplies. and equipment
tongue and groove boards 3 or 4
wood glue
Ruler/straight edge \/ pencil
2 eye hooks and picture hanging wire.
The first thing I did was to measure my picture. Then I added 3" all around. This is the size I will need to cut my wood piece. But first...
Let's glue some of the boards together that will yield a piece the size we need. Spread the glue onto the tongue side of the board. Let dry well.
Over to the Proxxon mini table saw as it's time to cut this big piece to the size we need. Remember to leave a 3" border around your picture.
Notice I am using the extended fence that is located on the left side of the Proxxon mini table saw.
Next, I use the Proxxon mini table saw to cut 2 slats that have the tongue side intact. The slats are approx 1 1/2" wide Our picture will slide under the tongue and this is what will hold it in place.
Everything is sanded really well using the Proxxon OZI/E delta sander.
I centered the bottom one and glued it in place. I clamped it down and let it dry good.
I checked the fit with the picture and glued down the top piece.
On the back I glued another slat about 1/3 of the way down and then placed 2 eyehooks on the ends then strung picture wire for hanging. All done.
When you make it, you can paint or finish the wood. I like the look of the naked untreated wood.
Thanks for visiting. See ya next time. Take care.
Thanks Proxxon. Love your tools. Carol


.JPG)


1 comment:
Very nice, Carol. You do great work!
Post a Comment