Supplies:
Proxxon table saw
Proxx on delta sander
Drill press with hole cutter (optional)
assorted clamps
wood glue
(1)12 x 12 " ceramic tile.
(1) 1 x 4 x 24" pine board
(1) 1/4 x 4 x 24" cedar board
(2) 12 x 16 x 1/4" plywood pieces (for roof)
post size optional I used cedar but you can use treated lumber.
metal L brackets (pkg of 4 with screws)
acrylic paints
I started by laying out my cutting patterns on my various pieces of wood. As you can see I try to lay it out so as to get the most from each piece of wood.

I cut out my pieces using the really cool Proxxon table saw. It is so easy to use!😉

And then I sanded all my pieces using the Proxxon delta sander This is my new best friend. It gets into all the corners, and smooths all my curves. Best of all, I can switch back and forth between coarse and fine grits reusing them over and over. They attach with hook and loop like Velcro only better. It has an adjustable speed too.

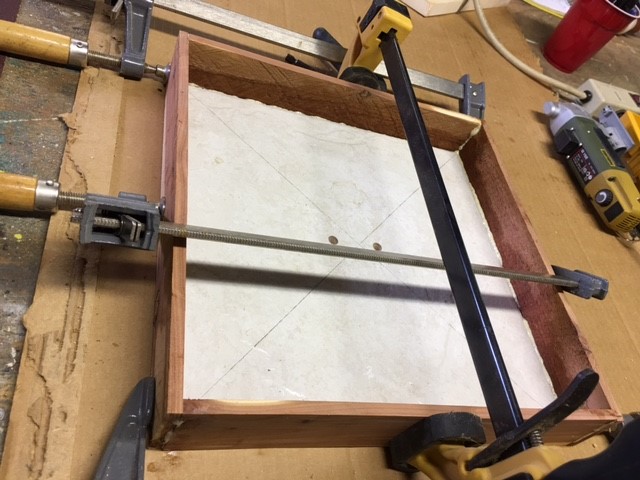
Ok, I got my pieces ready now. So next I glue my cedar fence to my ceramic floor and clamp it up. I leave it overnight to dry good and solid.
I had given my walls and roof pieces to Misty to paint up pretty. She did a nice job and they look great! I glued my corner pieces in and clamped them and let dry. Next I glued on my roof and secured it with rubber bands.


Check out the final piece. I just need to plant it in the ground and the birds will love it.

12 comments:
Great first post for the Dusty Lady team, You do awesome work Carol. You know I love our feeder and so do all the birds.
You make the project seem so easy, and the tools are the perfect size for gals to use easily. Great job. Now go and make me one!! LOL
What a great bird feeder! Job well done!
awesome job , thanks for sharing
Now that's one terrific bird feeder! Very pretty to have in the yard and easily cleaned. I'm thinking it would look great on a post also. The birds are going to love it. Way to go!!!
very nice birdfeeder and who doesn't like easy clean !
Nice! It makes me want to go to my shop and build one right away.
You go girl, you are so talented.
I love the bird feeder. It looks so easy to make. I think I will have my husband build one and I will paint it.
great idea its so cute love the painting that is done on it
Love it, the birds will too. Great job Carol and nice painting Misty.
What a neat bird feeder and Carol and Misty, you two have a great team project. Charlie is good at working with wood.
Love it!! Great idea to use a ceramic floor.
Post a Comment