The Mood Lamp.
This is a cute little lamp that is easy to make using Proxxon tools. Proxxon makes tools that are sized just right for the smaller projects. Use this Mood Lamp as a nightlight, or place it in an intimate space for some romantic or peaceful ambiance. How awesome, that YOU made it. In my project I chose a simple curvy little design, but YOU can customize yours. Hearts, flowers, dates... Paint it, change the light color.... Oh my endless choices. Make it special for you or yours!

Supplies and Equipment needed:
1/8" thin hardwood 3 x 8" (4 pieces)
1/8" thin hardwood 3 7/8" x 2 3/4" (1) the bottom
1/8" thin hardwood 3 7/8" x 2 3/4" (1) the bottom
pine board cut to 1 x 1 x 11" (4 pieces)
lamp fixture with roller switch,
night light bulb (I used a 4 watt bulb)
wood glue
semi-opaque plastic sheet (optional)
Let's get started:
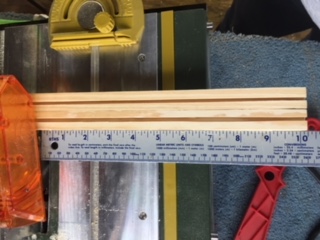
The first thing I did was to cut my pieces to size on the Proxxon table saw FET except I left the 1x1 pieces of pine long for now I had cut them from a 1 x 4" piece that was 4 ft long. I cut two 1" strips off that and am leaving them long temporarily as we are going to make grooves in them and it is easier when they are longer. Sand everything smooth with the Proxxon OZI/E detail sander.
.
Next step: I removed the blade guard and splitter from the table saw and set the blade height to 1/4".

I set the fence 3/8" from the saw blade and ran all the long pine pieces across it making a thin slot in each. Next I turned each piece a quarter turn and made the same slots along those sides. These slots are too narrow as yet to fit the hardwood sides into so I adjusted the fence out just a tiny bit more and ran them through again so that the slots are slightly widened and the wood sides will now fit easily into the slots.


| end view |
For safety, I replaced the blade cover and splitter then cut the pine pieces to the 11" lengths for the sides. (4 of them).

Now off to the scroll saw to make pretty. Since I was going to cut out identical sides I decided to cut them as a stack. I used masking tape to tape them together and cut them all out at the same time. These are all inside cuts so some holes are drilled to pass the saw blade through before cutting. Proxxon makes this easy on their scroll saw.
Now off to the scroll saw to make pretty. Since I was going to cut out identical sides I decided to cut them as a stack. I used masking tape to tape them together and cut them all out at the same time. These are all inside cuts so some holes are drilled to pass the saw blade through before cutting. Proxxon makes this easy on their scroll saw.
 stacked, taped and ready to cut  |
| finished side pieces |
The bottom piece needs a hole to pass the electrical plug through. This was also cut out on the scroll saw. After passing the cord through, I taped the gap with black masking tape so that light would not shine down through the hole then I glued the "wings off the socket onto the bottom and clamped it to dry. The tape will not show as it will be inside the lamp.


Assembly:
Assembly is easy. Put some glue in the slots then slide the side panels into the grooves. The extra length on the legs is at the bottom. The sides should be flush with the top. Make sure your lamp is square and clamp it securely. Let dry. The bottom is simply glued on. It will fit between two of the legs.

I noticed that I could see the light bulb through the holes so I cut some semi-opaque plastic and glued it to the inside. The light still shines through but the bulb is no longer visible. This is an optional step. If thinner lines were used on the pattern this step could be avoided.


This lamp looks fantastic in a dark room. It was a fun little project. Truthfully, the Proxxon line of tools makes these little projects so enjoyable to make. Hope you all have a good day. Carol
5 comments:
With you it is hard to say what I like best
This is for sure in the top three. I love this little
light. I would like to have one twice the size.
(Please) It is lovely, and has a oriental flair for me.
Great post.
Carol I am like Misty I like this and I really like the oriental flair Keep coming up with these great ideas bj
What a very clever idea Carol! And your tutorial is spot on. This lamp is very nice and so adaptable to different tastes. Great job!
I love the idea. Makes me almost sad I'm not allowed to use power tools!
Another great project, Carol. Very pretty and I'm sure it looks great lit up in a dark room, as you said.
Post a Comment