This sweet embroidery floss horse keeps your floss organized and untangled. Use the downloadable pattern, and follow the tutorial to make your own.

Here are the supplies and equipment that you'll need:
- 4" x 4" wood blank
- Pattern for floss horse
- Proxxon Bandsaw MBS/E OR Proxxon Scroll Saw DS 460
- Proxxon Disc Sander TSG 250/E
- Proxxon Delta Sander OZI/E
- Bench Drill Press TBM 115
- ¼" drill bit
Let's make a Floss Horse:
- Mount the pattern for the horse on wood blank. Cover one side of the blank with painter's tape. Mist the back side of the pattern with spray adhesive, and mount on the taped paint stir stick. The painter's tape makes removal of the pattern easy without leaving any sticky residue.

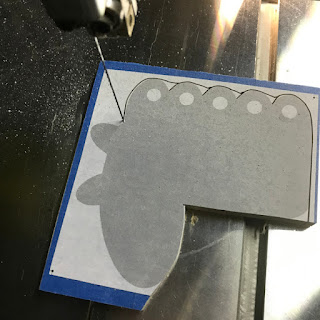
- Cut out the horse using the bandsaw or scroll saw.
- Use the disc sander to round the bottom corner.

- Sand the edges using the Delta sander. I have my sander mounted in the Precision Vice FMZ, so that both hands are free.

- Prepare to drill the holes for the floss. Load a ¼" bit into the drill press. Line up the holes for drilling using the adjustable fence. Place a length of painter's tape on the back side of the horse to help reduce tear-out. Use a piece of waste wood under the horse, also to help reduce tear-out.

- Drill each of the holes using the drill press. Keep the shape snug against the adjustable fence so the holes are equally spaced from the edge.

- Remove the pattern and painter's tape. Do any final sanding, as necessary.
- Add the eye. There is a pattern included that can be cut from vinyl, or you can draw a free-hand eye with permanent marker or paint.

- Thread the floss through the holes and secure with a lark's head knot.

- If you're not an embroiderer consider trimming the mane and gluing a magnet on the back for a colorful frig decoration.
.png)


.png)
 |
| Carole |

No comments:
Post a Comment