Hi folks. Hope you had a good 4th and are re-energized and ready to take on some new projects. I got a good one today. We are going to make a simple art easel that is compact and light and easy to take with you on those art outings.
This is a nice little easel because it is very light and folds up nicely. It can easily stand up to travel
First the material list
- I used 1/2" cedar side board for the whole thing.
- (See cutting list below)
- Good wood glue
- Small 1 " nails.
- Nail set and hammer
- Proxxon mini table saw
- Proxxon OZI/E delta sander
- Proxxon mini band saw
- Proxxon disc sanderProxxon.com
- Proxxon professional rotary tool with small drill bit
- Proxxon scroll saw
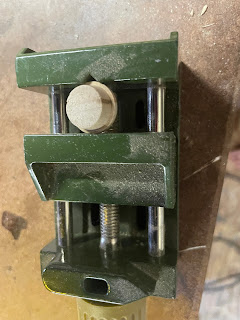
- Proxxon mini vice.
- Regular size drill with 3/8" drill bit.
- Triple thick brush and sealer glaze.
- 3/8" dowel
- 2 wing nuts and bolts 2 - 21/2 inches long
First thing I did was to cut my cedar board into 2" slats. I will use the Proxxon mini table saw to do this and these slats will be used to make the easel.
Now I want to cut them to size.
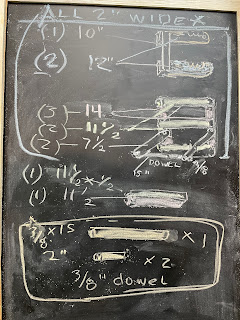
Here is a cutting list.
Well, that is a bit messy. Lets see if I can make you a readable list
Remember with few exceptions these are all cut from the 2" slats
10 " (1)
12: (2)
14" (2)
11 1/2" (3)
7 1/2' (2)
3/8" DOWEL cut 1 piece 15" and 2 pieces 2"
Now let glue the 10"piece to the 2 12" pierces
Here is another schematic.
The two small pieces also need a 3/8" hole at each end.. One end will attach to the front piece with a screw and wing nut. The other side will have the long dowel spanning to the small piece on the other side.
I think it might be easier to show pictures so you can put it together
The bottom piece has grooves cut into the sides up by where the cross bar is. I taped the two sides together then cut these on the Proxxon scroll saw so they would line up together,
Below is the bottom piece (except in this photo the groove are yet done) Drill holes about 1: from the end of the pieces opposite the cross bar. This is where the top will connect with the bottom later.
This is the top piece . The 2 side pieces stand up and the 2 cross bars span across them. The side piece needs a 3/8{ holes in the center of exch side piece. This is where the small pieces attach with wing nuts.
Note the small groove towards the top on the sides. This should line up with the dowel when you fold the easel.
Put the top to the bottom with a short dowel on either side capped so it wont fall out but can still move freely.
Now add the 3 cross bars and glue them down. The bottom cross member will need a tray. This is the 4th 12" piece that was cut. It is glued perpendicular to the last slat. This will hold the canvas.
Your easel is now done. Trust me it is way more easy to make that it was for me to try and explain.
This easel can be carried holding onto to the long dowl and it should stay folded flat.
I finished it with a good sanding using the Proxxon OZI/E delta sander.
Then I sealed it with some leftover triple thick solution.
Thanks for visiting. Next time I will try to be a little more clear.
Carol

.jpg)


1 comment:
This is a very nice project for a gift for kids or adults.
Post a Comment