
Equipment :
kapro measure mate 313 or tape measure
drill with small drill bits for predrilling
and 2" hole cutting bit
screwdriver
Supplies :
Wood- I used 3/4" pine boards
base measures 7 1/4" x 15"
sides 5 1/2" x 14 (x2)
middle 5 1/2" x 7"
roof 1/4" x 8" x 11" (x2)
middle supports 1/2" x 1/2" x 5 " (x4)
roof supports 3/4" x 2" x 5" (x2) cut lengthwise at 45 degrees
90 degree molding 11" long (optional)
wood screws 1" (x 16)
1 1/2" bolts with nuts or wing nuts (3)
electrical connectors (3)
wood glue
paint brushes
stencils or stamps (optional)
1 glass bottle with a long neck and
1 martini glass, margarita glass, bowl....or whatever. (find at thrift shop)
Paint :
Kilz2 latex primer
I used bimini blue, yellow flame, holly branch, and new shamrock
To get started, measure all your wood pieces (see above) using the kapro measure mate 313.

Then cut out all the wood pieces to size. using the proxxon mini table saw .

The center piece will need a hole cut in the middle that the long neck of the bottle can slip through. The center is easy to find using the kapro measure mate. Just use the centering side and lay it on the diagonal across the wood. The zero will mark center. Cut the hole size you need according to your bottle. Mine was 2".

Next, I drilled 3 holes in the base piece of wood to surround the base of my margarita glass so that I can secure it firmly to the wood yet still remove it for cleaning when I want. I found that 3 electrical connectors would hold it well and the rubber protects the glass.

Next measure up the sides to where you will need the center support. Make sure the long neck bottle top will sit above the bottom of the glass but not higher than the rim. This will allow the seeds to fall as the seed level drops due to hungry birds.


I used a margarita glass and a vinegar bottle. Add the little "supports" you cut as well as screws to to hold the middle securely.
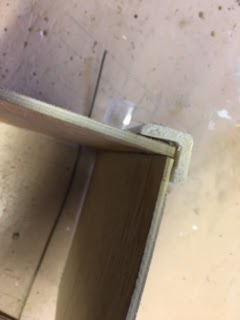
Add the roof supports to each side and secure with screws and/ or wood glue.

Where the roof meets at the top, place the molding edge and secure it to the 2 roof sides with glue. I added some small screws for strength as this will be outdoors. Set the roof on the supports being sure to center it then screw it onto the supports. Ta Daaaa….It's basically done now.
Time to paint.
First I used Kilz2 primer on all the wood surfaces. Then I used Plaid paints to make it pretty. A stamp made doing the checkerboard easy! You ought to visit the Plaid website, it is so full of fun ideas!


There you have it. The over -hanging roof will keep the seeds dry and the birds still have ample room to feed.
Thanks for visiting. Hope you had fun, I did. Thanks Proxxon, Plaid, Kapro, and Terri our guru.
catch ya next time. Carol
4 comments:
Oh that looks so cool Carol! Looks like the birds are having a party. Great tutorial too!
I really like the idea and I have plenty spare wood I like the colors on the feeder to so cool and refreshing bj
Very nice, the birds should love it. You always do a great job !
The birds re not the only one who love it I do too!!!
So pretty and sturdy. You know of course you will
have to make me one. Like I don't have enough bird
feeders but not like this one. I love this one Carol.
It is so different and convenient for the birds and
us to clean. Great Blog. As always your directions are
great.
Good Job.
Post a Comment