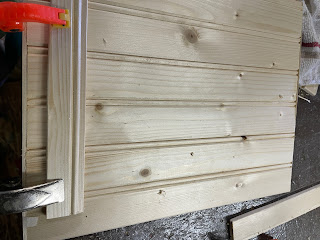
Hi there! I am glad you came to see what we are doing today. Well I thought we might do an easy project. I had some leftover pieces of wood from when we did some wainscotting in the kitchen., so we are going to use these.
Thursday, September 15, 2022
How to make a different kind of picture frame.
Monday, September 5, 2022
How to Make Farmhouse Picture Holders
These rustic, farmhouse picture holders are as versatile as they are easy to make. They are a great way to use scraps of wood left over from other projects.
Supplies and Equipment that you'll need:
- Scrap wood
- Proxxon Bandsaw MBS/E
- Proxxon Table Saw FET
- Proxxon Disc Sander TSG 250/E
- FolkArt Monument Gray Milk Paint
Let's make the farmhouse picture holders:
- Gather scraps of wood—plywood, MDF, hardwood—½" to 1" thick.
- Cut rectangles using the table saw. Vary the lengths and widths.
- Measure and mark for the top triangle. Mark the center of the width. Mark each side equidistant from the top.
- Connect the measurement marks to form a triangle. Cut away excess using the bandsaw.
- Measure and mark the center width at the top of the triangle.
- Using the center mark as a guide, cut the picture slot at the top of the triangle using the bandsaw.
- Sand the surfaces using the disc sander.
- Finish the farmhouse picture holders with a colored wash. I chose a gray wash. You'll want to test the look on a scrap. Thin the paint with water—4 parts paint to 1 part water. If you want a more solid color, then use less or no water. Apply the gray wash with a brush and immediately wipe with a rag. Let dry thoroughly. If you want more pronounced color, add more coats of the gray wash, following the apply/wipe procedure. Hint: I wore a disposal glove on the hand that was doing the wiping.
- Enjoy displaying your photos in these farmhouse picture holders.
 |
| Carole |
 In addition to paper crafting Carole enjoys a variety of handcrafts and fiber arts, including needlepoint, crewel, knitting, crocheting, beadwork, and lacemaking. She regularly travels abroad to study the dying art of handmade bobbin lace. She incorporates mixed media techniques to create unique greeting cards and paper art pieces. She has served on several craft industry design teams including Sakura Hobby Crafts, Amazing Crafting Products, USArtQuest, and The Robin's Nest. Her favorite food is sushi, especially sea urchin.
Thursday, September 1, 2022
How to use metal to make a decorative plaque.
Hi again. Time for another little project. I was reading up a little bit on some of Proxxon's tools and I found out that the micro bandsaw cuts metals. Well, no kidding I should have known this long ago, but in my past. I dealt with a bandsaw that only cut wood. In fact, it was written all over the saw itself, "wood only", and I'm not one to argue with an ornery looking giganto bandsaw. Finding out that I can cut metals has opened a new door. Let's walk through it and try a small project.
Equipment and suppliesFirst thing I did was to place masking tape on the front side of all my tiles and draw my design. Bearing in mind that there can't be any inside cuts, make sure that you can enter the closed letters at some point that won't interfere with it's stability or readability. I got my inspiration from my friend. I asked her what she would like to see on a plaque and she told me, " Beyond Blessed". Guess who gets the plaque when it is finished. In the picture above you can see the progress I was making cutting out the saying. PLEASE MIND YOUR FINGERS- This cutting requires some up close holding. Nope, the red on the letters is not blood, it is where I marked the way in to the closed areas. I guess I should have used green or blue paint. The Proxxon micro scroll saw cuts easily into this thin metal. Another word of warning. Please wear eye protection. You surely don't need a metal splinter in your eye.


.JPG)


.png)


