Friday, July 13, 2018

How to make a lovely Butterfly box with Mod Podge


Tools used  For this project

Proxxon Pen Sander
Proxxon professional rotary tool
small drill bit
screwdriver that fits small screw head


Supplies

plaid Paints (colors of your choice) I picked ones that went with the scarf color.
Salt Box. you choose the size, Craft store or Online
1/8 inch thick wood
Scarf from the Thrift shop (used  to cut out design)
School Glue
2 small screws


 The first step in making this box was to sponge paint it with a sea sponge and plaid
Yellow and a soft orange.
I painted the entire box with a first coat of yellow by dipping a small corner of the sponge and tapping it lightly over the box. Let it  dry completely and repeat the process with the


I found flowers I thought would go well with this, cut them out, and glued them to the box top.


Cut our flowers so butterflies would visit.
Used white school glue to stick them onto the box.


This was my inspiration, cost $ 1.00 at the thrift store.
I pressed the scarf and laid it flat on a large sheet of freezer paper.
Then I selected the butterflies I wanted to add to the box.
I used glue on the butterflies to seal them so the edges would not unravel when cut. I let it dry good and then cut out the special ones for this project.


Butterflies cut and placed on and around the box.


Box Bottom


Now for using the layer upon layer of Plaid Mod Podge
I used several layers to ensure the scarf material was going to stay in place. I put some of the butterfly wings just a little up under the lid. Love the idea that they are getting in the box.


Now this box top needs reinforcement for support so I can attach a handle without damaging the cardboard box..  Carol takes over here so that my eyes won't be subjected to sawdust.  My eyes are getting better since the cataract surgeries but it will be awhile yet before I get my glasses.  I don't think I should mess with the bandsaw.


Hi everyone... It's Carol now.   We are going to make Misty a handle for this pretty little box.  I think the box is looking really nice.  I love the colors.   
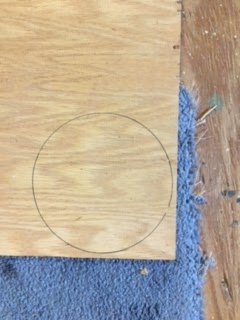
Ok, first thing I did was to measure her box.  It has a diameter of 6" so I cut out a circle 5" in diameter.  I don't want the wood part to interfere with the closing of the lid.  I used a container lid to draw my circle.  You could use a compass if you wanted to.


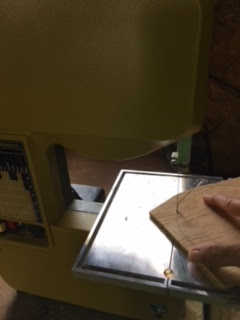
I cut out the circle from thin (1/8" thick) oak plywood  using the proxxon mini bandsaw.  I sanded the edges smooth using the proxxon OZI/E delta sander then Misty painted it pretty and glued it to the inside  of the lid to the box.  There is a small border left intentionally so the lid closes good.


We decided on a shape for the handle and cut it out on the proxxon mini bandsaw.


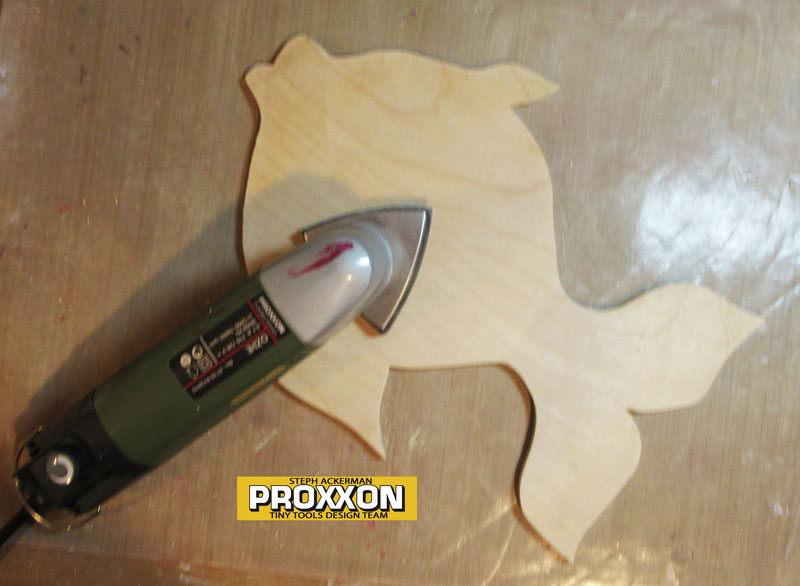
Using the proxxon OZI/E delta sander and the proxxon pensander I sanded the handle to a rounded shape.


Using the proxxon professional rotary tool. small holes are drilled into the handle where it will attach to the box.  


After being painted, the handle is attached to the box with the 2 small screws.  The wood disk inside will hold it firmly.


All done. 


I would like to thank our sponsors for their continued support.
Proxxon and Plaid are both awesome companies. proxxon products are well made and ideal for small craft items.
Plaid Paints has so very many things to offer the crafter. Love the new watercolor paints. So many new things to work with.
Terri Sproul is our point of contact for these companies and does a good job of trying to keep all happy.
I thank, and am greatful for the friends who visit and support this blog. You are so special and such good friends.
Thank you, last but not least by far,  my best friend Carol Wulf for assisting with my blogs during this very difficult healing time.


My sincere thanks to all of the above mentioned..


.
.

Friday, July 6, 2018

How to make an easy toy paddleboat


OK kids, this one is for you.  

     Let me tell you, it is HOT here!!!  and we all need an excuse to get in the water and cool off.   My excuse today is, "We are going to make a toy boat and we will have to get wet to test it."   I sure would hate to give this boat to the little boy next door and have it sink first thing.   So I will have to play with it,,,,, I mean test it first.

This project was fun for me and I know this special little boy is going to love it!  

Equipment and Supplies:
1x6" pine board
1/4" plywood 
wood glue
rubber bands
krylon krystal clear sealer


Procedure:


I have a confession.   I built this boat piece by piece, designing and measuring as I went.   But after the fact I put together this pattern that you can use if you like how my boat came out.  It's a scale drawing.  1 square = 1/2"


The first thing I did was to cut out my pieces using the proxxon mini band saw.   I truly love this saw, it cuts so smooth and effortlessly.


Making the paddlewheel- if it is cut perfect it will fit together really well.  Be sure to glue it with waterproof glue and let dry completely.


Then glue the deck onto the bottom of the boat and clamp it until dry.  (ignore that paddle wheel in the picture.  It was premature at this step.)


Glue on the windshield and sides of the boat.  Clamp and let dry.


Next glue the top on. 


Next step was to glue the keels on both sides of the bottom of the boat.  This will help the boat go straight.

It looked a little flimsy- remember this is a young boy's toy- so I added some supports to strengthen it.  These are glued to both sides of each keel.  The  pointy end goes towards the front  to decrease resistance in the water.


**Important** sand everything smooth. No splinters or sharp edges for the little kiddies.
The proxxon OZI/E delta sander makes this easy work!


I used waterproofing paint on every piece of this little boat.  It is specifically made for concrete but I am sure it will waterproof the boat.   I will paint the boat pretty after I let this dry for 24 hours.


Painted with plaid paints
I used 2938 titanium white, 02506 black noir,  414E cardinal red, and 401E true blue.

then sealed it with 2 coats of krylon krystal clear.
I think it is ready for the water!!!

Oh,, the rubber band gets fastened in the two notches on the bottom of the boat.  One loop goes through the top of the X (the paddlewheel) the other through the bottom.   Wind it up. set it in the water. and watch it go!


I got my feet wet! and it worked.  Boone is gonna love it!


Thanks y'all for coming by and visiting.  Thanks proxxon, plaidkapro, our sponsors, and Terri Sproul, our guru.    Now go have some fun.    Hope to see you next time.  Carol 


Yup... he loved it!!


Wednesday, July 4, 2018

Gone Fishing by Steph

Hi everyone, Steph here to share a new project created with my Proxxon Tools.


Supplies:
The Robin's Nest Dew Drops


I began by drawing a fish on a piece of plywood. 


Using the Scroll Saw, I cut around the pattern.


I used the Delta Sander to sand the fish.


I painted the fish with Plaid FolkArt Coastal Texture Paints in High Tide, Largo Blue and Seal Grey, blending the colors together.


I used a stencil with Plaid FolkArt Coastal Texture Paints in Sand Dollar for some texture.


To decorate, I added an assortment of metal gears and washers around the fish.  Then I added dew drops and a wiggly eye to finish.


Didn't he turn out awesome?

Thanks for stopping by.


Sunday, July 1, 2018

How to Make a Wooden Lamp Pull on a Lathe

I have a pull cord shop light over my work area, and decided to dress it up will a wooden lamp pull made on the Proxxon Woodturning Lathe.

Supplies and Equipment for Making the Lamp Pull

Instructions for Making the Lamp Pull

  1. Mark the center of the dowel rod using a centering square. Make a divot in the rod at the center point.
  2. Mount the rod in the lathe. Snug the tailstock making sure that the point of the tailstock rests in the center divot.
  3. Use wood turning chisels and gouges to carve a simple beaded pattern on a 1½" portion of the dowel rod. Finish the lathe work on the lamp pull with the exception of parting off.
  4. Release the tailstock and replace it with a drill chuck specially designed for the lathe. Insert a ¼" drill bit in the drill chuck. Center the bit in the divot and drill out the center of the lamp pull.
  5. Release the drill chuck and replace it with the tailstock. Using increasingly fine sandpapers, sand the lamp pull until it is smooth. Polish with a paste wax.
  6. Part off the lamp pull. Alternatively, you can remove the rod from the lathe and use a band saw to free the lamp pull.
  7. Thread the lamp cord through the pull, and secure with a knot in the cord.

Carole

Friday, June 29, 2018

How to make a patriotic door hanger for the 4th of July


Hi everyone.   I'm doing the blog for Misty this week.  She had cataract surgery last Tuesday and she is having her other eye done this Thursday.  So far all has gone well but she of course has to avoid sawdust in her eyes for awhile.   So I'm stepping in as substitute until she is hale and hardy again.   Boy, is she going to owe me for this one.  

4th of July is just around the corner.  Let's celebrate our independence and freedom!  I also hope and pray for a little more peace in our country, and in the world. 

Let's get busy on this little decorative piece.  It really is very simple and doesn't require a lot of materials so it is easy and cheap.   This will probably take you just a couple of hours, longer if you really get fancy!

Materials:
1/4 inch plywood or similar thin wood.
6-8 inches of thin wire
dental floss or strong thread
plaid paints  (I used red white and blue)
glitter (optional)
sticky foam sheet (optional for making a star stamp)
wood sealer  (I used Krylon triple thick spray)

Equipment:
scissors
small drill or rotary tool
small drill bit.


The first thing I did was to draw a star onto a piece of cardboard.   If you are good at drawing you could just draw it onto your piece of wood.  Size is up to you.  My star measures about 10" wide and tall


Then I transferred the design onto my wood piece and cut it out using the proxxon band saw.


I used the kapro measure mate 313 to mark off some lines at 1/2" intervals.  I am going to cut these into strips.  These will be the stripes on my "flag"  7 red and 6 white.  Check out the link above regarding the measuring device.  They have a short little video which shows all the neat stuff this device can do.  I like using it for all my measuring.


To cut my "stripes" I set the fence on my proxxon mini table saw to 1/2" from the blade then I simply ran my wood piece across it 13 times.   So easy and they come out all the same--exactly.

                                                                Now I have all my pieces

I sand everything...everything... using the proxxon OZI/E delta sander... because I love it... because it is so easy...does a fantastic job... and I hate splinters!


I drilled holes through the "stripes" and also at the ends of the side points of the star.


Time to Paint:
  I paint the star blue and the stripes I paint red and white.  I am using plaid paints for this.  They cover well and go on smooth.


I cut out a star shape from the sticky foam sheet and stuck it on a stick to use as a stamp on my star.  Worked well.  I stamped white stars on my big blue star.


I used dental floss and threaded my "stripes" onto the string  then I secured the strings to the arms of the star.  The stripes were like a little skirt.  😏  Finish it off with spray sealer and it is done.   YAY..

But...
Here I changed my mind and decided to go a little bit fancy.   I used the proxxon scroll saw to cut a smaller star out of the middle, then I painted it white and wrote peace and USA on it.  I secured it with wire and added glitter.   The wire goes through both stars and out the back of the big one to form a hanger.   Now I am done.  Time to hang it.


I hope you all have a fabulous 4th!  Thank you for stopping by.  Thanks again Proxxon tools,  the Plaid companyKapro tools with vision and Terry  Sproul.