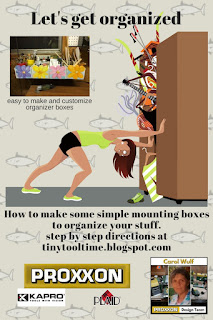
All right, now, I think it is time to get started.
Tools and supplies
1/4" plywood for sides and bottom
1x6" pine board for front and back
length of 2x 4 equal to length equal to back of boxes (or wall space)
wood glue
small nails or screws
clamps.
plaid paints to decorate if you choose.
The first thing I did was to cut my 2x4 to the length I had available on my wall. Next I set my table saw at a 45 degree angle and cut down the length of my 2 x 4. see picture below. The 2x 4 piece is black on this diagram. Hopefully you can see how they will fit together and hold the box on the wall.
I mounted my wall piece to the wall using screws. I made sure to find studs so my holding piece will be very secure. I used the kapro prolaser nail gripper to find a level line and the kapro measure mate 313 to measure and mark my line on the wall. I want it straight and level. 😀
The next step is to simply make the boxes. These will be cut to your appointed size to fit your space.
I had a 24" space I could use so I cut mine:
sides= 8 1/2" x 6" back= 6"x4" front 6"x6" bottom 7 1/2" x 6"
this made room for 4 boxes.

I used the kapro measure mate 313 to measure and mark my lines and then I cut them all in production mode using my proxxon mini table saw FET.
I made my front pieces a little taller so I could add a little decorative touch to make them mine. Might as well perk up my walls with some color.
I drew flowers on them and cut them out using the proxxon band saw This of course is an optional step. But I say why not make it pretty? Besides, I really enjoy using my proxxon band saw!
Sand everything smooth. No splinters! Yay for the proxxon delta OZI/E sander. It gets the sanding done fast and is easy on the hands and ears!
Now let's put this together
First, don't forget to secure the cleat onto the back of your boxes. Make it secure and tight. Pointy end down. If you want your boxes level with each other be sure to measure each one. I used glue and screws to secure mine.
Now put the boxes together.
A little glue some clamps then add some nails for strength. I put the sides on the outside so I could nail into the thicker front and back.
 |
making sure it is going to fit prior to gluing.
Oh, notice I painted my flowers using plaid paints.
All done now and hung on the wall. Wish I had a little more wall space so I could make some more. I still have a lot of "stuff" looking for a home. But this is a start and it was fun to make.
Remember you can take them down, then put them back when your done.
Thank you proxxon, kapro and plaid. Thanks Terri, and thank all of you who read this. Have a great day. Be Safe!!
See ya next time Carol
|


4 comments:
Hey Carol, this is neat. Love the idea you can
pick up and take it to the work area. Not have
to go to the hanging place when you want to use
an additional item.
I also Like the flowers instead of just a
plain box.
Good project and great directions as ever,
I love this project Carol! Such awesome storage!
This is a great idea and so useful. Who doesn't need a little more organization in their life. The flowers make it so pretty too.
Handy little boxes and cute too! Nicely done!
Post a Comment