Thursday, August 18, 2022

How to make a totable 54 egg, egg carrier

 Hi folks, I got a useful little project for you today.  That is if... you live on a farm and if... you have chickens or know somebody who does.  I'm really happy how this turned out, and I hope you might want to make one for yourself or for someone you know who can use it.  If not... then heck, it makes pretty decor.   You can skip the shelving part and use it as a decorative basket.  Ok, let's do it!


Wood requirements:

I used 3/8" poplar plywood for my box and 3/16" plywood for the "shelves",   I used an old broom handle (1 1/8" dowel) for the handle. and 1/4" dowel as locking device.


Equipment:

Proxxon mini table saw.                                                                                                                          Proxxon cordless rotary tool.                                                                                                                    Proxxon cordless belt sander,                                                                                                                      Proxxon OZI/E delta sander.                                                                                                                        Proxxon scroll saw,                                                                                                                          Proxxon mini bandsaw.

Miscellaneous

Wood glue.                                                                                                                                                    Old metal clothes hanger or stiff wire and wire cutter                                                                                  Drill and  1/4" drill bit                                                                                                                        Primer paint and Plaid paints 


Let's start with the bottom and the shelves.   Good news, the bottom is ready to go, if you cut it to the size above.  The 3 shelves need the egg holding cut-outs.  I divided my shelves so they would hold 18 eggs each and drew circles where I needed to cut.    I did NOT want to cut out 54 holes so I used masking tape and taped them together making sure they were secure and would not shift.  Next I drilled a started hole in each circle with my Proxxon cordless rotary tool.   I then used the Proxxon mini scroll saw to cut out my holes.  18 holes took a while but it was way better than cutting 54 holes, am I right?

 
Which leads us to the next step.  Sanding.  I used the Proxxon cordless belt sander and the OZI/E delta sander to do the work. 


Set these shelves aside for the moment.


Cutting plans for Box

Long sides measure 13" x 91/2"    (cut 2)                                                                                                    Stationary end 13 1/2" x 7"    Door end 13 1/2" x 6"                                                                                Bottom and  3 shelves 6 3/8" x 13"  (cut 4)

I used the Proxxon mini table saw to cut all my pieces to the sizes above.....  Note in the picture how I am using the outlying fence on this saw to keep my cuts straight.  


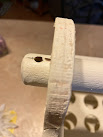
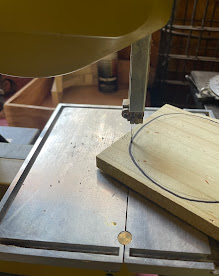
. After cutting all the above pieces, take the two end pieces and make a decorative cut as b to the tops of both pieces.  Bear in mind that you will be cutting a hole slightly larger than  1 1/8" in that part to accommodate the broom handle dowel we will use as a handle.  I used the Proxxon mini bandsaw to do this.   Alternately you could use the Proxxon mini scroll saw.  


Now use the Proxxon scroll saw to make a 1 1/4" hole in each of the boards you just cut.

  Set the boards aside for now.  We need to measure our eggs to know how much room they will need.  I calculated 2 1/2" between shelves, but I recommend 3".  Some eggs may be bigger.  I also left 1/2" in the bottom.  

Now we will make the grooves for the shelves to rest on.  There are several steps to this.  

Step 1   Mark one side of your box,   1/2" from the bottom, then 3: up from that line, then 3" up from the second line, and 3" up from that line.  

Step 2.  Remove the blade cover and splitter from your Proxxon mini table saw and set the blade height to 1/4"  


Step 3.  Set your fence at 1/2" from the saw blade.  

Step 4.  Run each of your 4 pieces along the fence and over the blade.  This should cut approx 1/2 way through your wood.    It is the bottom of your pieces running along the fence.   Note that you get a small groove, however you need a larger groove to accommodate the shelving.  So move your fence just slightly closer the blade again run all the pieces through before moving the fence..  And repeat once again for a third time to make a channel that is wide enough for you shelves to slide smoothly.


Do that procedure 3 more times for the 3 shelves.  

Glue the sides to the larger of the back piece, Put 1 or more shelves in to help keep it square.  Clamp it and let dry well.  Note the end piece is on the outside of the side pieces.

Put the box together, with the shelves and dowel and door end in place. Turn it on its side and drill a hole where we will place our wire as a pivot point and drill a small hole the size of your wire through the side and into the door piece.approx 1 1/4" deep   .  Make a second hole about 3/4" above the first but being careful not to go through to the door.  This is just to anchor the first piece.  Bend the wired like shown in the picture below.  You may need to encourage it to go in by using a hammer gently.  Now this door will pivot.  


We are going to use the dowel handle as a lock for the door.  On the opposite side from the door mark where the dowel is entering and exiting the wood piece and drill a 3/8" hole through the dowel at these marks.  Cut the 3/8" dowels 2 1/8" long and glue them in to secure the dowel on the far end.  

Slip the other side of the dowel handle into the hole on your door piece and mark where it come out on the outside and drill a hole approx 2/4" from the top in the dowel handle.   This will secure everything yet allow a person to add shelves as needed.  To open the door, pull out the little dowel and slide the dowel out of the hole.  It will pivot on the wires we placed earlier. 


Ok finish sanding and paint.  I used good old exterior house paint as a first coat then used Plaid paints to paint my chickens.    


Remove the top two shelves to begin collecting eggs.  When first (lowest), shelf full add the second shelf.   BTW the extra shelves hang well on the dowel ends.  

Ok.  Now we are done.   I know that was long, but it came out great and is going to be a present for our neighbors who have the chickens who lay the eggs that end up on our table.     

Thanks for visiting.   Come back again.   Thanks Proxxon.   Again, awesome tools.                Carol

Sunday, August 14, 2022

How to Make a Pom Pom Maker from Scrap Wood

This easy to make pom pom maker will have you creating those cute projects using pom poms!! Great for kids and adults. 


Supplies and Equipment

Instructions for making the Pom Pom Maker:

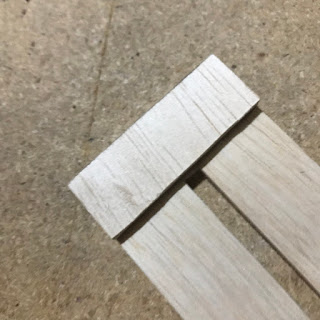
  1. Use painter's tape to tape two pieces of wood blanks together. With the pieces taped together, you can cut the pom pom maker pieces as the same time, thus ensuring absolute duplicates. Trace or mount the pattern. I printed the pattern, then misted the back side with spray adhesive, and mounted on the taped blank. The painter's tape makes removal of the pattern easy without leaving any sticky residue.


  2. Cut the shapes on the bandsaw or the Proxxon Scroll Saw DS 460.

  3. Sand the edges using the Delta sander. I have my Delta sander mounted in the Precision Vice FMZ.

  4. Glue the spacer to one of the pom pom maker pieces.

  5. Glue the second piece in place.

  6. Since you were cutting a double thickness of wood blanks, you automatically got an extra spacer. It can come in handy as a support when gluing the top piece in place.


How to make a pom pom:

  1. Cut a 22" length of yarn, and fold in half. Slide this tying cord into the slot on the pom pom maker. Using a double thickness helps to ensure that this cord doesn't break when you're tying the securing knot in place.

  2. Wrap yarn around the loom. The more wraps you make, the fatter your pom pom will be. The weight of the yarn also affects the number of wraps you'll want. Thinner yarn requires more wraps.

  3. When you're finished wrapping, bring the tying cord on the back side of the pom pom maker around the wraps and through the open slot. Tie a very tight, secure knot.

  4. Cut the loops at the top and bottom of the loom. The spacer creates a channel for the scissor blades. Really sharp scissors will be a big help here.

  5. Fluff your pom pom, and give it a haircut if necessary to even out the shape. The tying cords can be trimmed if you don't need them for attaching the pom pom to anything.


Thursday, August 4, 2022

How to make a simple piggy bank

 Hi gang.  Hope all is going well for you.  Today I have a simple project that you can help your child make, under strict supervision of course due to the nature of saws living to cut, wood and or fingers.)  In other words, just be careful with cutting tools.  Enough said, let's get busy with this easy project.


I'm not sure if you can tell from the picture but my inspiration was an empty Gatorade bottle.  It had a couple of things going for it.   It was a nice sturdy plastic bottle, (so it could be cut) and... the orange bottle top which was bigger than a quarter sold me.


Firstt,I designed a pattern that I was going to use.  Everyone should do their own but basically see the cutting pattern below.  These are the 3 pieces you will need.


I drew my patterns onto my pieces of scrap wood then took it over to my Proxxon mini bandsaw and cut out the perimeter of all 3 pieces.


Now, for the inside cuts I used my Proxxon professional rotary tool with a small drill bit to make a hole inside the circle I wish to cut out.  Then I passed the scroll saw blade through that hole and reattached it so I could make my inside cut.

Then I used my Proxxon cordless mini belt sander to bevel the edges slightly outward on my inside pieces, so they fit the bottle pretty tight.   I used the Proxxon OZI/E delta sander to smooth all the edges of the wood, (no splinters allowed!)


Its a good time to paint the pig parts.  🐷🐖  I used Plaid paints because they have the best colors.


I used my Proxxon professional rotary tool with a cutting wheel to cut a slit in the top of my bottle.  This is where everyone is invited to stuff coins, and or paper cash.!


Next Glue the cap of the bottle the front part to the pig.  Be careful not to glue the piggy parts to the body of the bottle.   (To get our money out we are going to untwist the nose).


I'ts done, if you want, put a squiggly tail on him--or not

I painted him at this point, but hopefully you painted him earlier.  It's a lot easier before it is together. 


It[s been a lot of fun,  Thank's Proxxon, and Thank you for visiting!

Catch ya next time..   Carol