Before I start with the instructions I want to say thank you for the time we have been blogging. We started as a team and we wish to close out the year as a team. So this project was a combined
team project. Carol worked on the desk and I selected the project and did the painting.
This is a photo of the finished product.
This is a photo of the finished product.
Tools used
Proxxon Mini Table Saw
Proxxon OZI/ E detail sander
Supplies
Wood of your choice we used 1/4" Poplar ( sides, back and front)
and 1/4" Birch plywood for Top and Bottom.
2. Small Hinges
Plaid Folk Art paint
Krylon Crystal clear
Latch (optional)
See the cutting design below and cut your wood accordingly.
2. Small Hinges
Plaid Folk Art paint
Krylon Crystal clear
Latch (optional)
See the cutting design below and cut your wood accordingly.
The Proxxon table saw worked beautifully for this, it cuts fairly smoothly, even with the birch plywood which is notorious for splintering . This cut was for the sides and is cut at a 100 degree angle.
After cutting the sides back and front you will need to cut some dados in them for the bottom piece to slide into. This is to ensure sturdiness.
To do this you need to take the splitter off the proxxon table saw. Set the blade height to about 1/8" and set the fence about 1/4" from the blade. Run the bottom of the sides, back and front across the blade to make a thin slot. Then move the blade slightly farther away from the fence and run them across again to widen the slot so that the bottom will slide in place. When sides bottom and front are put together they should all line up perfectly making a nice support for the bottom.
When you get the wood cut and are building the box remember that the sides will lay outside of the front and back.
Cut across the top (lid) piece three inches down from the top. this is glued to the back and the sides on the tall side of the frame. Clamp and let dry. After the desk is painted you will attach it to bottom part of the lid with small hinges.
The box is now partially assembled and will be painted in two sections. After everything dries well we will put the hinges on and attach the lower part of the lid to the top.
Painting
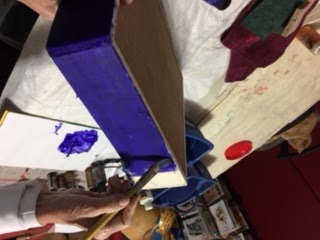
I started the painting with the sides of the box. I chose
a dark blue to base coat the entire lap desk. I left the inside unfinished.
Since this is being made as a Christmas gift for a young girl,
Emma, who is a grandchild of our neighbor, I chose the design of a large sunflower for the top of the desk.
Line up the top and bottom, attach the hinges and the lap desk is finished.
 |
| finished lap desk |
Some of the colors I used are as follows.
Burnt Sienna 943
Burnt Umber 462
Daffodil Yellow 2912
White
Classic Green 2554
Old Ivy 927E
Hauser light green 459
Some combining of color mixed were used
to gain changing values.
I would like to thank Proxxon Mini Tools and Plaid Paints
for their continued support for this blog. I would also like to thank Terri Sproul our point of contact and gracious guide and helper.
Wishing everyone a Happy, Healthy and
Prosperous New Year.


12 comments:
Misty, this is a great project. Very pretty and useful
great idea love the colors you used
I like this project and I know Emma is going to love it. Beautiful painting.
Like this project very much , Misty
I love this thanks , the idea is wonderful thanks for sharing
Great idea . love the design
Thank you for the visits and comments.
Great project...yay You!
Great project Misty! You are really involved with your tools. Love that. Thank you for sharing how to make the dados.
You and Carol have gotten so profecient with your tiny tools. I'm blown away. Great project, great job...Luv it!!
This is a wonderful and pretty lap desk. It would make a great gift!
Thank you for visiting and leaving a comment,
I appreciate it and you a lot.
Post a Comment