I've been fascinated with plastic bottle cutters since I first saw them online. Proxxon tools made it easy to make my own bottle cutter.

Here are the supplies and equipment that you'll need:
- Solid wood blank 7" x 1½" x ¾"
- Aluminum flashing or sheet of craft brass
- Four ½" to ¾" screws
- One replacement cutter blade
- Proxxon MICRO Bandsaw MBS/E
- Proxxon Disc Sander TSG 250/E
- Proxxon Bench Drill Press TBM 115
- Proxxon MICRO-Press MP 120
Let's make the plastic bottle cutter:
- Measure and mark the three cutting slits and the blade slot following the diagram.
- Cut the lengthwise slits on the bandsaw.
- Measure the height of the replacement cutter blade that you are using. This measurement will be the depth of the blade slot. Mark that depth on the side of the blank. Cut the blade slot on the bandsaw.
- Cut two pieces of metal ¾" x ¼" for the clamps that hold the blade in place. Mark two screw holes on each.
- Use the micro-press to punch the screw holes.
- Position the clamps over the blade slot, and mark the holes for drilling.
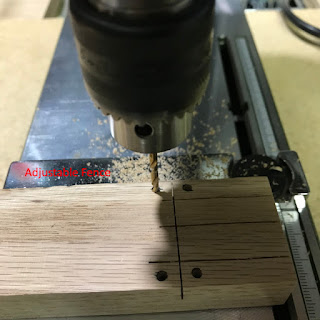
- Drill the screw holes using the bench drill press. Use the adjustable fence to ensure accurate placement.
- Use the disc sander to sand the surfaces, removing any markings.
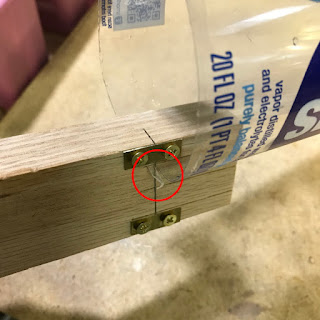
- Drop the blade, sharp edge down, into the blade slot.
- Screw the blade clamps in place.
- Cut the bottom from a plastic bottle.
- Slide the bottle into the appropriate slot, depending upon the width of the ribbon you want.
- Turn the bottle against the blade until you see the ribbon tab emerge.
- Then, pull on the tab to cut the ribbon. Continue pulling on the plastic ribbon until you reach the neck of the bottle. Snip the ribbon from the neck of the bottle. Ta-da!! You've just recycled a plastic bottle into several feet of usage ribbon!!


 |
| Carole |

1 comment:
I love stuff like this. I think I will have to make one of these too. Have you seen where you can use plastic bottle strips and a hot air gun to join two wood pieces? BTW, Your tutorials are always excellent
Post a Comment