
Hi friends. It's January and I need to make some major changes in my workshop. My New Year's resolution Is to get more organized. I desperately need a place to store my paint bottles so I can see what colors I have. I had a cabinet door that I saved for future projects. It seemed perfect for what I had in mind. Follow along with me and I'll show you how I built the wall cabinet.
SUPPLIES:
Wooden Cabinet Door
1x2" pine boards for outside frame
1/2" scrap birch plywood
Drill
Screws
Brad nails and nail gun
First I laid the cabinet door on the floor to get the exact measurements. Simple way was to just lay the 1" x 2" next to it and transfer the length.

I cut 2 side pieces and then figured the measurement for the top and bottom pieces. Measure the top then deduct 1 1/2". I cut these pieces to length with the Proxxon Scroll saw but I could have also used the Proxxon Table Saw FET.


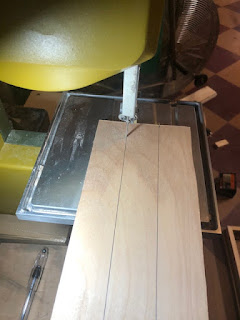
Next, I needed to make the shelves. I used scrap 1/2' birch plywood. I measured the inside distance between the 2 outer sides and also measured the depth. I cut out as many shelves using the Proxxon Micro Bandsaw as I could, remembering to leave a little head room so I could pull out each bottle with my finger. Measuring the height of each shelf, I attached them to the frame using the brad nailer.


Here's how it looks so far. I decided to add one more piece of plywood inside at the top to have something to screw through to attach it to the wall

I drilled two holes at the top through the header piece and screwed it to the wall.

Next I attached the hinges to the cabinet door. Held the door to the frame and attached the hinges to the frame.


Thats it!!! All I needed to do was fill it up. I did end up putting a hook and eye latch on it to securely close it

Depending on the width and depth of your wood this could be modified and used to store all kinds of stuff. Thanks for following along with me. Till next time....
Colleen :-)
.
1 comment:
That is really nice. And you can see all the colors while you paint, handy!! ( I thought I had a lotta paint, you win)
Post a Comment