Hi again. It's time for a little project. If you have kids, they will like this one and you can get them involved and using their creative skills. We are going to make a wooden toy airplane.
To start we need some wood. I used 1/4" birch plywood,
I had some 1/4" flat silver wire, I want to use for landing gear,
2 small 3-4" wire pieces
1 small wood wheel, 2 slightly larger wood wheels. (or buttons)
Proxxon mini scroll saw
Proxxon OZI/E delta sander
Proxxon's cordless long neck grinder
Proxxon mini rotary tool with some small drill bits
Plaid paints for decorating.
Paintbrushes, pliers, pencils, etc.
super glue, and accelerator if you got some
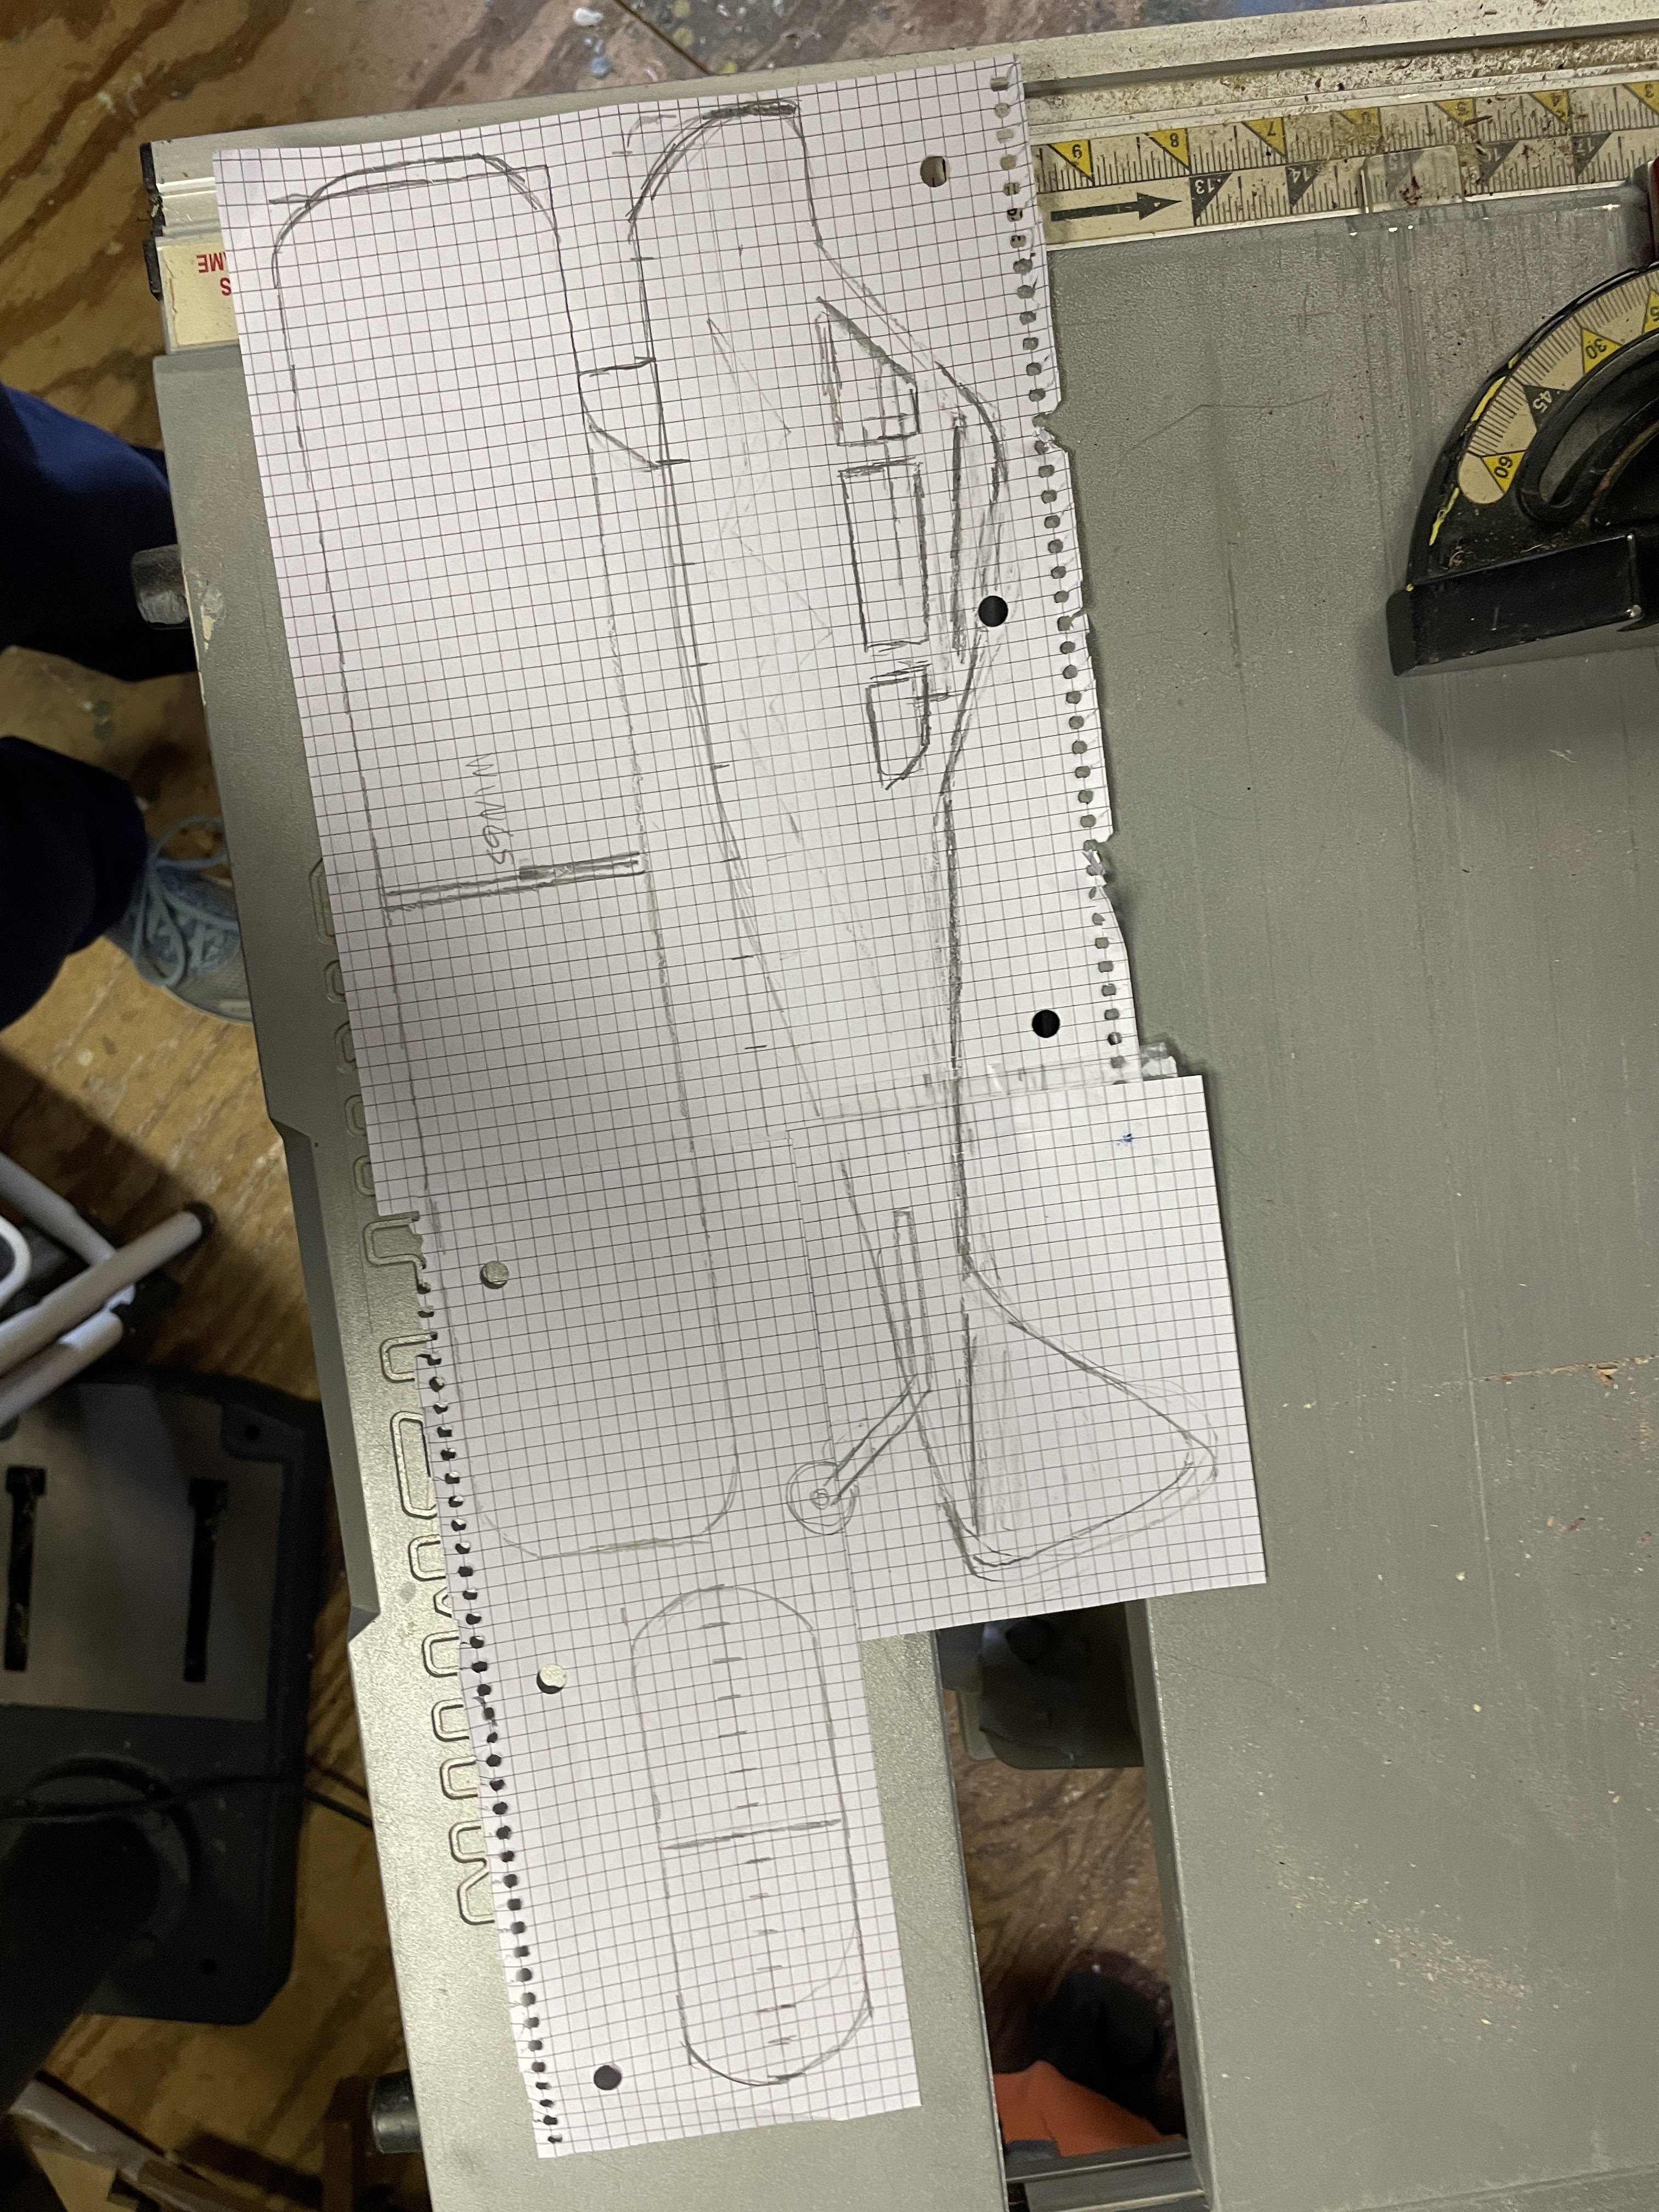
First, we need a pattern. You can use mine if you want or draw your own.
Then transfer that pattern to your wood piece. I chose the thin wood just to make it easier for me. But I also cut a big fat body of a plane for a later time when I plan to shape it into a more dimensional plane. I was very impressed with Proxxon's cordless long neck grinder. You can take a chunk of wood and "carve" it down in a jiffy using that tool.
This plywood gets a little rough around the edges when cut so then it is time to sand, sand, sand. Proxxon's
OZI/E delta sander does the trick with little effort.
The slot for the wing and the tail in the back was cut with the scroll saw as well. Try to keep the slots thin enough to hold the wings tightly when it is pushed through, but not so tight you break it trying to put it through. You know, do it just right 🤣
Next, we deal with the landing gear. I used a 2 1/2" length of the flat wire. Then I snipped a piece out of the middle so I could easily bend it into a L shape. I made 2 identical pieces,
I glued the unpierced sides to the back of the plane as landing gear. Then threaded the small piece of wire through one side then through the hole in the wheel then through the other wire piece. I twisted a small loop into the ends of the wire to keep it from "unthreading".
Let the kids paint! We use
plaid paints because of the rich colors.
Now lastly is the tricky part. The propeller. I first cut out a small cube and scored a line across it using
Proxxon long neck grinder. I use this slot to fit on the nose of the plane.
Next I fashioned some propellor pieces and glued them to the square. These were also made using the
scroll saw, then the grinder, and sander.
I used super glue to glue the propellors to the cube. Then I slipped the cube which I had rounded a bit over the nose of the plane and glued it on. It should stay.
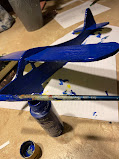
I added a front wheel. and let's call it done. I think the kids really enjoyed participating and are pleased with their artsy plane. This was a fun project. I basically "winged" it. LOL. I know whoever you are out there can have some fun with this. It's creatively wide open.
Thanks for visiting.
Thank you
Proxxon, I always have fun with your tools.
till next time.... play safe Carol


No comments:
Post a Comment