


←Here is the finished project. I made it for a little painting I had done in my art class. I hadn't spent much effort painting it and it was a funny size so I really didn't want to invest a lot of money in a "custom" frame. The beauty of this project is that you can make your frame any dimensions you want, and use whatever scraps of wood you have lying around.
Equipment and supplies:
1/2" x 2" by ( ) piece of wood suitable for the frame you desire. ( )= length of picture x 2 + height of picture x 2 + 4" Mine was 7" x 4 1/2" so I needed a piece about 27" long.
1/8" thick plexiglass piece big enough to cover your picture.
Proxxon mini bandsaw (optional)
Woodburner (optional)
wood glue
Sealer of your choice
Sealer of your choice
 So let's get started...
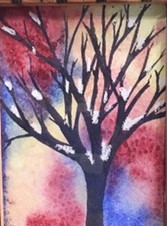
Here is the picture I am going to use. It measures 7" x 4 1/2"
Using Proxxon's mini bandsaw I cut the plexiglas to size. Note the masking tape. This enables me to draw a line on the Plexiglas. Leave the protective plastic on for now as this will protect the glass from scratches. It cuts so easy on Proxxon's mini bandsaw. Set the glass aside for now.


Now we are going to make a groove in the frame sides that will hold the glass and pictures. For now I am going to leave the wood for my frame piece in one long piece. This will ensure that the grooves line up when we put it together.... and it is just easier to push one piece through the saw. (safer too)!
First thing that needs doing is to remove the wood splitter from the table saw. This is necessary because we will not be cutting entirely through the wood at this step. We are just making a groove.
Next I set the blade height between 1/8" and 3/16" (the depth I want my groove). Then I set the fence so that it would hit just about center in my wood side. I then ran the length of the wood through the saw. This left me with a groove just a bit too small for my Plexiglas to slide into... so I nudged out the fence a tiny bit and ran the wood through it again. Now my Plexiglas and picture will sit nicely in the groove I just made. 👍


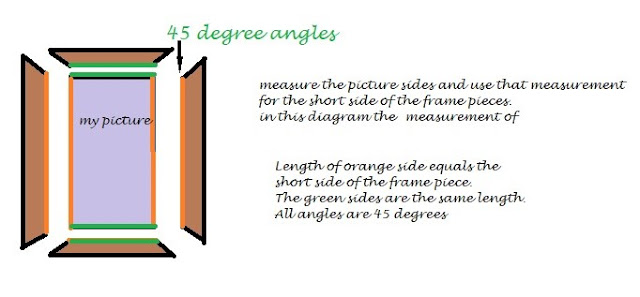
Important. the lengths of the sides of your picture are going to be equal to the of the short side of the frame pieces. See below. The picture here is worth a thousand words....(I hope) The groove you made will always be on the short side of the frame sides
The next thing to do is to finish your frame--sanding always comes first and I sanded my frame using the Proxxon OZI/E delta sander.

Cedar wood if sanded fine enough will shine up like red glass when it is sealed or varnished. I decided to do a little wood burning on mine prior to sealing it with krylon triple thick glaze.
I then glued 3 pieces together and let them dry well. Keep your angles at 90°

When everything is dry, I slipped my picture behind the Plexiglas and slid them both in the groove then glued the final side on. Add a sawtooth or other picture hanging device on the back and it is ready to hang.

Thanks for visiting.
Truthfully, thanks to Proxxon tools this was much easier to build, than it was to explain. . I hope the pictures help, so you too can make your own picture frames. Your really should check out the Proxxon line of tools. They are certainly designed for the crafter in mind.Catch ya next time Carol


