Showing posts with label picture frame. Show all posts

Wednesday, October 18, 2023

How to Recycle an Old Frame into the Perfect New One

I needed a specifically sized frame to display one of my bobbin lace pieces. Yes, in addition to creating with my Proxxon tools, I make bobbin lace. With no read-made frame available, I decided to make my own using Proxxon MICROMOT tools and an old frame that I found at a local thrift shop.


These are the supplies and equipment that I used:

Here's how I transformed an old frame into a perfect new one:

  1. Here's the thrifted frame with dimensions of about 20" x 16". I needed the picture area for my new frame to be 15" x 4".

  2. The first thing I did was to tear away the backing and remove the old mat and picture. When the backing was removed, I could see that the frame was held together with corner staples—ones that there was no way I could remove.

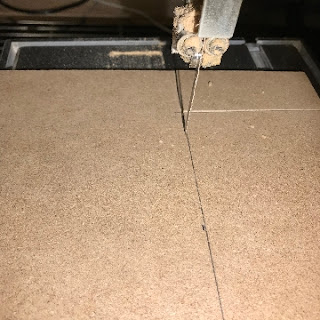
  3. I used the bandsaw with the miter gauge set to 45° to cut away the stapled section at each corner. I was left with ­four lengths of picture framing.

  4. Next, I used the chop and miter saw to cut each side using the 45° pre-set stops and the longitudinal fence stop to insure accurate lengths.

  5. Now I was ready to glue and clamp the sides together forming my new frame.

  6. I used a glass cutter to cut the glass from the thrifted frame to fit the new frame.

I'm thrilled with my new frame. It cost a small fraction of what a purchased custom frame would have, and I have the satisfaction of knowing I made it myself!!


    Carole

    Sunday, February 18, 2018

    How to Make a Hanging Picture Display Frame

    I love using unique frames to display pictures of family. You're sure to enjoy creating this eye-catching display frame.

    Supplies and Equipment for Making the Display Frame

    Instructions for Making the Display Frame

    1. Mark measurements on the piece of ¼" MDF and on the 1/16" wood. You will need one 8" x 5½" piece, and two 5½" x ¾" strips.
    2. Use the band saw to cut these pieces.
    3. Select the pattern for the scroll top of your frame. I've included both a solid and openwork pattern for the frame top.  
    4. Mount the pattern onto your selected substrate. Cover the substrate with painter's tape; spray the back of the pattern with removable adhesive; place the pattern on the substrate. The adhesive holds the pattern in place, and the painter's tape makes for easy removal.
    5. Use the scroll saw to cut the top of the frame.
    6. Sand the strips and sides of frame using the disc sander.
    7. Glue and clamp the 1/16" spacers to the back of the frame cross strips.
    8. When the glue is thoroughly dry, paint the cross strips. Paint the frame piece, and optionally, decorate with stamped or painted images.
    9. Decision time!! Decide if you want to display your photos in portrait or landscape orientation.
    10. Landscape orientation
      Portrait orientation
    11. Position the cross strips according to your display choice, and glue and clamp them in place. I place a piece of scrap paper between the clamp and the cross strip to protect the paint.
    12. Enjoy displaying your favorite photos in this unique picture frame.

    Carole

    Sunday, September 3, 2017

    How To Make a Custom Picture Frame

    In addition to making projects with my Proxxon tools, I'm also a bobbin lace maker. I specialize in Withof lace, and many of the pieces that I make are small. Now I can use my Proxxon tools to make a custom picture frame that is perfect for my lace pieces. This 4½" square frame has a 2¾" square opening.

    Equipment and Supplies to Make a Custom Picture Frame

    Calculating the Length of the Moulding 

    1. Decide the dimensions of your frame. In this case I wanted a 4½" square frame.
    2. Add the length of the four sides together: 4½+4½+4½+4½ = 18
    3. Multiply the width of the moulding my 8. My moulding is 1" wide. 8x1 = 8
    4. Add this to the total of the four sides: 18 + 8 = 26
    5. Add an inch or two to allow breathing room in the recess so the picture doesn't fit too tightly, and to allow for the thickness of the blade as it cuts. 26 + 2 = 28"

    Instructions for Making a Custom Picture Frame

    1. Set the angle on the miter saw to 45°.
    2. Firmly clamp the frame moulding in the miter saw, and make the cut.
    3. Set the saw stop for the desired length.
    4. Move the miter saw table to the opposite 45°, and make the second cut.
    5. Repeat for the other three sides of the frame.
    6. If necessary, sand your frame pieces, then finish them. I polished mine with Johnson's Paste Wax. Here you can see the difference between the top three unpolished sides and the bottom, polished one.
    7. Using wood glue, glue each of the corners together. Since I don't have framing clamps, I held the four sides together while the glue dried with painter's tape. All the sides were laid in a straight line, with a length of painter's tape along the outer edge. I painted glue on each cut surface, then "closed" the frame. 
    Enjoy your custom frame!!

    Carole