Saturday, February 24, 2018

How to make a driftwood candle holder

My Proxxon tools have helped me make a very nice, decorative piece. This post has a beachy theme which is very fitting as I am at the Florida Gourd Show helping a friend with her booth. I love the beaches that I've been to in Florida and all the shells that I have collected.


For this project you will need:

Proxxon Band Saw
Proxxon Delta Sander
Small nails
Hammer
Glue
Raffia
Seashells
Brown paint
Sealer
Small pieces of driftwood
Small board to cut base out of


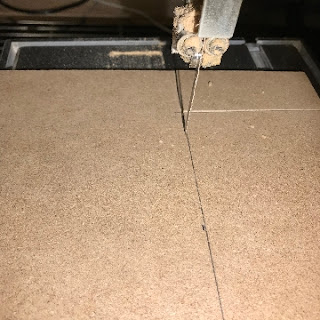
The first thing to do on this project is to draw a circle on the wood and cut it out with the band saw. I checked the bottom piece of wood with the width of the candle that I planned to put in it and drew my line accordingly. 


I next sanded the edge of the round wooden piece smooth. I painted the bottom of the gourd with the brown paint and let it dry.


I cut the pieces of driftwood on one end to make them all level on the bottom of the candle holder. I checked as to how the pieces would sit together around the candle and tried placing several different pieces before I came up with ones that would go around the wood bottom and fit.


Next I nailed the driftwood pieces into the bottom side of the circle that I had cut out of wood.

Once everything was in place I took some raffia and wove it in and out of the driftwood pieces and cinched them together along with a little glue. After tying the raffia into a bow, I glued some seashells to the front and voila' my candle holder was finished! Here's the finished look with the candle in it.

Wednesday, February 21, 2018

Mixed Media Sign

Hi everyone, Steph Ackerman here with a new mixed media project using the Delta Sander,  the Bench Drill Press, and assorted colors of Plaid Paints.


Start by lightly sanding the panel, then add tape to the edges to avoid painting the bark.  Use molding paste through a Plaid stencil. Allow the stencils to dry.


Glue a selection of chipboard, floral, clay and metal elements to the panel.


Paint the entire panel and all elements with black gesso.


Once dry, add metallic paints to selective elements.


 Using Plaid Color Shift paints, add color to the panel.


 Once the panel is completely dry, spray Tattered Angels Pearl Glimmer Mist over the panel.


Stamp around the panel with a script stamp using black ink.  Stamp dots and numbers randomly about the panel.


Add metal clocks to finish.


Use the Bench Drill Press, to drill holes in the panel.


Add twine to hang the panel.


Thanks for stopping by.


Sunday, February 18, 2018

How to Make a Hanging Picture Display Frame

I love using unique frames to display pictures of family. You're sure to enjoy creating this eye-catching display frame.

Supplies and Equipment for Making the Display Frame

Instructions for Making the Display Frame

  1. Mark measurements on the piece of ¼" MDF and on the 1/16" wood. You will need one 8" x 5½" piece, and two 5½" x ¾" strips.
  2. Use the band saw to cut these pieces.
  3. Select the pattern for the scroll top of your frame. I've included both a solid and openwork pattern for the frame top.  
  4. Mount the pattern onto your selected substrate. Cover the substrate with painter's tape; spray the back of the pattern with removable adhesive; place the pattern on the substrate. The adhesive holds the pattern in place, and the painter's tape makes for easy removal.
  5. Use the scroll saw to cut the top of the frame.
  6. Sand the strips and sides of frame using the disc sander.
  7. Glue and clamp the 1/16" spacers to the back of the frame cross strips.
  8. When the glue is thoroughly dry, paint the cross strips. Paint the frame piece, and optionally, decorate with stamped or painted images.
  9. Decision time!! Decide if you want to display your photos in portrait or landscape orientation.
  10. Landscape orientation
    Portrait orientation
  11. Position the cross strips according to your display choice, and glue and clamp them in place. I place a piece of scrap paper between the clamp and the cross strip to protect the paint.
  12. Enjoy displaying your favorite photos in this unique picture frame.

Carole

Friday, February 16, 2018

Simple wood butterflies


February...and, the butterflies are nowhere to be found, and I miss them!!  I suspect they are all sunning themselves down south, not thinking of us at all, while we endure the cold. Oh well.... who needs them anyway, We can make our own.

This is a really, really, easy project, and it was fun too! 
After pruning some trees, I again find myself with lots of  "material" to work with.


Here is what we will need.

Equipment and Materials 


1- Yard scraps- I used limbs with diameters of 1"-2"
pine needles
twigs

2- A proxxon tool  -your choice of -
(any and all of these work for this but I found the bandsaw easiest to use)


4- Glue gun and glue sticks


So lets begin... 


First thing I did after gathering my scraps was to cut some very thin slices which I will use as "wings"   I cut them on an angle (about 30 degrees)  so they would be a little more oblong or "butterflywing" shape. What's neat too is that as they dry they curve a little bit. 


                                                                         table saw                                                                             band saw


I sanded them smooth using the proxxon OZI/E detail sander


Next I chose a twig that had a little "V" shape.   This just made it easier to glue on the bigger upper wings.  I placed a dab of hot glue and stuck on the top wings


Next, (bet you couldn't guess), I glued the bottom wings to the twig.

 I snipped off the extra twig pieces, then added another twig piece for the body, again using the hot glue to secure.   Careful, that glue gets HOT. 


Pine needles make great antennae!
just a dab of glue to the back, slap them on and cut them to size.  


All done!


Now stick them everywhere!      They make great refrigerator magnets, or put a bunch on a little branch for a centerpiece.  


Have fun with them! 


Thanks for visiting.                Catch ya next time  
                                                     (don't make me have to use my butterfly net!)

Carol


Saturday, February 10, 2018

A Valentine Door Decoration!

I really enjoyed making this piece for the blog this time ( shhh, I really enjoy making all of them ). I enjoy turning myself loose so to speak with my tools and my imagination. lol In this instance all worked out well. I also got to use a few of my favorite, go to Proxxon Tiny Tools !

Let's jump right into this one!


The Supplies Needed For This Project Are:

Proxxon Jig Saw
Proxxon Belt Sander
Proxxon Drill
Assorted Plaid Paints
Paint Brushes
Gesso or Kilz (I used Kilz because of the size of the piece)
A couple of cups of water to wash your brushes in
Plaid Acrylic Sealer
2 X 4 piece of birch wood (just my preference)
Ribbon or Cording for the hanger
Painters tape

These are the Plaid paints and sealer that I used all except one, I did use the New Plaid  Color Shift paint in Red.
I free hand drew a funky heart out onto my board. And put it up on some sawhorses in the sunshine we had a few days ago. 
It was still a little chilly but my Proxxon Transformer and Jig Saw did and awesome job of cutting everything out! 
I used my trusty hand held Proxxon Belt Sander to smooth out any rough edges. 

I set the heart on a trash basket in my playroom to paint it with the Kilz. Plus a trash bag on the floor for drips!
I am only so good at painting lines freehand and so I taped off the outside edge of the heart to get the black paint on it. 
I took care of the dots on the black and then filled in the center of the heart with red and pink Plaid paint. I then set myself free with decorating the rest of the piece with Plaid paint including the New Color Shift Plaid paint!
Once I had finished the heart, I used my Proxxon Drill with the accompanying flex shaft to drill a hole to put the cord through that I used to hang it with.
Sweeeeet! I love how it turned out! And once this picture was taken I used the Plaid Acrylic Sealer to finish it off. Now I'll be able to put it on my front door every year. Happy Valentine's Day!

I hope that you've taken the time to go to www.proxxon.com to check out all of these awesome tools and also to  www.plaidonline.com to see all of the paints and art supplies that they have.

Please leave me a comment below and let me know what you thought of this Valentine project!

Barbara