Saturday, September 30, 2023

Easy Glass etching

 Hi everyone.   

    Today I want to show you something different.  I want to show you how easy it is to etch on glass,  In fact, almost any glass surface can be etched using the Proxxon engraving tool. You will be amazed at how easy this is to do.   I know I was.  


Supplies and Equipment

1. a glass surface to etch on  

2. Proxxon engraving tool

3 Etching bit which is a diamond coated burr.

4 Safety glasses

5 a pattern or drawing to work from (unless you are awfully brave and feel like winging it.


I chose a very simple pattern to do today.  

It has a couple elements and some writing so I can show off the tool.   

1st step is to either draw it on the cup or what we are going to do which is to place it on the inside of the glass where we can trace over it with our engraver tool.


Now enjoy the video.   Please excuse my multiple faux pas.  I am a rank amateur as a videographer.  


Here is the final result after I added a few more touches.  I put the liquid in the cups to emphasize the engraving.   Mike has his cup and I have mine,  I don't see how they can confused now.  😵


I forgot how fun the Proxxon engraving tool was.   Personalize something for someone and it becomes special.  A few ideas; wedding aniversaries, baby births, birthdays, graduations etc.   Have fun.  

Thanks for visiting.  Come back soon for some more creative fun.  Carol

Sunday, September 17, 2023

How to Make the Perfect Leaf Print Night Light Using Proxxon Tools

 First, I must confess that I've totally copied this night light project. The original was conceived, designed, and executed by Colt, a ten year old Proxxon woodworker. Yes, you read that correctly—ten years old. If he can make it, so can you. 

I've taken Colt's idea and broken it down into easy to follow step so you can create a similar night light.

Here are the supplies and equipment that you'll need:

Instructions for making the Leaf Print Night Light:

  1. Cut the wood blank to size using the bench circular saw.

  2. Print and cut out the leaf template. Transfer the leaf outline and veins onto the wood blank. 

  3. Using the bench drill press and a 1/64" drill bit, drill holes along the outline and veins about 3/8" to 1/4" apart.

  4. Color the leaf with crayon, marker, or acrylic paint. Trace the outline and veins in black.

  5. Hot glue the finished leaf print blank to the night light.
  6. Enjoy!! 

Here's Colt working on an unrelated project, but it's too cute not to share. 

Carole

Sunday, September 10, 2023

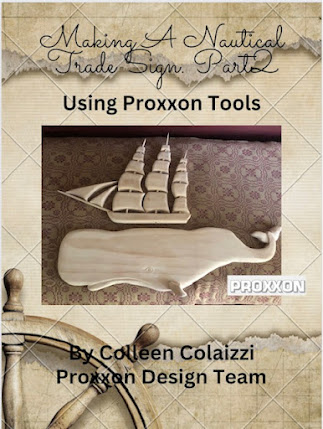
Making A Nautical Trade Sign Part 2


Hi everyone.  Today I'm continuing on with may trade sign.  This will be part 2.  The ship will be above the whale when everything gets assembled on the background board which will be part 3.  Follow along with me to see what tools I used and how I made it  :-)


Supplies:

   Scraps of clear pine  3/4" thick
   3/8" wood dowel rod
   Wood Glue
   Drill


First, I tried to decide how big I wanted to make the ship. I laid a piece of pine above the whale to figure the length. I then drew the ships hull on and cut out with the scroll saw.


I cleaned up the edges using the Proxxon Disc Sander.


Next, I cut some dowel rod for the masts.  Using my drill I made a hole in the hull, at an angle for the front pole.  I sanded the pole to a point with the disc sander and inserted it in the hole.


Next, I drew out the masts on the 3/4' clear pine and cut out with the scroll saw. 


I started to lay out my pieces to see how the looked and were lining up as far as size.  After I was satisfied, I continued on with the rest of the rows of masts.


Now I needed a way to connect the masts together.  I drilled a hole in the top and bottom of each one and inserted small pieces of dowel that I cut on the Micro Band Saw.


After all the holes were drilled, I started to sand each piece.  I initially started with the belt sander, which worked great. Because I had so many pieces, I switched to the Long Neck Angle Grinder.  It seemed to work much quicker.  I sanded them to give them a 3D look.


Using the small pieces of dowel, I connected all the masts together.


Here's how it looks sitting above the whale.  


This completes part two!  Part 3 will be making the board they get mounted on, then painting everything and assembling it all.

Thanks for following along.  See you next time!
Colleen :-)


Saturday, September 2, 2023

How to make a little bird feeder

 Hi folks !!  Time for another new project.  I'm thinking spring.  Why dont we  make a simple little birdfeede that will keep them coming back.  I love to watch the birds, dont you?     what I found appealing in this project was that every piece was scraps.


Let's get started.   Keep in mind this will be made with your scraps so your measurements might be different than mine.   But I will give you mine as an example.

I found 2 square pieces of 3/4" pine measuring 7.5 x 7.5   This will do for our roof and the middle piece.

My little feeder boxes are 3.5 x 4 x 1.5"  I will cut my scraps to size on my Proxxon mini table saw.

Additionally, I will need 4 small cup hooks and about a dozen small nails, and some leather  lacing.  .I will use my Proxxon cordless rotarty tool a small drill bit and my Proxxon OZI/E delta sander and, of course, paints by Plaid.  

Ok, so I made a line diagonally across the board I am going to use as my roof,  Then I laid a line of glue down and placed my second board vertically on it and let it dry.  I reinforced it later with some small nails  


Setting that aside I moved on to make my small feeder trays.  I cut 4 identical pieces approximately 1.5 x 4" to be the long sides of my little boxes and 4 similar pieces but only measuring 3.5 " in length.  My bottom pieces measured 4" square   I cut them on my Proxxon mini table saw then glued them together to form the two feeder trays. ( In the picture below the hammer is just a weight while the glue dries the bottom to the sides) When the glue dried, I reinforced all the junctions with small nails after drilling my pilot holes with my Proxxon cordless rotary tool.


Now I have 2 little trays.  Of course, I sanded everything well using my Proxxon OZI/E delta sander

Next, I put small cup holder hooks on two sides of the trays and on the ceiling part of the roof so I can hang the little trays.  I made loops in my leather hangers.  


Now find someone to paint it.   Hello kiddies next door.  👀  Then hang it and let the birds enjoy it. 

🐦🐦🐦🐦🐦🐦🐧


It's been fun.  I love spring!  Catch ya next time.  Carol