Showing posts with label Tammy Santana. Show all posts

Wednesday, January 4, 2017

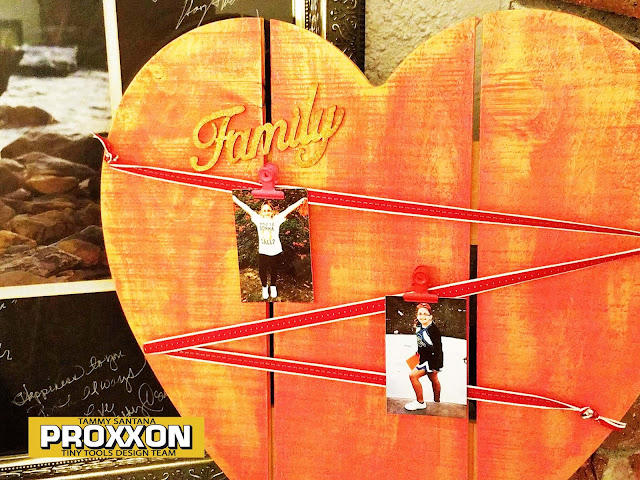
Photo Display Mini Heart Wood Pallet


Hi everyone! Tammy here with you today, with a fun wood pallet project. I love creating home décor items with my Proxxon Delta Sander and this one is definitely one of my favorites.
Here is how I made it...

Supplies:
Proxxon Delta Sander
Heart shaped mini wood pallet
Red paint
Gold metallic paint
Glitter paint
Die cut "Family"
Ribbon
Eye hooks

Directions:


Knock down some of the grain of the wood with the Proxxon Delta Sander.


Paint with red paint, let dry completely


Dry brush metallic gold paint lightly onto the wood to create a rustic effect


Add a glitter painted "Family" die cut with Glue Dots


Add eye hooks and ribbon

 Add your favorite family photos and enjoy! I hope this has given you some unique ideas on how to use your Proxxon Delta Sander.
 Let’s be friends!


Wednesday, December 7, 2016

Rustic Snowman Christmas Ornament Tutorial

Hi everyone! Tammy here with you today with a fun rustic Christmas ornament tutorial. I love Christmas time and making ornaments has always been a family tradition in our home. This year we have a rustic theme for our Christmas tree and this fun snowman ornament fits perfectly! 
This is how I made it...

Supplies:
Wood pieces
Ribbon
Fine tip Sharpie marker


Directions:
Use a medium size drill bit and create small holes in the top of a small piece of wood, two holes in the middle piece, 


and one hole in the top of the bottom pieces of wood.


String ribbon through the holes and tie double knots to hold the wood pieces together.


Add decoration to the wood pieces with the Sharpie and hang on your tree! 


I love how this turned out! It really goes with our theme this year. I hope this shows you how easy it it to use the Proxxon Model Building and Engraving Set to create Christmas ornaments of your own.

Let's be friends!


Wednesday, November 16, 2016

Personalized Jewelry Charm Locket


 Hi everyone! Tammy here today with a tutorial on how to personalize charm lockets with the Proxxon Glass Engraving Tool. I purchased one of these charm holders, and I decided to personalize it with my initial. Here is how I did it...


Supplies:

Glue Dots Removable
Printed "T" template
Paper punch .75"
Charm holder

Directions:
Print the initial to match the size of the space where you will be engraving. My space was a little under .75"


Use a paper punch to cut out the initial.


Place a removable Glue Dot on top of the template


Place the template face up on the back of the glass.


Use the Proxxon Glass Engraving Tool to etch the initial onto the glass.


Carefully remove the template and dust off any remaining dust from engraving. Fill in any missing areas of the engraving.

Add charms and a chain.

I love how this turned out so much that I think I may be making some of these for my friends for Christmas! (shhh don't tell anyone)

I hope this has given you another unique idea on how to use the Proxxon Glass Engraving Kit. This is one of my favorite tools from Proxxon!

Let’s be friends!

Wednesday, November 2, 2016

Thanksgiving Wine Charms Featuring The Proxxon Model Building Set


Hi everyone! Tammy here today with a fun tutorial on how to use the Proxxon Model Building Set to create these cute Thanksgiving wine charms. I love spending time with friends over the holidays and this Thanksgiving I will be giving these fun wine charms to friends. Here is how I made them...

Supplies:
Flat bottle caps
Epoxy self adhesive domes
1 inch paper punch
Xyron sticker maker
Small ball chain holder
Split ring
Thanksgiving printable (included below)


Directions:

Use Proxxon Model Building Set and small drill bit to create hole in the bottle cap

Add split ring to bottle cap


Add ball chain holder to split ring


Right click on the above file and save it to your computer (for personal use only). Then print on 4x6 photo paper.


Use 1 inch round paper punch to cut out the sentiment

Use Xyron machine to turn cutout into a sticker


Place self adhesive epoxy dome on top of cutout.


Place epoxy dome inside of the bottle cap.


Place wine charm on the stem of any wine glass and start the party! I love how this project turned out when you own the Proxxon Model Building Set, you can use any bottle cap. I hope this has given you some ideas on how to use your Proxxon Model Building Set.

Let's be friends!

Wednesday, September 21, 2016

DIY Engraved Halloween Party Glasses Featuring The Proxxon Glass Engraving Kit

Hi everyone! Tammy here with you today with a fun tutorial on how to use the Proxxon Glass Engraving Kit to make these cute Halloween party glasses. Here is how I did it...

Supplies:
Proxxon Complete Glass Engraving Kit
Champagne glasses from the Dollar Store
Ribbon for decoration
Feather hair clip for decoration


 Directions: 

Start with a Dollar Store champagne glass and an image you want to engrave on the glass.


Place a couple of Glue Dots on top of the image and place image, facing out, inside of the glass


Use the Glass Engraving tool to trace the image.


When the image is all traced, remove the image from the inside of the glass and correct any missing spots on the engraved image on the glass.


Tie a bow to the stem of the glass for decoration.


I added a feather alligator clip to add a fun decoration to the bow. I recommend you use removable decorations, so you can easily wash the glass after the party. I really love how these glasses turned out and I can't wait to share them with my friends at my Halloween party :)

Let's be friends!


Wednesday, August 10, 2016

Back To School Engraved Teacher's Gift


Hi everyone, Tammy here with you today with a fun back to school teacher's gift tutorial. I can't believe it's almost back to school time already! I love to give my daughter's teacher a bouquet of flowers on the first day back so this year I decided to kick it up a little and add some decorations to the vase.

 Supplies I used:
Dollar Store vase
Pencils
Ribbon
Scissors
Text image
Glue Dots 

  
Directions:
 Cut a piece of decorative ribbon about 18 inches and run a line of Glue Dots on the back of it.

 
Use a Proxxon Scroll Saw to cut pencils a length that will allow space for engraving at the top of the vase you are using.
 
Attach the pencil to a Glue Dot on the back of the ribbon.


 Measure the circumference of the vase and attach enough pencils, to the top of the Glue Dots on the ribbon, to go all the way around the perimeter of the vase.


 When all pencils are attached to the ribbon, add a couple of glue dots to the vase and wrap the pencils around the vase. Tie a tight bow to keep the pencils close to the vase. You can also seal the bottom of the pencils with some clear nail polish to keep the lead from staining any surface the vase is sitting on.


 Next, print out a sentiment you would like to use, and trace it onto the top of the vase with a Proxxon Engraving Tool.


When I find out the name of my daughter's teacher, I will add that to the vase also.

 
That's it, all that is left to do is add flowers to the vase and head back to school! I hope this has given you some ideas for easy and cute teacher's gifts you can create with your Proxxon Scroll Saw and Proxxon Engraving Kit.

Let's be friends!