Showing posts with label Proxxen Engraving Tool. Show all posts

Thursday, December 2, 2021

How to make a whistle

 Hope you all had a great Thanksgiving.   Ours was quiet and I enjoyed it.   Today I have a quick and easy project, but one the kids will love.   Take it on a hike... just in case you get lost or find yourself in trouble.  I enjoy making things with and for kids.  Call me a big kid, and I won't argue the fact.  🐐


Step 1-   I started with a piece of hardwood measuring 1" x 1" x 4"  (A pen blank for woodturning is just about the right size)   If I had needed to cut it I would have used Proxxon's mini table saw.

Step 2-  Using the Proxxon vise clamp to hold my wood piece vertical I drilled a 3/8 inch hole down the center, stopping 1" short of the end.

Step 3- Using the Proxxon mini band saw I made a 90 degree cut approx 1 inch down from the hole side of the wood just deep enough to meet the hole we made in step 2.

Step 3.  Starting approx 3/4" down from the 90 degree cut, I used the Proxxon mini band saw to make a cut at about 45 degrees that met up with the 90 degree cut. to take a wedge out of the top of the soon to be whistle.  


                              hope you can follow my drawing 🠞🠞🠞🠞🠞🠞🠞


Step 4.Take a 3" piece of 3/8" dowel and cut the top so that it has a flat top.  Insert it into the hole in the whistle.  Moving it in and out find the sweet spot.  You will know when you find it because it will whistle loud and clear.  Hold it in place and drop a couple drops of super glue around the dowel. where it meets the wood.  Let it dry then cut it flush with the end of the whistle.  The whistle is now complete.       

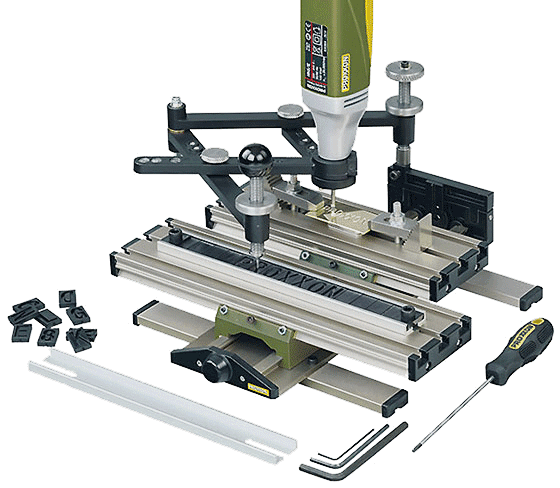
But wait... there is more.  Just for fun lets doll it up a bit.    I am still learning my new Proxxon engraving device, so I set it up and engraved on the little whistle.

Then I took it over the Proxxon disc sander and rounded all my edges.

Then more smoothing with the OZI/E delta sander

And a coating of butcher block, which is non toxic and a key ring.   Now give it to the
 boy or girl scout of your choice.


Again, this was easier to make that to describe.  Give it a shot, it won't take but about an hour.

Thanks for visiting.   Thanks Proxxon, Your tools are the best!

Catch you next time.   Carol


Thursday, November 4, 2021

Small cedar Christmas tree decor

 Let's see, It is November now and you know what that means.... time to get started on Christmas.  Actually we should have got started earlier, but now, better late than sorry.  Today let's do a little family Christmas tree.  I have some 1/4" cedar and that should work.   Also, I am still fasinated by my new Proxxon egraving set so maybe we can find something to do with that.  


Ready?   Let's get going here

Equipment and supplies

Scrap cedar wood, Im going little so I picked a piece with 1/4" thickness.  (You can make this as big or as small as you like---I think a big one would be great!)

Proxxon mini scroll saw

Proxxon OZI/E delta sander  and / or Proxxon cordless mini belt sander.  (either or both)

Proxxon mini drill press with small drill bit

Sealer of your choice

Small pieces of thin bendable wire

Plaid paints if you want  -optional-  

!st thing to do is draw your pattern.  If you are brave you can draw it on your  piece of wood.   A little less brave and you should draw it on paper, then transfer it to your wood pieces.  This is going to be 3D so mark a line half way up the tree trunk on one, and on the other mark a line from the top to the middle of the tree.  This should be the same thickness as your piece of wood.  In our case the thickness is 1/4"  The 2  flat "trees" will slide together creating a 3D tree that will stand.  


Cut the trees out using the Proxxon mini scroll saw.

Sand them very smooth with the Proxxon OZI/E delta sander and or the Proxxon cordless mini belt sander.  ↓↓  I started with 80 grit and then went to 120 grit sandpaper.  I then sprayed them with krylon crystal clear to seal them and make them shiny.   Next slip them together .


  Part 2

Using the Proxxon mini scroll saw, cut out some small rectangles from the leftover scraps of cedar wood.  


I used the Proxxon engraving device to engrave my family members names on the little wood pieces  The set comes with clear instructions on how to set it up.  I love it.  I kept my wood pieces a little long and could fit several names on each one, then cut them apart later.

Using the Proxxon mini drill press I put small holes in the ends of the branches of the Christmas trees and also in the top left corner of my little name tags.  I slipped a small wire through the hole in the name tag and bent it into a hook I could use to hang it on the tree.  Look below.  A little plaid paint around the edges for contrast. 

For some crazy reason people feel so special when they see their name on something like this.   Well if it makes them happy... It makes me happy too! 
Almost forgot.   I added a star.   Now you  can paint or whatever you like with your new decor.   Have fun!

That was fun, I highly reccomend making some of your very own Christmas decor.Every year when you bring it out you will remember how much fun you had making it.  


Thanks for visiting!    Carol W


Sunday, August 18, 2019

How to Make a Zodiac Constellation Pierced Egg

These Zodiac constellation pierced eggs make unique gifts, and the Proxxon glass engraver makes it easy to get professional results.

Supplies for Making a Zodiac Pierced Egg

Instructions for Making a Zodiac Pierced Egg

  1. Blow out the contents of the egg. There are several ways to do this, but here is my method:
    1. Drill a hole in the wide end of the egg.
    2. Insert the needle of an empty flavor injection syringe into the hole and gently pump air into the egg. The air expels the contents of the egg. Repeat until the egg is empty. (Note: I recommend dedicating a syringe for use only with eggs.)
    3. Using the syringe, partially fill the egg with warm water. 
    4. Remove the syringe, hold a finger over the hole, and gently shake the egg.
    5. Repeat Step B to expel the water.
    6. Use the syringe to fill the egg with a weak bleach solution. Immerse the egg in additional bleach solution, and leave for 10 to 15 minutes.
    7. Use the syringe to empty the egg, and thoroughly rinse inside and out with warm water.
    8. Let egg dry.
  2. Using a constellation map as a guide, mark the positions for the holes. 
  3. Hold the egg in the palm of your hand and using a 1/32" bit in the engraver carefully drill holes in the marked positions.
  4. Stars in the constellation may vary in brightness. For larger/brighter stars enlarge the holes using larger engraving and grinding bits.
  5. Using a spherical head grinding bit, slowly enlarge the hole on the bottom (wide end) of the egg to accommodate the bulb of the tea light.
  6. If desired, color the egg and the base of the tea light.  
  7. Enjoy your Zodiac constellation pierced egg.
Carole


Wednesday, September 21, 2016

DIY Engraved Halloween Party Glasses Featuring The Proxxon Glass Engraving Kit

Hi everyone! Tammy here with you today with a fun tutorial on how to use the Proxxon Glass Engraving Kit to make these cute Halloween party glasses. Here is how I did it...

Supplies:
Proxxon Complete Glass Engraving Kit
Champagne glasses from the Dollar Store
Ribbon for decoration
Feather hair clip for decoration


 Directions: 

Start with a Dollar Store champagne glass and an image you want to engrave on the glass.


Place a couple of Glue Dots on top of the image and place image, facing out, inside of the glass


Use the Glass Engraving tool to trace the image.


When the image is all traced, remove the image from the inside of the glass and correct any missing spots on the engraved image on the glass.


Tie a bow to the stem of the glass for decoration.


I added a feather alligator clip to add a fun decoration to the bow. I recommend you use removable decorations, so you can easily wash the glass after the party. I really love how these glasses turned out and I can't wait to share them with my friends at my Halloween party :)

Let's be friends!


Wednesday, August 10, 2016

Back To School Engraved Teacher's Gift


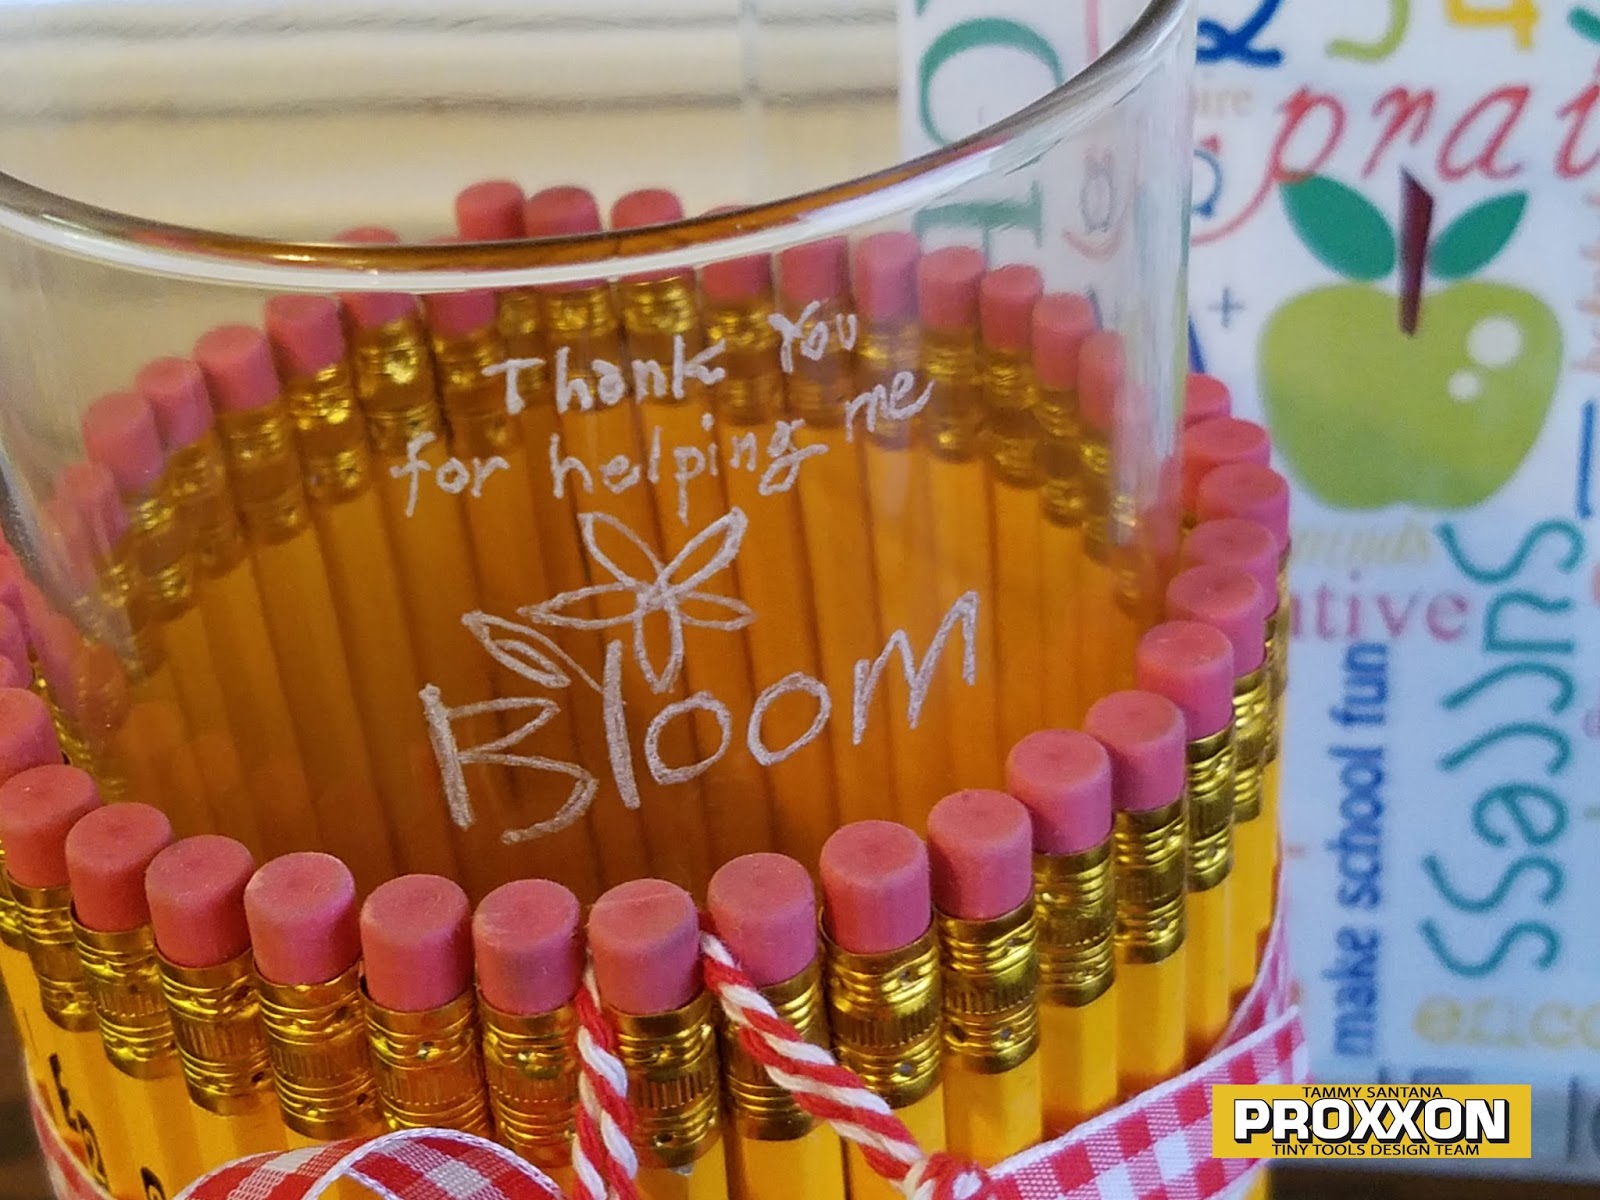
Hi everyone, Tammy here with you today with a fun back to school teacher's gift tutorial. I can't believe it's almost back to school time already! I love to give my daughter's teacher a bouquet of flowers on the first day back so this year I decided to kick it up a little and add some decorations to the vase.

 Supplies I used:
Dollar Store vase
Pencils
Ribbon
Scissors
Text image
Glue Dots 

  
Directions:
 Cut a piece of decorative ribbon about 18 inches and run a line of Glue Dots on the back of it.

 
Use a Proxxon Scroll Saw to cut pencils a length that will allow space for engraving at the top of the vase you are using.
 
Attach the pencil to a Glue Dot on the back of the ribbon.


 Measure the circumference of the vase and attach enough pencils, to the top of the Glue Dots on the ribbon, to go all the way around the perimeter of the vase.


 When all pencils are attached to the ribbon, add a couple of glue dots to the vase and wrap the pencils around the vase. Tie a tight bow to keep the pencils close to the vase. You can also seal the bottom of the pencils with some clear nail polish to keep the lead from staining any surface the vase is sitting on.


 Next, print out a sentiment you would like to use, and trace it onto the top of the vase with a Proxxon Engraving Tool.


When I find out the name of my daughter's teacher, I will add that to the vase also.

 
That's it, all that is left to do is add flowers to the vase and head back to school! I hope this has given you some ideas for easy and cute teacher's gifts you can create with your Proxxon Scroll Saw and Proxxon Engraving Kit.

Let's be friends!


Wednesday, June 1, 2016

DIY Personalized Graduation Gift Featuring The Proxxon Glass Engraving Set

 I love to give personalized gifts whenever I can, so when I found this frame I thought it would be nice to add a engraved message on the glass to make it more personal. I chose to add "Congratulations" but you could also add a name or any saying you like.

Supplies:
Frame from Dollar Store
Print out with phrase you would like to trace

Directions:
Print or stamp your favorite phrase on a piece of paper. Remove the backing and any extra paper from the frame.

Place the phrase you would like to trace and tape it to the glass from the back showing through the front. 

 Trace the design with the Proxxon Glass Engraving Set until you have traced all of the letters and you are happy with how it looks on the glass.

Add your favorite photo and you are ready to give the frame to your favorite graduate! I love how easy the Proxxon Glass Engraving Set is to use. You can add names, dates, monograms etc. to any glass item in a matter of a few minutes! The possibilities are endless, and it is always nice to have the option to easily give a personalized gift without having to wait for a special order item.

Let's be friends!