Showing posts with label Compact Power Tool. Show all posts

Wednesday, December 16, 2015

Christmas Ribbon Tree With Pearl Star

Happy holidays everyone! Tammy here with a fun ribbon Christmas tree tutorial using my favorite Hot Wire Cutter from Proxxon Tools.

Supplies used:
Tree form
Ribbon
Straight pins
Smoothfoam
Ann Butler Designs Iridescents from Earth Safe Finishes
Star image

How I made it:

Cut ribbon pieces about 6 inches 
Fold them in half and secure each one with a straight pin.


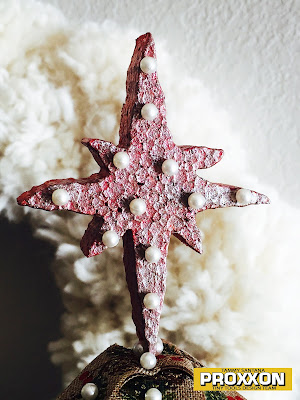
Print and cut out a star image and trace the image onto a piece of Smoothfoam
Cut the Smoothfoam as shown in this tutorial video:
I painted my star with Ann Butler Designs Iridescents from Earth Safe Finishes in the Russet color
I added pearl push pins as decorations to the star 
Secure the star to the top of the tree with more pearl push pins.
I love how my tree turned out! It looks so cute with the Rustic Christmas Wreath I made in my last post. I hope this gives you some ideas on how easy it is to use the Proxxon Hot Wire Cutter
The possibilities are endless!

I love to see your projects! Tag me on Instagram @TammySmithSantana

xoxo Tammy


Friday, December 4, 2015

Christmas Sled Centerpiece

Good morning everyone, Steph Ackerman here with a Christmas post today.  It's almost time for Christmas and center pieces are always fun to display around the holidays.  Proxxon's tools are definitely fun to work with and perfect for projects, both big and small. 


Supplies:
Proxxon Tools:  Delta Sander OZI/E
Smoothfoam
Earth Safe Finishes Chalk It Up Paint - Licorice; Cherry Jubilee
Christmas Picks


I love decorating for the holidays and a sled is the perfect Christmas decoration.  Since my wood sled was very rough, I used the Delta Sander to smooth it out before painting it.

 
There were a lot of small areas on the sled that needed sanding and because of it's shape, the Delta Sander was able to get into those spots.   The sander is the perfect size to access even the smallest of areas.

 
Once I finished sanding it, I painted the sled with Earth Safe Finishes Chalk Paint.  Once dry, I adhered Smoothfoam blogs to the sled and inserted Christmas picks creating a nice Christmas centerpiece.
 
 
Thanks for stopping by today.

Steph

Wednesday, November 4, 2015

Thanksgiving Turkey Framed Decor


Hi everyone! Tammy Santana here from the creative lifestyle blog, www.TammySantana.com, with my take on a fun home decor project that is perfect for a gift or just to showcase on an entry table or mantle.
Supplies I used:
Metallic copper and gold paint
Ribbon
Zip Dry adhesive
Dollar Store Frame
Straight Pin
Red glitter cardstock
Needle and thread

How I made it:
Cut your turkey shape out of the Smoothfoam and freehand the squiggle cuts inside the shape. Separate the pieces a little bit to create the raised effect.
 
 Add a little Zip Dry adhesive to the back of the piece to keep the pieces separated and paint metallic copper. Drybrush some metallic gold on the top of the piece sticking out. Add pieces of red glitter cardstock and a black straight pin head for the eye.

 Cut and heat seal the ribbon with the Proxxon Hot Wire Cutter and glue to the back of the turkey body.
 Add some fabric adhesive tape to the ribbon
 Adhere the finished turkey to the outside of the frame. Add some glitter cardstock to the inside of the frame and attach the back onto the frame.

 And that's it...easy peezy!

xoxo Tammy