Showing posts with label black cat. Show all posts

Sunday, September 2, 2018

How to Make a Halloween Cat from Lumber Scraps

It will soon be time for witches, pumpkins, and black cats. Halloween is right around the corner, and I've got an easy decorative project that you can make from scraps. Isn't this Halloween cat fun??!!

I used ½" birch plywood for my cat body and ¼" birch plywood for the tail.

Instructions for the Halloween Cat

  1. Start by measuring and marking the width and height of the cat and the depth of the ears. This can vary depending upon the size of your scrap lumber and you desired finished size of the cat. My cat measures 7" high and 2¼" wide. For the ears I marked a point in the center of the width and 2½" from the top. Then, I marked diagonal lines from the top corners to the marked point.
  2. Cut the shapes on the Proxxon MICRO Bandsaw MBS/E.
  3. Save the triangle from the ears. It will make a great Christmas tree!!
  4. Sand any rough edges on the Proxxon Disc Sander TSG 250/E.
  5. Paint the pieces with black FolkArt Chalkboard Multi-Surface paint.
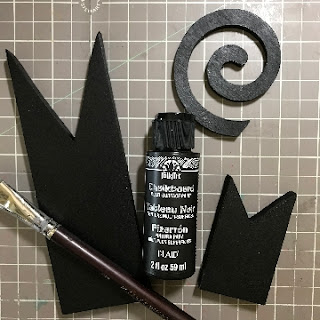
  6. When the paint is dry, distress the edges with 150 grit sandpaper.
  7. Glue the tail to the back of the cat. Glue googly eyes in place, and finish with a raffia ribbon bow.
A note about my cat's tail: It was a scrap the was already cut that I retrieved from a trash bind at a local makers' space. But it could easily be cut on a scroll saw, so I've included a pattern for the tail.
Carole

Sunday, July 17, 2016

Door Hanger Cat

I'm having a blast with my Proxxon Scroll Saw!! This whimsical door hanger is perfect for the cat lovers in your life.

Here's the pattern mounted on a piece of 1/4" plywood. To apply the pattern to the substrate, I cover the substrate material with painter's tape, spray the reverse side of the pattern with adhesive spray, and adhere the pattern on top of the painter's tape. I made a modification to this pattern—I didn't cut out his eyes. I prefer the look of the silhouette.

To begin, I used my Proxxon Professional Rotary Tool to drill pilot holes for the enclosed areas of his tail.

After I cut the exterior of the pattern, I passed the saw blade through the pilot hole to begin cutting out the interior pattern.

When I completed cutting this portion of the pattern, I again passed the saw blade through the second pilot hole to cut the area between his tail and leg.

The next step was a light sanding with the Proxxon Delta Sander. I used Sandits for the tiniest spaces.


I put small finishing nails through the top paws to act as hangers. A coat of paint finished this black cat door hanger.
Carole