
I used ½" birch plywood for my cat body and ¼" birch plywood for the tail.
Instructions for the Halloween Cat
- Start by measuring and marking the width and height of the cat and the depth of the ears. This can vary depending upon the size of your scrap lumber and you desired finished size of the cat. My cat measures 7" high and 2¼" wide. For the ears I marked a point in the center of the width and 2½" from the top. Then, I marked diagonal lines from the top corners to the marked point.

- Cut the shapes on the Proxxon MICRO Bandsaw MBS/E.

- Save the triangle from the ears. It will make a great Christmas tree!!

- Sand any rough edges on the Proxxon Disc Sander TSG 250/E.

- Paint the pieces with black FolkArt Chalkboard Multi-Surface paint.
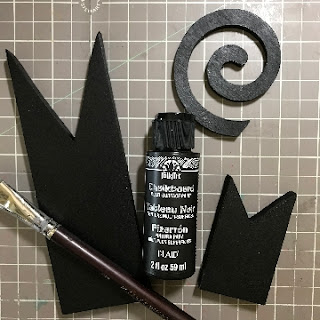
- When the paint is dry, distress the edges with 150 grit sandpaper.

- Glue the tail to the back of the cat. Glue googly eyes in place, and finish with a raffia ribbon bow.


A note about my cat's tail: It was a scrap the was already cut that I retrieved from a trash bind at a local makers' space. But it could easily be cut on a scroll saw, so I've included a pattern for the tail.
 |
| Carole |

4 comments:
That is just so cute Carole! I love it!
Yes time is just flying by. Love your ingenuity.
You always come up with great ideas for your projects.
Thank you for posting the tool list for Terri.
I willtry to get mine up after this weekend.
Congratulations on another winner.
How cute is this Carole!!!
I love this cat! Especially since you don't have to feed it or mess with kitty litter. He just looks super cute all the time! Nice job!
Post a Comment